


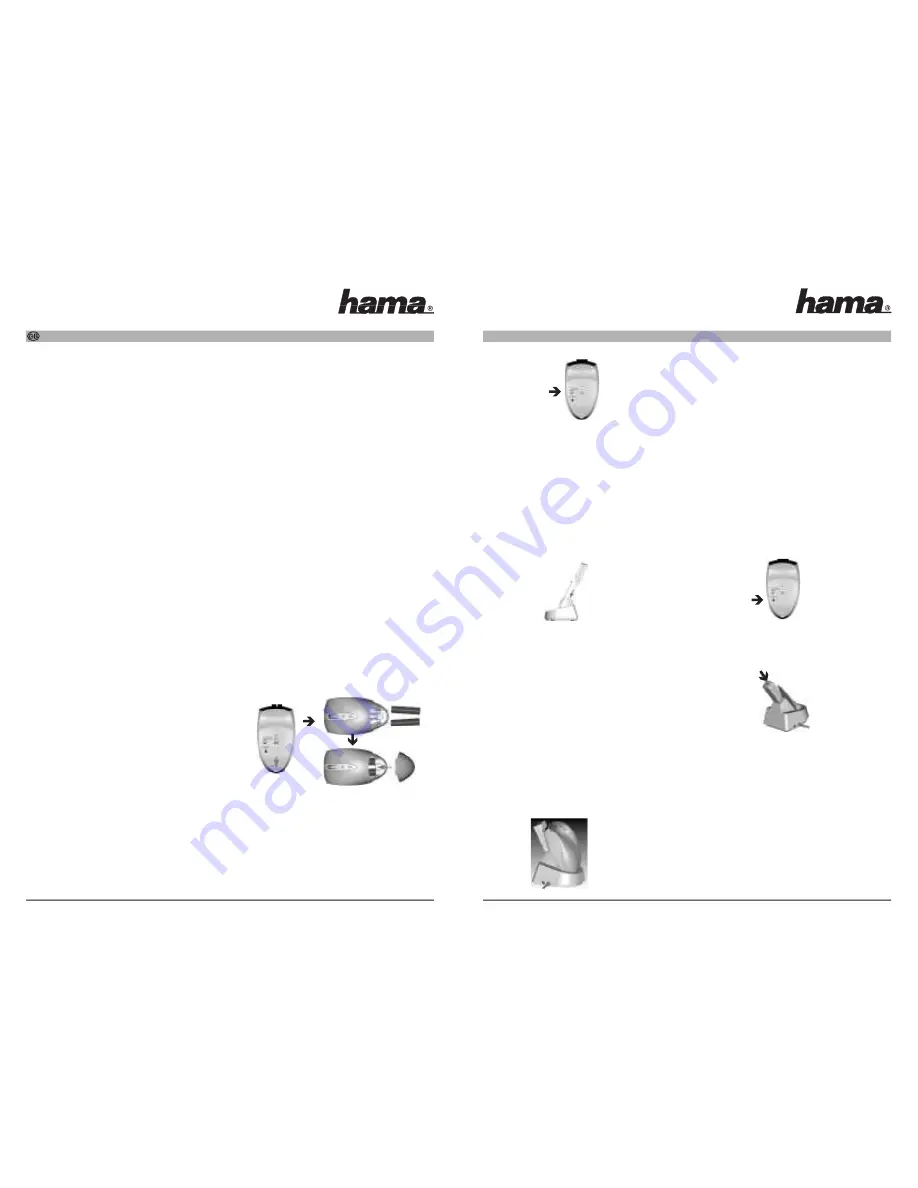
Step 2. Connecting the power
1. Connect the AC adapter into an AC power outlet.
2. Connect the DC output connector of the adaptor
into the DC jack on the left side of the charger.
The red LED on the top front end of the charger
will light up to indicate that Power line is well
established.
Step 3. Connecting the charger to PC system
Before you go on, plug the mini USB receiver into
the USB receptacle on the rear top of the charger
base.
Please follow the steps below to finish the
connection:
1. Plug the USB cable connector of charger into a
USB port of your PC system.
2. Turn on the computer, if it is off.
If you have not registered the mini USB receiver
to your computer, please have your original
Windows CD in hand, and follow Windows’
instructions to finish up the registration of a new
USB device.
Step 4. Full charge the batteries
1. Put the wireless optical mouse with its
rechargeable batteries on the correct location of
the charger. The green LED will light up to
indicate charging process is undergoing.
2. Before you use the wireless optical mouse, you
have to charge the batteries as full as possible. It
will take about 9 hours to fully charge the Ni-MH
batteries inside the mouse.
Step 5. Synchronize the RF Mouse
Once the batteries are fully charged, remove the
mouse from the Charger base; if the mouse is in
sleep mode. click the mouse button once to wake it
up.
1. Bring the mouse within 1 ft range from the
receiver, Hold the mouse upside-down and use a
pointed object, such as a pen tip, to click the
“CONNECT” button once. Do Not depress the
CONNECT button longer then 1.5 seconds.
(The red sensor light will go off when the
“CONNECT” button is pressed down.)
2. Click the receiver’s connect button once (located
on the back of the receiver) the LED will start
blinking, when the connection is established.
3. Move the mouse around on the desk, the mouse
cursor should be moving and the mouse is ready
to use.
4. If the synchronization is not successful for some
reason, please remove the batteries and unplug
the receivers . Wait for 20 sec then try the steps 1
to 3 again.
Getting Started
Congratulations on your purchase of an 800dpi RF
(Radio Frequency) wireless mouse. By using the
advanced RF technology, a 360˚ of operation is pos-
sible, and no line-of-sight is required between the
receiver and the mouse. The 800dpi high resolution
will bring users the best operation accuracy and
efficiency, especially for a display at 1024*768 or
higher. It has a double operation speed and only
requires 1/4 space by comparing with a 400dpi
mouse.
The innovative design of patented charger base is
an ideal accessory to your PC system with an RF
optical mouse. For those who also own a notebook,
and wish to work on their desk top PC while at
home, and on their notebook while traveling. The
charger base provides a convenient way of atta-
ching and detaching the mini USB receiver to and
from the PC system. So, when you are traveling with
your notebook, and wish to bring your wireless opti-
cal mouse, you need only to pull out the mini recei-
ver from the charger base, rather than to bring the
whole charger with receiver inside.
Package Contains
Your Hama RF OPTICAL MOUSE CR100 package
includes the following:
1. Optical Mouse
2. Mini USB Receiver
3. Charger base for RF Mouse
4. AC Adaptor
5. User’s manual
6. CD-ROM Driver Windows 98/2000/ME/NT/XP
7. Two AAA size of Ni-MH rechargeable battery
Note
• The optical mouse can not work on a glass or
mirror surface. Avoid operating this mouse on a
glossy surface. otherwise, this mouse may not
operate normally.
• For consideration of saving battery power, it is
strongly recommended to operate an optical
mouse on a bright surface with fine texture to
obtain lower power consumption. A very dark
surface will cause higher power consumption.
• For optimal performance, place the receiver at
least 8 inches or 20 centimeters away from other
electrical devices, such as the computer, the
computer monitor, speakers or other external
storage drives.
• For a better transmission distance, avoid to use
this device on a metal plate or desktop because a
large surface of iron, aluminum, copper and other
metal will be a shielding or ground to the RF
antenna of the mouse and receiver. Operating on
a metal may cause the transmission distance
shorter.
• If your notebook computer has a metal (contains
Al or Mg) case, the metal housing of the LCD
panel will isolate partial radiation of the RF signal
from the mouse. This will possibly result in
reducing the distance of transmission when you
operate the mouse right in front of the notebook,
and the receiver is connected on the back of the
notebook. However, the RF mouse should work
properly while you are operating the mouse just
beside your notebook computer.
Installation Guide
Step 1. Inserting the rechargeable Batteries
1. Remove the battery cover by pushing down the
Tab and the battery cover will spring off.
2. There are signs to indicate the polarity of the
batteries. Carefully follow the signs to place the
batteries don’t reverse the polarity!
3. Place the batteries cover back and make sure it is
firmly Closed.
4. There is a slide switch on the button of the mouse
for selecting correct battery type. Be sure to side
the switch in the upper position for rechargeable
Batteries.
L
RF OPTICAL MOUSE CR 100 USER’S MANUAL
Slide switch
Press


