


6. Enter the code required for the target network in the subsequent window. Switch to the
Advanced
tab.
7. If you want to connect to an access point or router, we recommend that you leave all settings on this
page as they are. If you want to connect to another wireless LAN client device, e.g. a USB stick or card
bus, select Ad-hoc as the
Network type
and the same channel used by the client device under
Channel
.
8. Click
Ok
to confi rm your entries. Switch to the
Current status
tab. All current information on your profi le
is displayed here. A green bar for the
Signal strength
shows that you are connected to the target
network.
If no connection is displayed, or if you want comprehensive instructions, please read on under “The confi gu-
ration program – introduction and operation”.
4. The confi guration program – introduction and operation
Open the wireless LAN confi guration utility by clicking the
Atheros Client Utility
link on the Desktop or under
Start/Programs/Atheros/Atheros Client Utility
.
This view gives you information on various settings of your
wireless LAN. If the target network to be connected is not
encrypted, the WLAN device may already have automati-
cally connected to an available network. If this is the case,
the signal strength display at the bottom of the screen
shows a signal.
Change to the
Profi le management
tab.
When confi guring it is useful to create a profi le. A profi le
serves to save various settings for a connection under
a certain name. For example, if you want to connect to
various wireless networks, you can save the settings for
the networks in profi les, which allows you to change the
confi guration quickly.
All profi les saved are shown in the window at the top left. Initially, only the
standard profi le
is saved here.
Details on the selected profi le are displayed in this list. The right part of the window there are various buttons
for editing profi les.
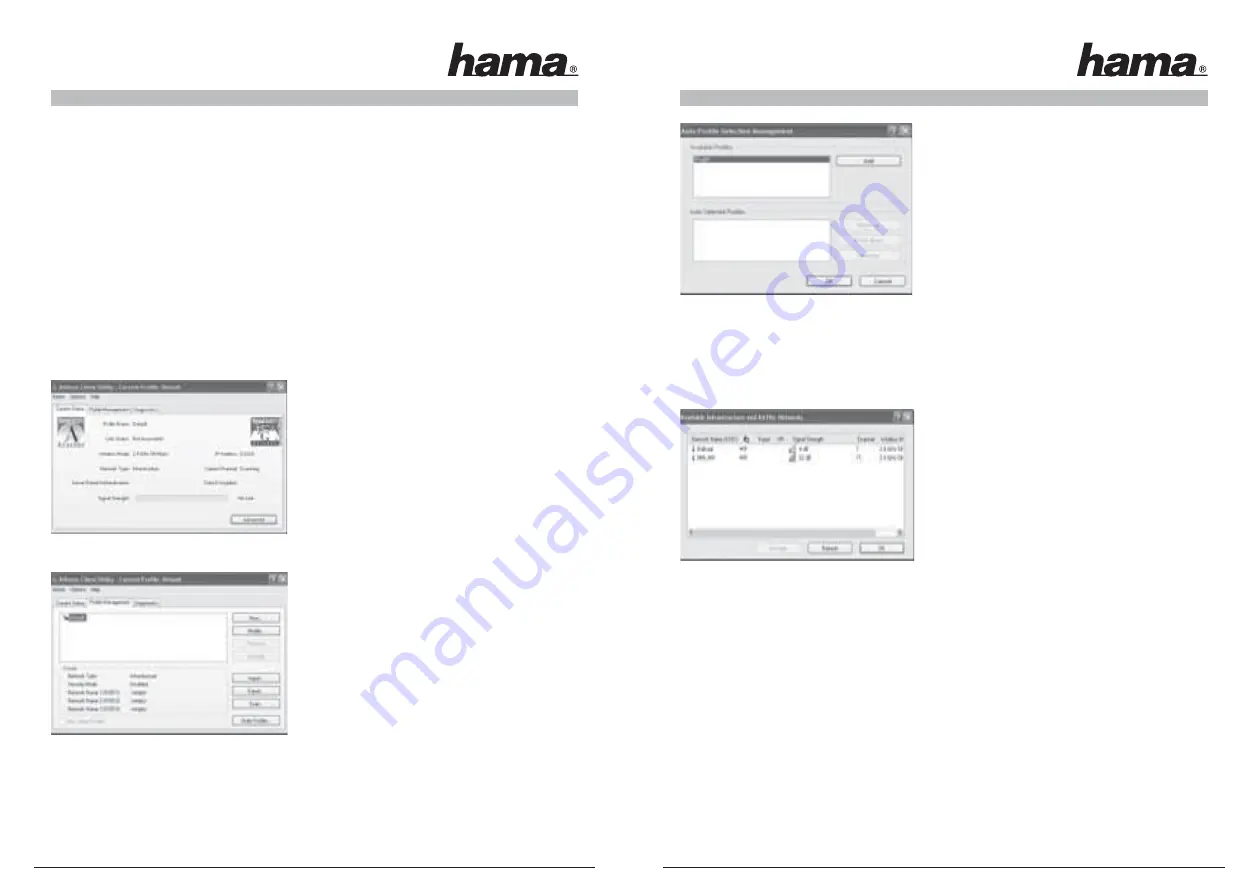
The
Order profi les
button allows you to add created profi les to a list of
Auto selected profi les
.
Select the required profi le in the list of the
Available pro-
fi les
. Click
Add
. The profi le select is then displayed in the
list of
Auto selected profi les
. That means that this profi le is
run automatically, e.g. after a restart. If there is more than
one profi le in this list, you can set the required sequence
with the
Move up
and
Move down
buttons. The
Remove
button allows you to delete a profi le from the list.
Click
OK
to complete the confi guration.
Click the
Modify
button to edit a selected profi le from the list. The
Remove
button allows you to delete a
profi le which is no longer required from the list. To activate a profi le from the list, fi rst select it and then click
the
Activate
button.
Click the
Scan
button to search for available wireless networks.
All wireless networks available in your reception range are shown with the following information:
•
SSID
network name/network ID
• If
wireless encryption
is used, this is indicated by a key
symbol.
• Use of
Super G
™
• Use of
eXtended Range (XR)
™
•
Signal strength
• WLAN
channel
(in Europe, channels 1-13 are available)
•
Wireless mode
, either 108Mbps, 54Mbps or 11Mbps
-
Super G
™ is a method of increasing the maximum data rate to 108 Mbps by using two channels with
54 Mbps each.
-
eXtended Range (XR)
™ is a special technology to increase the range via the fallback of the standard
data rate which can be expanded to up to 0.25 Mbps.
Click the
Refresh
button to refresh the view. Click
OK
to close the window again.
Click the
Activate
button after you have selected an available network from the list. You can record it in a
new profi le If you do so, the dialogue box for creating a new profi le opens. For more information on this, see
Creating a new profi le.
18
19


