16
Proceed to mounting of new sealing
strip in inverse order.
Tighten the knurled screws (by
hand) and from the centre towards
the outsides (slotted sealing strips
point to the front, plain ones to the
back)
The rear sealing strip can
be turned round if worn at
the front edge.
Nozzle
The Hakomatic E
1
0 has been
equipped with a nozzle by which the
water is sprayed between the brushes.
Clean Nozzle
The nozzle clogs after some hours of
operation. It is thus required to clean
the nozzle at daily intervals before
start of operation.
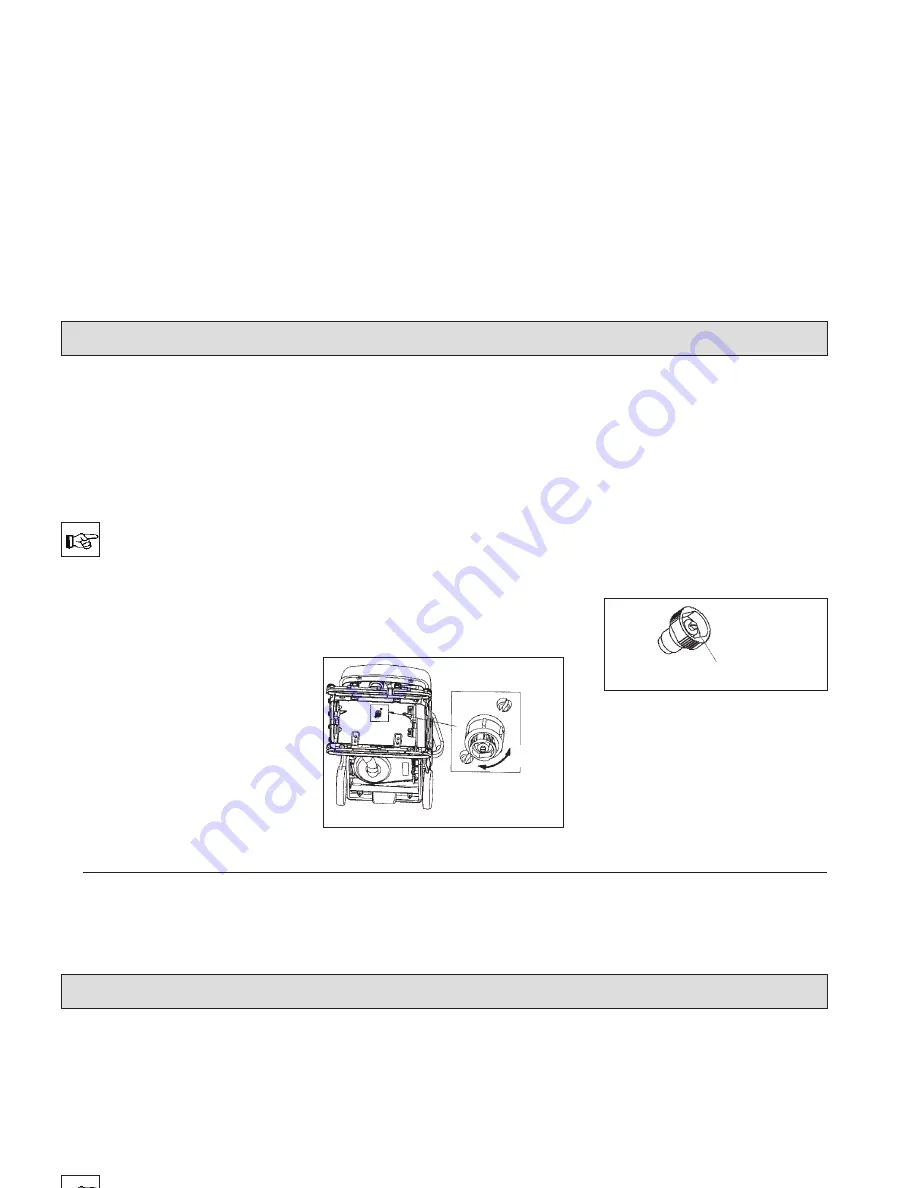
Proceed as follows for cleaning
thenozzle:
(I) Remove nozzle
Dismount brushes from the Hako-
matic (see "Dismount/Mount Bru-
shes").
Lift machine and lay down on its
back as represented.
Turn the nozzle to the left
(II) Clean nozzle
Clean nozzle by compressed air or
water.
(III) Mount nozzle
After cleaning, insert nozzle by
screwing clockwise.
Make sure that the nozzle slot is as
the mounting direction of the bru-
shes.
Upright machine
Description
Tighten
Loosen
Nozzle slot
Nozzle
Summary of Contents for Scrubmaster E10
Page 1: ...Instruction manual Scrubmaster E10 7739 03 ...
Page 26: ...26 Maintenance Maintenance ...
Page 29: ...Notes ...


