12
13
Continue selecting each position in the matrix and assign the
desired key from the keyboard diagram for each position.
The repeat selection only applies to the current matrix key
position being defined. Repeated and non-repeated keys may
be intermixed within the same configuration.
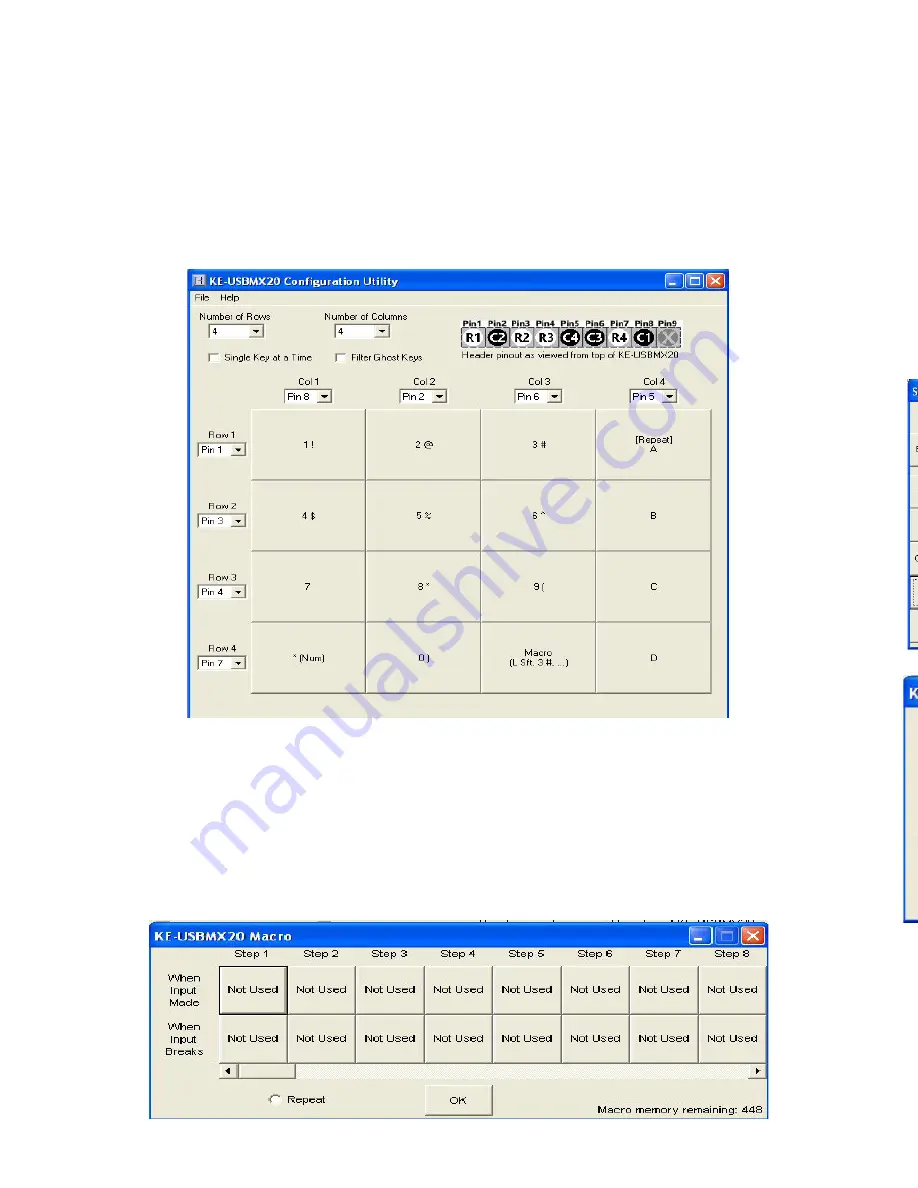
In the example illustrations, the user clicked matrix position
Row 1, Col 4 and assigned the key “A” to it. The repeat box was
checked before selecting “A” from the key selection screen.
Step 4
The KE-USBMX20 has the capability of sending a macro, or
sequence of keystrokes for a single key activation. To program a
macro sequence, hold the Ctrl key before clicking on the matrix
cell to be defined. A macro sequence box will be displayed.
When defining a macro, each action is either the press (make) or
release (break) of a key. In this example, the desired character for the
key is “#”. In order to get this character, it must be entered the same
way as it would be manually typed on a keyboard.
The shift key will be “pressed” (“make”), then the “3” key is pressed.
At this point, both keys are being held down. In order to release them,
a “break” must be done for each key currently being held on. First
the “3” key is released, then the shift key. Before selecting a key, be
sure to check the “make” or “break” selection box above the keyboard
before the key, to achieve the desired press or release of the key.
When defining a macro, the key actions may be done when
the input is activated, “When Input Made”, or when the key is
released “When Input Breaks”, or at both events. Always be
sure to issue a “break” for any key in the macro sequence that
was activated with a “make”. Failure to release keys will result
in a stuck key, which can affect all further key actions.


