14
11
Step 3
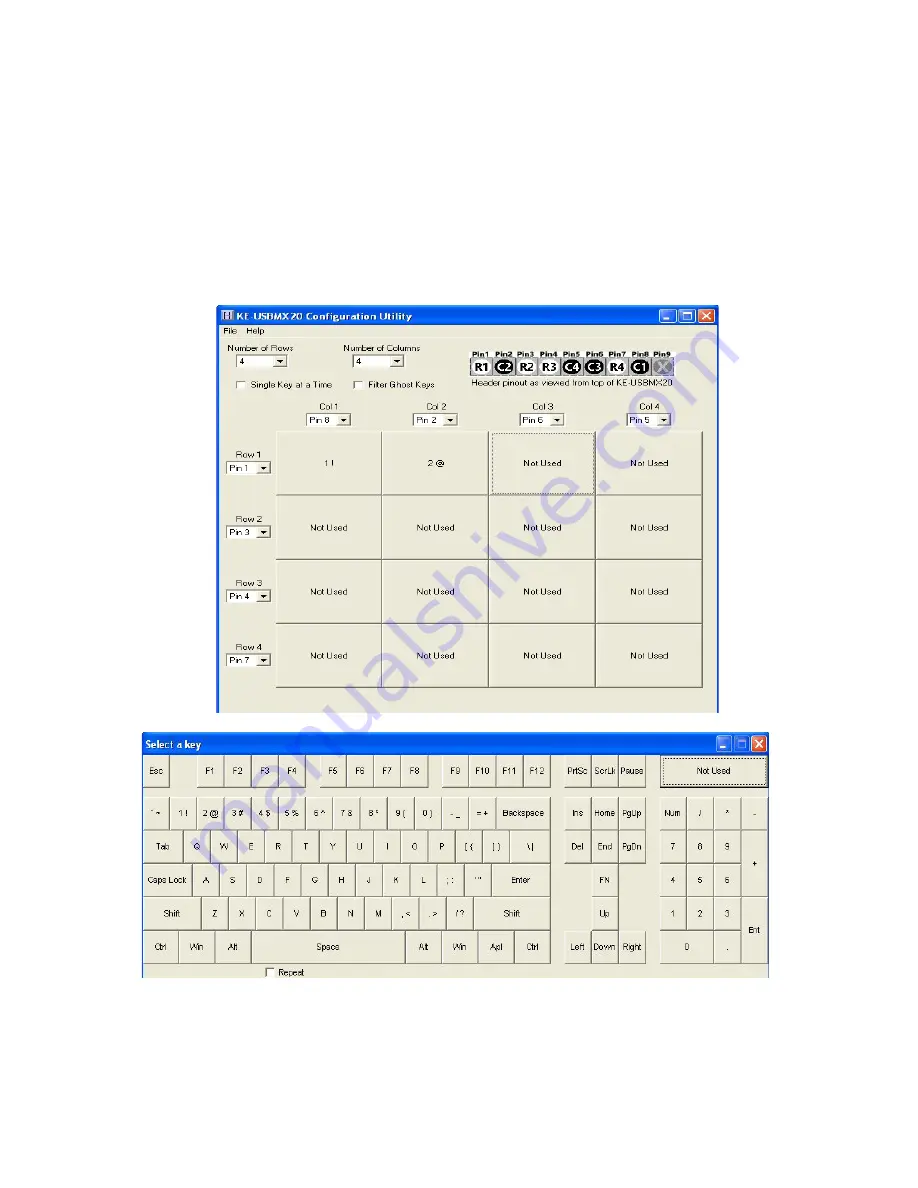
With the size of the matrix now defined, and the pins selected,
assign the keys to be emulated to each position in the matrix.
To assign keystrokes, click on the desired matrix position. A
diagram of the keyboard will be displayed, as shown below.
Click on the representation of the key to assign it to the matrix
position.
Note the repeat selection box at the bottom in the middle of the
key selection screen. If the key is to send only one keystroke
per activation, leave this box unselected. If the key is to repeat
when held active, select this box before choosing the key.
Macro Example 1:
The following macro demonstrates
using a macro to send the text “on” when the input is activated
and the text “Off” when the input is deactivated. Note also that
sending a second make of the “f” key requires that it be issued
a “break” before the next “f” make, just as if the sequence
were being manually entered from a keyboard.
Macro Example 2:
The macro below demonstrates the
same macro sequence as above, but with use of the “Break All”
macro function to release keys that are currently being held on
from an earlier “make” action.
Note in the example above that “break all” only releases the
keys held active on the current line, and only those keys held
on up to the point the “Break All” appears. In the “When Input
Made” line, “Break All” releases the “O” and “N” keys. On the
“When Input Breaks” sequence, the “Break All” releases the Left
Shift and “O”, then proceeds with the rest of the line to produce
the two “f” characters.
Macro sequences can be up to 16 steps long for both when the
input is made (activated) and when the input breaks (released
or deactivated).


