


Page 19/45
installer_07-2017
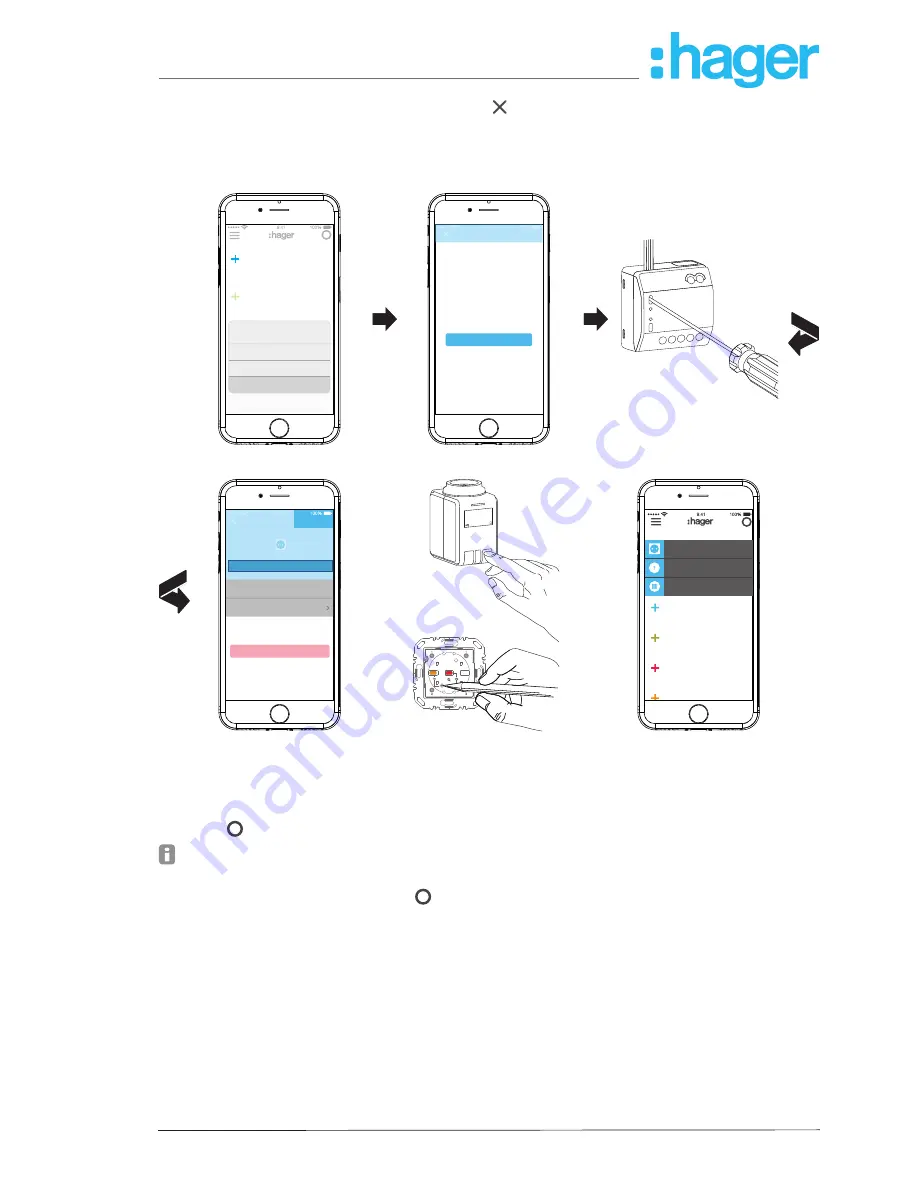
Finish the operation with
Save
or discard via .
The added device is displayed under
my devices
und its function can be tested directly.
Carry out the operation with each additional actuator(channel) within the KNX radio installa
-
tion of the customer until all devices have been added and uniquely named.
i
Security device
my covigrams
my groups
my devices
What kind of device
would you like to add?
Netatmo
Cancel
Comfort device
Let's go
Adding KNX device
1. Press the 'Let’s go' button and
your coviva controller will wait for
compatible devices
2. Now you have to press the
device pairing button
Add a device
Add to Favorites
Groups
none
On
Details
Save
Remove device
Light garden shed_TRE2...
i
Off
Off
Off
my devices
my groups
my covigrams
my favorites
Detector hall
Heating kitchen...
Light garden shed...
...
...
Figure 16: Add Comfort device
Edit/remove device (
Figure 17
)/(
Figure 18
)
After adding the devices, they can be edited in the app or removed again at any time.
Press
i
in the top right corner of the main menu.
Hold the button down for longer if using Android devices.
All elements in the main menu are switched to edit mode.
Select the device to be edited via
i
in the device list.
Details about the device, such as the switching state or the groups in which it is integrated, are
displayed.
Then implement the following actions as required:
–
Change the name of the device by pressing the name line and entering via the displayed
keypad.
–
Add device of a
Group
by activating the checkbox.
–
Remove device from a
Group
by deactivating the checkbox.
–
Device
Add to Favorites
or
Remove from Favorites
.
–
Switch to the delete mode via
Remove Device
. Then press
Remove Device
again and
press the
fct
button on the device to be removed.
hager.com
coviva smartbox


