


4-2
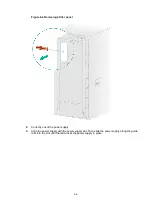
Figure 4-1 Marking the cage nut installation holes
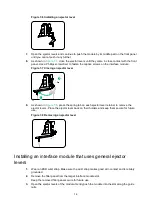
2.
Insert cage nuts into the marked square holes in the front rack posts.
Cage nuts are not required for the two upper marked installation holes on the right front rack
post.
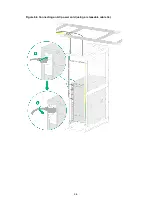
Figure 4-2 Installing the cage nuts
3.
Place the router on the slide rails from the front of the rack. Slide the router along the guide
rails into the rack.
4.
Use M6 screws provided with the router to secure the router to the rack posts.
Summary of Contents for CR19000-16
Page 16: ...4 3 Figure 4 3 Mounting the router in a rack...
Page 25: ...6 8 Figure 6 6 Connecting an AC power cord using a releasable cable tie...
Page 36: ...9 3 Figure 9 3 Installing a filler panel in a fabric module slot...
Page 38: ...10 2 Figure 10 1 Installing a fan tray...


