background image

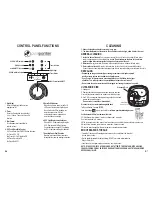
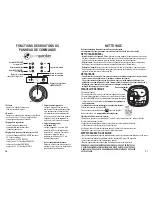
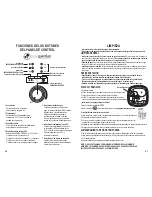
UV RESET

12H

6H

4H

OFF

Power Plug

Cleaning

Brush

SPECIFICATIONS

HUMIDIFYING MODE:

 Ultrasonic Cool and Warm Mist          

TANK CAPACITY:

 2 gallons

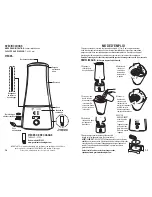
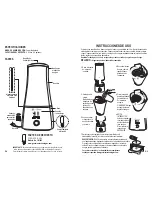
PARTS


E-4

Lid

Humidity Spout

Base

Control Panel

SET UP

Select a firm, level, flat location - at least six inches (15 cm) from any wall or object for proper air flow. 

Place the humidifier on a water-resistant surface, as water can damage furniture and some flooring. 

Do not place unit directly on carpet, towels, blankets or other absorbent surfaces.

Guardian Technologies will not accept responsibility for damage caused by water spillage.

FILLING - 

Make sure unit is unplugged.

DIRECTIONS FOR USE

1. 

Separate the tank

  from the base of 

  the unit.

2. 

Flip over water 

  tank and open 

  the tank lid,

  turning to the left.

3. 

Pour cool, clean 

  water directly into 

  the tank. Do not 

  pour anything but 

  water into the tank.

4. 

Close the tank 

  lid, turning it to 

  the right. It is 

  important to FIRMLY 

  secure cap after filling 

  the tank with water.

5. 

Attach the tank to 

  the base of the unit 

  and plug in.

6. 

POWER BUTTON

  Before turning on 

  make sure there 

  is water in the 

  unit. Turn the 

  power dial on.

7. 

Add a few drops of your favorite essential oil to the pad in the tray 

  (Oil not included).


WARNING:

 DO NOT add oils or other additives directly into the 

  water tank. Add only to the pad in the tray. Oils added to the tank 

  will damage the tank and the whole unit. Any use of such additives

  in the tank will void the manufacturers warranty.

  Pureguardian essential oils and replacement pads 

  sold separately at www.guardiantechnologies.com

E-5

Water

Tank

Handle

Aromatherapy

Oil Tray

and Pad

Water

Tank

UV-C Bulb

Compartment

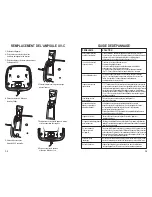
REPLACEMENT PARTS

UV-C BULB (3.5W):


Model No. LB1000

www.guardiantechnologies.com

IMPORTANT: To maintain warranty and the performance of the air cleaner, 

use Guardian Technologies GENUINE Replacement Parts only.

To Purchase Contact Customer Service.

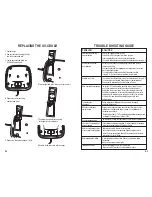
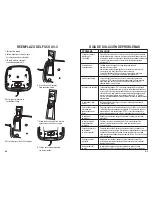
UV RESET

12H

6H

4H

UV RESET

12H

6H

4H

UV RESET

12H

6H

4H

OFF

Summary of Contents for H5450

Page 1: ...tilize this warranty according to the conditions stated above To submit product under warranty the complete machine must be delivered pre paid to Guardian Technologies LLC Please include complete info...

Page 2: ...one is home Do not keep water in the tank when not in use for an extended period of time Do not clean the unit water tank or water reservoir with detergents or chemicals of any kind The use of water...

Page 3: ...it to the right It is important to FIRMLY secure cap after filling the tank with water 5 Attach the tank to the base of the unit and plug in 6 POWER BUTTON Before turning on make sure there is water i...

Page 4: ...rface of the unit with a soft damp cloth if needed If you notice an accumulation of water during usage reduce humidity and dry outer surface with a cloth DESCALING Depending on usage and water type cl...

Page 5: ...has not been set Water is accumulating outside of unit or area surrounding unit Saturation of humidity Lower mist control setting Unit not level and water is accumulating Unplug and place on level sur...

Page 6: ...autre aux tats Unis L enregistrement de garantie de l appareil peut se faire en ligne l adresse www guardiantechnologies com Nous consid rons le processus d enregistrement comme important afin d assu...

Page 7: ...prolong e ou lorsque personne n est la maison Ne laissez pas d eau dans le r servoir lorsque vous n utilisez pas l appareil pendant une p riode prolong e Ne nettoyez jamais l appareil ni le r servoir...

Page 8: ...ournant vers la droite Il est important de BIEN serrer le bouchon apr s avoir rempli le r servoir d eau 5 Rattachez le r servoir la base de l appareil et branchez le 6 BOUTON MARCHE ARR T Avant de met...

Page 9: ...rieur de l appareil Essuyez la surface de l appareil l aide d un chiffon doux et humide au besoin Si vous remarquezune accumulation d eau pendant le fonctionnement de l appareil r duisez l humidit et...

Page 10: ...i aucune humidit ne sont mises Prise d alimentation d branchez l appareil et rebranchez le pour r essayer Panne de courant r essayez une fois la panne termin e Installation du r servoir v rifiez que l...

Page 11: ...do en los EE UU Puede completar el registro de la garant a en l nea en www guardiantechnologies com Consideramos que el proceso de registro es importante para garantizar el servicio superior a nuestro...

Page 12: ...aso de que la unidad haya sido colocada de manera incorrecta No lo utilice si el enchufe est da ado o suelto Antes de llenar o limpiar la unidad aseg rese de que est desconectada Una vez que haya cone...

Page 13: ...la tapa despu s de llenar el dep sito con agua 5 Vuelva a colocar el dep sito en la base de la unidad y con ctela 6 BOT N INTERRUPTOR Antes de encender la unidad verifique que la unidad est llena de a...

Page 14: ...illo suave se recomienda usar un cepillo para limpiar botellas Superficie externa de la unidad De ser necesario limpie la superficie externa de la unidad con un pa o suave h medo Si observa acumulaci...

Page 15: ...ad est apareciendo un polvo blanco El agua dura puede crear ciertos dep sitos de polvo El polvo en el aire tambi n se asienta debido a la humedad de la habitaci n Si le molesta este polvo use agua des...

Reviews: