background image

__________________________________________________________ 

Maya M1 v2

 6-2 

Programs


6.3 Calendar 

Calendar helps you schedule and sound alarms for appointments, meetings, and events.   

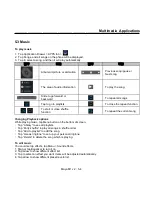
1.  Tap Application Drawer > APPS tab > 

2.  If you do not log in your Google Account, tap Menu > Settings > ADD ACCOUNT to create an account, or 

tap “Existing” to sign in the Google account. Please follow the on-screen instruction to log in. 

3.  Tap Calendar arrow > Day, Week, Month, or Agenda to change the displays of your events. 

4.  Tap 

  to go back to today. 

5.  Tap Menu > Settings to see more settings. 
 

To view a event 

1. Tap Application Drawer > APPS tab > 

2. Tap Calendar arrow > Agenda to display the events. 
 

To add and schedule an event 

1. Tap Application Drawer > APPS tab > 

2. Tap Menu > New event. 
3. Enter the details of the event. 
4. Select the dates in the fields of “From” and “To”. For an all-day event, check “ALL DAY”. 
5. To set up the “REPETITION”, select one of the options from the list. 
6. To set up a reminder, select the time from the list. 
7. When finished, tap “DONE” to return to the calendar. 


NOTE: 
The added and scheduled events will be showed in the status bar. 


6.4 Sound Recorder 

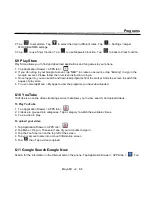
1. Tap Application Drawer > APPS tab > 


2. On the recorder screen, tap 

  to record. Tap 

  to end recording. Then Tap 

  to play. 

3. Tap “Discard” to delete an audio file. Tap “Save” to store an audio file.   

 
To play an audio file 

1. Tap Application Drawer > APPS tab > 

  > Playlists > My recordings. 

2. Tap an audio files to play. 


Summary of Contents for Gsmart Maya M1 v2

Page 1: ...GIGA BYTE COMMUNICATIONS INC Maya M1 v2 ...

Page 2: ...s software text music and pictures are owned by or authorized by original manufacturers to GIGA BYTE COMMUNICATIONS INC Reproduction transfer distribution or storage of part or all of the contents in this document in any form without the prior written permission of GIGA BYTE COMMUNICATIONS INC is prohibited GIGA BYTE COMMUNICATIONS INC ...

Page 3: ...e this may cause a short circuit Keep the battery away from metal objects since this may cause a short circuit Do not use damaged or deformed batteries If the battery emits a foul odor discontinue use Keep the battery away from babies and small children If the battery leaks Do not allow the leaking fluid to come in contact with your skin eyes or clothing If already in contact rinse with clean wate...

Page 4: ...ommendations have been developed and checked by independent scientific organizations through regular and thorough evaluations of scientific studies The unit of measurement for the European Council s recommended limit for mobile devices is the Specific Absorption Rate SAR and the SAR limit is 2 0 W kg averaged over 10 gram of body tissue It meets the requirements of the International Commission on ...

Page 5: ... 1V1 6 1 2 V1 4 1 Changes or modifications to this product not authorized by the manufacturer could void the EMC compliance and negate your authority to operate the product This product has demonstrated EMC compliance under conditions that included the use of compliant peripheral devices and shielded cables between system components It is important that you use compliant peripheral devices and shi...

Page 6: ...andards Permanent hearing loss may occur if earphones or headphones are used at high volume for prolonged periods of time Prevention of Hearing Loss Warning statement requirement under EN 60950 1 A12 To prevent possible hearing damage do not listen at high volume levels for long periods Note For France headphones earphones for this device are compliant with the sound pressure level requirement lai...

Page 7: ...nteract with the touch screen It is not covered by the warranty that you crack the touch screen because of the improper usage When you use the device for a long time such as talking on the phone browsing online or charging the battery the device may become warm In most cases this condition is normal Refer servicing to the provider or an authorized technician under the following conditions 1 The de...

Page 8: ...ople 1 8 1 9 The Home Screen 1 10 Chapter 2 Phone Functions Input 2 1 2 1 Phone Calls 2 1 2 2 Video Calls 2 3 2 3 Using On Screen Keyboard 2 3 Chapter 3 Email Messaging 3 1 3 1 Creating and sending a message 3 1 3 2 E mail Accounts 3 3 Chapter 4 Using the Internet 4 1 4 1 Connecting to the Internet 4 1 4 2 Bluetooth modes 4 2 Chapter 5 Multimedia Applications 5 1 5 1 Photos and Videos 5 1 5 2 View...

Page 9: ...Downloads 6 6 6 15 File Manager 6 6 6 16 FM Radio 6 7 6 17 Google 6 7 6 18 Dropbox 6 7 6 19 Connecting your phone to a computer 6 8 6 20 Screen Capture 6 8 Chapter 7 Managing Your Phone 7 1 7 1 Managing Basic Settings 7 1 7 2 Managing your SIM cards 7 2 7 3 Managing your accounts 7 3 7 4 Protecting Your Phone 7 3 7 5 Resetting Your Phone 7 4 7 6 Specifications 7 5 ...

Page 10: ...for several seconds to turn the phone on or off To set your phone to the sleep mode press the power button briefly Press again to turn the display back on 3 Earphone Jack Use a headset for hands free conversation or listening to music 4 Front Camera Use this front Camera to take pictures or record video 5 Receiver The source of voice 6 P Sensor Light Sensor P Sensor The screen will turn off automa...

Page 11: ... camera on the back of the device supports 8 0MP photo and high quality video 14 Dual Flash LED Help photo shooting 15 Battery Cover You need to open the cover to install or uninstall the battery SIM card and microSD card 16 Speaker The source of music and voice 1 2 Installing or uninstalling the SIM Card Battery and Memory Card To remove the back cover Please turn over your phone with the back co...

Page 12: ... GSM and right slot is for SIM2 GSM The gold contacts are facing down And the cut off corner is facing toward the outside To install the SIM1 card To install the SIM2 card To remove the SIM card Remove the battery and use your finger to slide the SIM card out of card slot To install the battery Make sure the contact of the battery is close to connectors in the battery slot ...

Page 13: ...re lower than 10ºC or higher than 45ºC To install the memory card 1 Slide the memory card socket cover toward left of the phone and lift it 2 Put the memory card with the gold contact facing down 3 Slide the memory card socket cover toward right of the phone To remove the memory card 1 For safe removal tap Application Drawer APPS tab Storage Unmount SD card 2 Slide the memory card socket cover tow...

Page 14: ... or while it is being charged 1 4 Turning the Phone On or Off After installing the SIM card and charging the battery you are now ready to turn your phone on To turn on your phone Press and hold the power button until the phone shortly vibrates To turn off your phone 1 Press and hold the power button for several seconds 2 A pop up window appears then tap Power off To switch on your phone automatica...

Page 15: ... settings 4 Tap Repeat Please select a day to turn off your phone Tap OK to save the setting 5 Tap DONE to finish settings To set your phone to the sleep mode To set your phone to the sleep mode press the power button briefly It will turn the display off To turn the display on press the power button briefly again Unlock your phone Slide G icon on screen to any direction for unlocking your phone Un...

Page 16: ...e headset jack NOTE When using a headset your ability to hear outside sounds may be limited Do not use the headset if it will endanger you Do not set the volume to its maximum with a headset as it may damage your hearing The following instructions are only provided with the headset of the original manufacturer Types Descriptions Play Pause Next control Press the button to play and press again to p...

Page 17: ...ses and other information People can connect to your Google Corporate accounts and integrate your contacts information Add a new Contact 1 Tap Application Drawer APPS tab 2 Tap tap to add a new contact 3 Choose where you want to store the new contact to 4 A new contact screen appears 5 Tap each field to fill out the contact information NOTE 1 You can t add pictures to contact information from the ...

Page 18: ... When finish searching you could tap to go back to the contacts screen To add Contact groups 1 Tap Application Drawer APPS tab People 2 Tap tab 3 Tap to add a new group Then select one of accounts to create group 4 Enter the new group name 5 Type person s name to add members Members of the group are displayed below 6 Tap DONE to finish settings Import Export Contacts You can copy your contacts dat...

Page 19: ... in the favorite list Remove from Favorites 1 Tap Application Drawer APPS tab 2 Tap tab the favorite contacts are displayed 3 Tap the desired contact into the information screen 4 Tap icon to remove it from Favorites 1 9 The Home Screen On Home Screen you can quickly access common features and view notifications of missed calls received messages battery and the status of the connection Icons Descr...

Page 20: ...tery is very low Battery is charging Network and Connection 1 2 Maximum signal strength Fewer bars indicate lower signal strength Left icon is SIM1 signal WCDMA GSM Right icon is SIM2 signal GSM 1 G 1 E 1 3G 1 H 2 G 2 E GPRS EDGE 3G HSPA is in progress SIM1 supports GPRS EDGE 3G HSPA networks SIM2 supports GPRS EDGE networks Wi Fi is connected Wi Fi is in progress Wi Fi Network is activated Airpla...

Page 21: ... is on The device is connected to PC via the USB cable Notification New text message New e mail New Gmail Alarm Event notification Missed call USB debugging is connected General notification FM FM radio is on Playing a song Downloading an application Shortcuts in status bar Tap the status bar and scroll down to use shortcuts Icons Functions Enable disable outdoor mode ...

Page 22: ...omize the wallpaper of your Home Screen with default wallpapers or with pictures in your phone Set wallpaper from Live wallpapers or Wallpapers 1 Long press any place on the Home Screens There is a menu that will pop up 2 Tap Wallpapers or Live Wallpapers 3 All system wallpapers are displayed You can tap to preview it 4 Tap Set wallpaper to set up your selection Set wallpaper from Video wallpapers...

Page 23: ...your wallpaper on the Home Screen Using Widgets You may add and customize widgets on the Home Screen as you like To add widgets 1 Tap Application Drawer WIDGETS tab 2 Select a widget you want Then tap and hold the widget icon to any Home Screen thumbnail you want to add it 3 Tap and hold the widget icon drag to move it among the Home Screens To delete widgets Tap and hold a widget icon which you w...

Page 24: ...older You can also drag other apps to add into the same folder 2 Tap the folder to open it 3 Tap Unnamed Folder to name the folder To delete folders Tap and hold a folder of Home Screen Drag the widget icon to the icon to delete it Recent apps list 1 Long press the Menu key 2 A Recent app list screen will appear 3 Remove an item by swiping left or right Or jump instantly from one task to another u...

Page 25: ...om Phone 1 Tap Application Drawer APPS tab 2 Tap 3 Tap a contact you want to call and tap to make the phone call To make a call from People 1 Tap Application Drawer APPS tab 2 Tap a contact into the information screen 3 Tap a phone number you want to call To make emergency calls You have to unlock your device before making an emergency call On the Phone screen input the international emergency num...

Page 26: ...nother incoming call slide to to put the first call on hold and answer the second call Tap to switch between calls To set up conference calls 1 When you are already having a call conversation tap to enter another phone number 2 When someone answer your phone call tap Merge calls to set up the conference call 3 If you are having a call conversation and there is another incoming call you can tap to ...

Page 27: ...make the video call Ending a video call Tap End icon to end a video call To manage other video call features When you are having a video call conversation Tap to activate speakerphone or tap again to cancel it Tap to mute microphone or tap again to un mute it Tap to switch the video windows 2 3 Using On Screen Keyboard On screen keyboard appears in portrait mode when an application requires text i...

Page 28: ...dit it or tap to delete it Using Android Keyboard To toggle between upper and lower case letter display tap To display the numerical and symbols keyboard tap Android Keyboard Settings 1 Tap Application Drawer APPS tab Language input 2 On Keyboard Input Methods Screen Tap to do the preference settings TouchPal Keyboard Icons Functions Icons Functions Tap to activate settings Tap to go to quick sett...

Page 29: ...ns Input TouchPal Curve Input Using Curve let you type faster than normal IME Input a word by drawing through letters Put your finger on the first letter of the word and draw a path from letter to letter then lifting up your finger after the last letter It will appear the predicted words ...

Page 30: ...e the default setting From Message screen 1 Tap Application Drawer APPS tab 2 Tap to create a new message 3 Type the recipient s phone number or tap to add from your contacts 4 Type your message and tap to send your message NOTE If you exit Messaging before sending unsent message will be saved as a draft automatically From People screen 1 Tap Application Drawer APPS tab 2 Tap a contact to display ...

Page 31: ...essage 1 Tap Application Drawer APPS tab 2 Tap a message to view the whole thread 3 Tap and hold a message to show Message option list 4 Tap Forward 5 Tap to select recipient 6 Tap to send your message To delete all messages 1 Tap Application Drawer APPS tab 2 Tap Menu Delete all threads 3 Tap Delete to delete all messages in this message box To delete a message thread 1 Tap Application Drawer APP...

Page 32: ...o delete 6 Type your message and tap to send your message 3 2 Email Accounts All your received email messages are delivered to your phone Set up an Internet Email account 1 Tap Application Drawer APPS tab 2 Enter your e mail address and Password Tap Next 3 Select the e mail account of types 4 The phone will retrieve the e mail settings automatically If the e mail settings are pre configured the e ...

Page 33: ... you have two more email accounts 4 Tap Remove account which is on the bottom of the page 5 Tap OK to confirm Composing and sending an Email 1 Tap Application Drawer APPS tab 2 Tap Account name to select an account 3 Tap to compose a new email 4 Enter the recipient s email address 5 Enter the Subject and compose your email 6 Tap to send your email Sending an E mail from People screen 1 Tap Applica...

Page 34: ...ng instructions Reply Tap to reply the email Reply all Tap to reply all recipients and sender Forward Tap to forward the e mail to other people 3 Enter the recipient and compose your e mail 4 Tap to send your email To delete an Email 1 Tap Application Drawer APPS tab 2 In your mail Inbox select the email you would like to delete 3 Tap to delete the email ...

Page 35: ...le Wi Fi networks 2 Detected networks are displayed below Tap one network then tap Connect 3 If you select an open network the connection is established automatically 4 To connect a secured connection you will be prompted for the password Enter the password and then tap Connect 5 When Wi Fi is connected the connection icon will be displayed on the status bar To add Wi Fi network 1 Tap Application ...

Page 36: ...ttings To start a data connection If you set up multiple data connections select the connection you want to use 1 Tap Application Drawer APPS tab SIM management Data connection 2 Choose a SIM card you want to enable data access over Mobile network Enabling data roaming Please set up your data connection first and then follow the steps as below 1 Tap Application Drawer APPS tab SIM management Roami...

Page 37: ... 2 Tap SEARCH FOR DEVICES to search for a new device 3 Detected Bluetooth devices are displayed on the screen Tap one device to connect 4 Start to pair enter the password and then tap OK to finish pairing NOTE 1 The password enter on your phone must be the same one be entered on the device which you want to pair with The password is required at the first time once a partnership has been created th...

Page 38: ...ace beauty mode Configure camera settings Panorama mode Tap to record a video Multi angle view mode Tap to take a photo Auto scene detection mode Display the flash mode Smile shot mode Switch between rear and front camera Displays the last image NOTE Drag your finger to zoom in out on the screen while you are taking a photo or recording a video Reviewing a photo After taking a photo you can review...

Page 39: ...wer APPS tab 錄影 圖示 功能 Indicates the recording time Tap to record a video and tap again to end recording Recording Taking photos while recording Pause Restart to record Displays the last image Reviewing a video 圖示 功能 Tap to play pause a video Slide to go forward or backward Tap to share a video Switches to standard screen or full screen ...

Page 40: ...lect the crop area 3 Tap CROP to set the image as the wallpaper To save a image as Contact photo 1 While viewing the image tap Menu Set picture as Contact photo 2 Choose a contact to add image 3 Drag your finger to select the crop area 4 Tap CROP to save the image as the contact photo To edit an image While viewing the image to edit an image To crop tap Menu Crop Drag your finger to select the are...

Page 41: ...sts To close the repeat function To start or close shuffle function To repeat the current song Changing Playback options While playing music tap Menu button on the bottom of screen Tap Library to see all playlists Tap Party shuffle to play all songs in shuffle order Tap Add to playlist to add the song Tap Use as ringtone to set up your personal ringtone Tap Delete to delete the song which is playi...

Page 42: ...s tab long press a song you want to add then tap Add to playlist in the pop up submenu 3 Tap New to create a new playlist The song will be added to the new playlist automatically 4 You may check this new playlist in Playlists tab To remove a music file from the playlist 1 Tap Application Drawer APPS tab 2 In Songs tab tap and hold the song you want to delete Then tap Delete in the pop up submenu 3...

Page 43: ...age 2 Tap Other to enter the URL of the page that you want to set as your home page 3 Tap OK to save your settings To add the Bookmarks 1 While viewing a web page tap Menu Save to bookmarks 2 Edit the bookmark label and other information if needed 3 Tap Add to to save the bookmark to Home screen Bookmarks or Other Folder 4 Tap OK to save your settings Managing Bookmarks On a web page tap Menu Book...

Page 44: ...ab 2 Tap Calendar arrow Agenda to display the events To add and schedule an event 1 Tap Application Drawer APPS tab 2 Tap Menu New event 3 Enter the details of the event 4 Select the dates in the fields of From and To For an all day event check ALL DAY 5 To set up the REPETITION select one of the options from the list 6 To set up a reminder select the time from the list 7 When finished tap DONE to...

Page 45: ...lly 1 Tap Application Drawer APPS tab 2 If you do not log in your Google Account tap NEW to create an account or tap Existing to sign in the Google account Please follow the on screen instruction to log in 3 Once logged in you can begin reading and sending emails from your Gmail account To remove Gmail account 1 Tap Application Drawer APPS tab ACCOUNTS Google the preferred Gmail account Sync 2 Tap...

Page 46: ... Settings Display To view information about Maps Tap Menu Settings About NOTE If you connect to the Internet and turn on the GPS you may be charged 6 7 Local Use Google maps to search places that you want to find near your current location and the details about the location you select displays on the screen NOTE If you connect to the Internet and turn on the GPS you may be charged 1 Tap Applicatio...

Page 47: ... and download programs from the market Slide the screen to switch the pages of play store 4 You can also tap Menu My apps to view the programs you have downloaded 6 10 YouTube YouTube is an online video streaming service that allows you to view search and upload videos To Play YouTube 1 Tap Application Drawer APPS tab 2 Videos are grouped into categories Tap a category to watch the available video...

Page 48: ...Navigation Tap Application Drawer APPS tab Navigation is an Internet connected GPS navigation system with voice guidance Helps you get to the destination NOTE 1 If you connect to the Internet and turn on the GPS you may be charged 2 In some locations and regions Navigation may not be available 6 14 Downloads Files and other items you downloaded in Email or Browser are stored You can view reopen or...

Page 49: ... account or tap Existing to sign in the Google account Please follow the on screen instruction to log in 6 18 Dropbox Dropbox is a free service that lets you bring all your photos documents and videos anywhere Any file saved to your Dropbox will also automatically sync to all your computers phones and the Dropbox website 1 Tap Application Drawer APPS tab 2 If you do not have your Dropbox account t...

Page 50: ...and drag down Status Bar and tap Connected as USB Storage on your device Please choose one of modes to connect with your computer 6 20 Screenshots Please press and hold Volume Down Key and Power Key at the same time to capture any screen from the device Tap view screenshots Please refer the screenshots link Pictures Screenshots ...

Page 51: ... the hour and the minute You can switch AM PM Tap Set to save the settings 6 Check Use 24 hour format if you want 7 Tap Select date format to select the date format you want Setting Alarms You can set up many alarms on your phone To set the alarm 1 Tap Application Drawer APPS tab 2 Tap to set up a new alarm 3 Tap to adjust the hour and the minute You can switch AM PM Tap OK to save the settings 4 ...

Page 52: ...sleep while charging To create a new ringtone mode You can create several audio profiles to use In the meanwhile you may also set up the voice call ringtone video call ringtone volumes and ringtone of events together 1 Tap Application Drawer APPS tab Audio profiles 2 Tap to add a new audio profile 3 Input the new profile name 4 Tap the new audio profile on the settings screen 7 2 Managing your SIM...

Page 53: ...lly 1 Tap Application Drawer APPS tab ACCOUNTS 2 Tap the account you want to sync 3 Tap Menu Sync now Removing your account 1 Tap Application Drawer APPS tab ACCOUNTS 2 Tap the account you want to remove 3 Tap Menu Remove account NOTE 1 Let Google apps access your location please tap Application Drawer APPS tab Google ACCOUNTS Location settings ON 2 To allow location access by non Google apps plea...

Page 54: ...firm your password and then tap Continue Tap None to disable it Set up unlock pattern You can further secure your data by locking the screen and requiring a screen unlock pattern every time after your phone is turned on or it wakes up from the sleep mode every time screen is off 1 Tap Application Drawer APPS tab Security Screen lock Pattern 2 Draw the unlock pattern by connecting at least four dot...

Page 55: ...HD IPS Screen 960 x 540 pixels SIM Card Slot Dual SIM card slot Dimensions L x W x H 136 x 67 x 9 7 mm Weight 147 grams with battery Rechargeable Battery Li ion pack 1700 mAh Power Adapter AC input 100 240V 50 60Hz 0 2A max DC output 5V 1A Standby time Up to 300 hours It depends on the availability of local networks and the individual usage Talk time Up to 4 hours It depends on the availability of...

Page 56: ...uld be caused by in app AD in Android phone We suggest you try to remove those apps with AD which had been installed in your device for preventing any abnormal situation happens and saving more power as well 3 Only one SIM card exists at one time when making phone call or internet browsing Network supporting SIM 1 GSM WCDMA SIM 2 GSM Please visit www gigabytecm com and download the latest version ...

Reviews: