19
enGlIsH
neTWoRKseTUP
-------------------------------------------------------------------------------------------------------------
To use the functions “GRUNDIG AppLICATION store” and
“Operation with Digital Media Server”, you must connect the
television to your home network with internet access and log
on.
Grundig Application Store is a depot where you can find
various applications that you may use on your Grundig
TV. You can download many applications from Grundig
Application Store. These applications include video, picture,
music, social networking applications, news and sports
applications, weather forecast applications and some specific
applications.
Your TV supports remote control feature for Apple iPhones,
Android and Windows based phones. Depending on the
features of your phone, you may control your TV by your
phone after downloading the free »GRUNDIG TV Remote«
application from Apple App Store, Google Play (Android
Market) or Windows Phone Store.
networkconnection
You can establish a wired or wireless connection between
your television and the local network.
If you want to use a wired network connection, please start
with the instructions here:
If you use a wireless network connection, please follow the
instructions in the "Wireless network connection" section on
page 20.
note:
7
The following section describes connecting to the home
network if you did not carry this out during the “initial set-
up”.
Wirednetwork
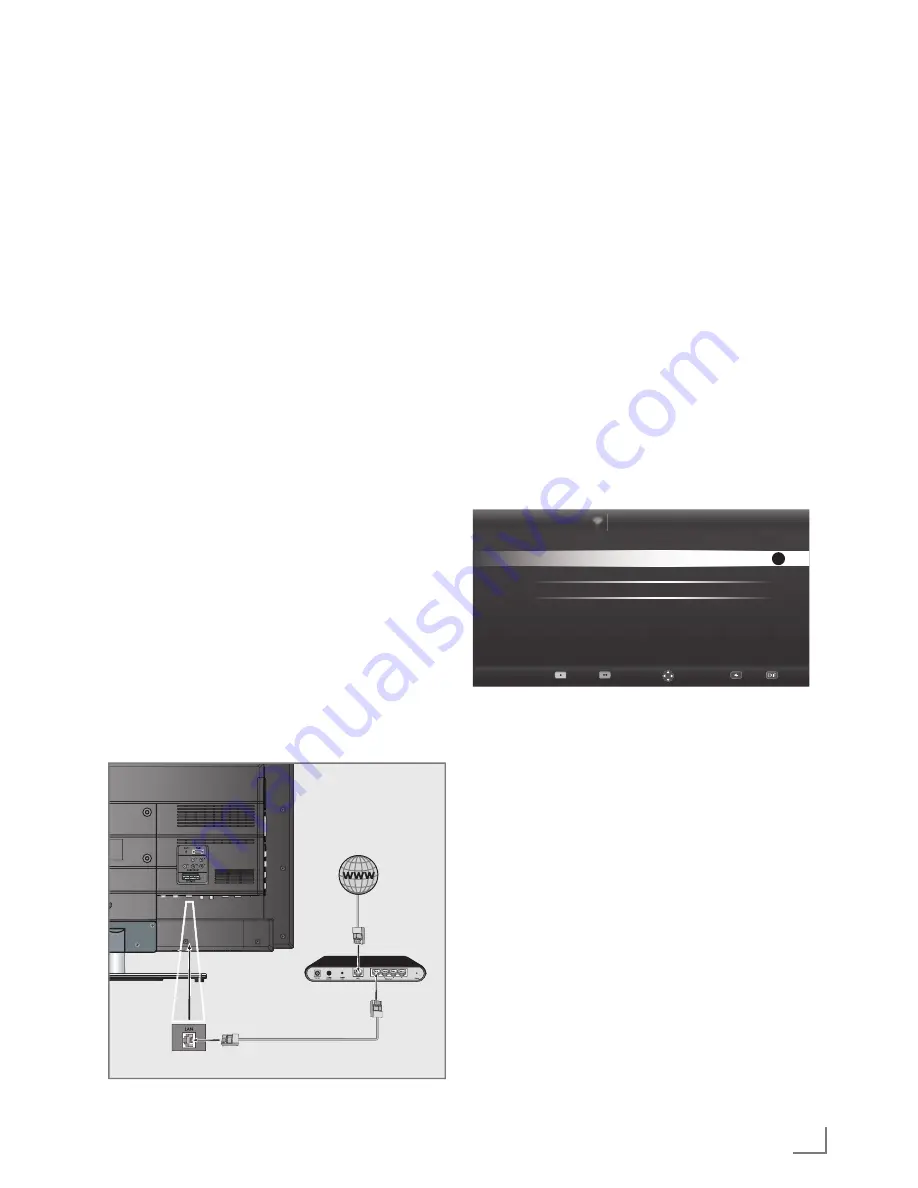
Wirednetworkconnection
1
Connect the output of external modem to »
lan
« socket
with Cat 5 cable.
note:
7
Connection cables are not supplied.
Wirednetworksettings
There are two ways of making the wired network settings.
a
Automatic connection,
All data regarding connection settings (»IP Address«,
»Netmask«, »Gateway« and »DNS«) are obtained from
modem automatically.
b
Manual connection,
all data regarding connection settings (»IP Address«,
»Netmask«, »Gateway« and »DNS«) must be configured
manually.
automaticconnection
Most of the home networks are Dynamic. If you have a
dynamic network, you must use a DSL modem that supports
DHCP. Modems and IP sharers that support DHCP obtain the
»IP Address«, »Netmask«, »Gateway« and »DNS« values
required for internet access automatically, and thus you are
not required to enter those values manually.
1
Open the menu with »
MenU
«.
2
Activate the menu item »Settings« with »
oK
«.
3
Select the menu item »Network Configuration« with »
>
«
or »
<
« and press »
oK
« to confirm.
– »Network configuration« menu is displayed.
Network Configuration
Timer Applications
TV Settings
Back
Ex
it
Con
n
ect
Test Con
n
ection
Ch
ang
e Area
Ch
a
nge Connection T
y
p
e
Wired
Network Configuration
Auto
Ad
v
an
ced
OK
4
Select the line »Change Connection Type« »
V
« or »
Λ
«
and press »
oK
« to confirm.
5
Select the option »Wired« with »
<
« or »
>
« and press
»
oK
« to confirm.
6
Select the line »Network Configuration« with »
V
« or
»
Λ
« and use »
<
« or »
>
« to select »AUTO«.
7
With »
« (red) select »Connect« to establish modem
connection.
– »Connecting ... Please wait« message will be
displayed, and if the connection is established
»Connection To Gateway: Success« message will be
displayed.
8
Press »
« (green) to check the performed settings and
also if the local network and internet connection has
been established.
– »Testing ... Please wait« message will be displayed,
and if the connection is established »Connection To
Gateway: Success«, »Internet Connection: Success«
message will be displayed.
9
Press »
eXIT
« to end the settings.
note:
7
If you do not have a dynamic network, follow the
instructions in manual connection section (see “Detailed
Manual”).


