33
ENGLISH
NETWORK SETUP
-------------------------------------------------------------------------------------------
Manual connection
Certain networks require Static IP address. If
your network requires a Static IP address, you
must enter the »IP Address«, »Netmask«, »Gate-
way« and »DNS« values manually. You can
get »IP Adress«, »Netmask«, »Gateway« and
»DNS« values (IPS) from your Internet Service
Provider.
1
Open the menu with »
MENU
«.
2
Activate the menu item »Settings« with
»
OK
«.
3
Select the menu item »Network Configura-
tion« with »
>
« or »
<
« and press »
OK
« to
confirm.
– »Network configuration« menu is dis-
played.
4
Select the line »Change Connection Type«
»
V
« or »
Λ
« and press »
OK
« to confirm.
5
Select the option »Wired« with »
<
« or »
>
«
and press »
OK
« to confirm.
6
Select the line »Network Configuration«
with »
V
« or »
Λ
« sand use »
<
« or »
>
« to
select »Manual«.
7
Select the line »Advanced« with »
V
« or
»
Λ
« and press »
OK
« to confirm.
– »IP Address«, »DNS«, »Netmask« and
»Gateway« options are active.
Network Configuration
Timer Applications
TV Settings
Back
Ex
i
W
Con
n
ect
Test Con
n
ection
Ch
an
J
e Area
Ch
an
ge Connection T
\
p
H
Wired
Net
Z
o
UN
Configuration
Manual
IP Address
192.168.000.164
DNS
192.168.000.001
Netmask
255.255.254.000
Gateway
192.168.000.001
8
Select the line »IP Address« with »
V
«.
Enter IP address with »
1…0
«.
9
Select the line »DNS« with »
V
«.
Enter IP address with »
1…0
«.
10
Select the line »Netmask« with »
V
«
Enter Netmask address with »
1…0
«.
11
Select the line »Gateway« with »
V
«.
Enter Gateway address with »
1…0
«.
12
With »
y
« (red) select »Connect« option to
establish modem connection.
– »Connecting... Please wait« message will
be displayed, and if the connection is
successful, Connection to Gateway: Suc-
cessful« message will be displayed.
13
Press »
yy
« (green) to check the performed
settings and also if the local network and
internet connection has been established.
– »Testing ... Please wait« message will
be displayed, and if the connection is
established »Connection To Gateway:
Success«, »Internet Connection: Success-
ful« message will be displayed.
14
Press »
EXIT
« to end the settings.
ENGLISH
34
Wireless network
Wireless network connection
There are different ways of making the wire-
less network settings. »Wireless« and »Wireless
WPS« (WiFi Protected Setup).
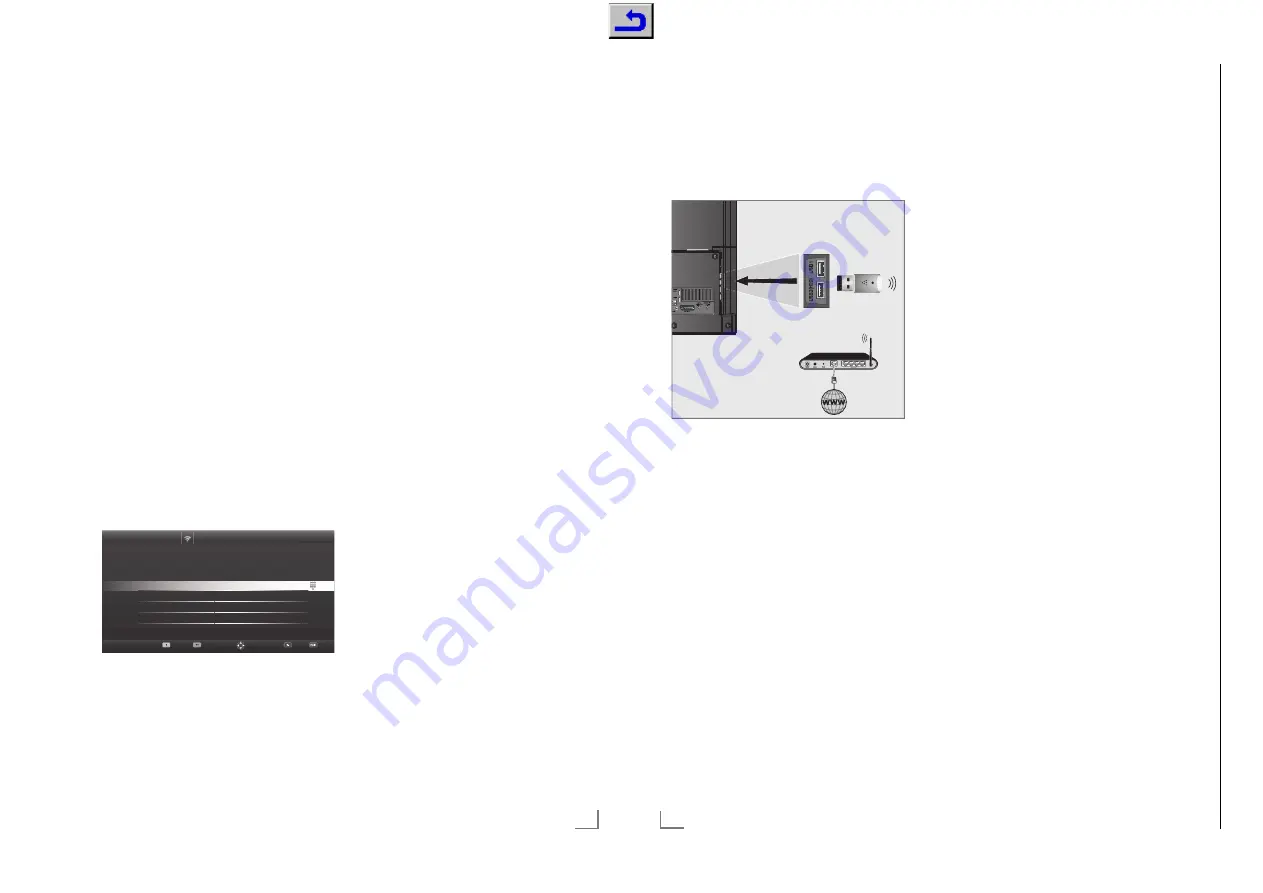
1
Connect Grundig WiFi USB dongle 2 to the
»
USB1
« or »
USB2 (HDD)
« socket of your
television in order to connect the television
to a wireless network.
Note:
7
Grundig WiFi USB dongle is not supplied
with the product but sold separately. Please
contact your dealer from where you have
purchased your TV.
Notes:
7
Wireless LAN adapter supports IEEE
802.11B/G and N communication pro-
tocols. We recommend you to use IEEE
802.11N protocol to obtain the best perfor-
mance in wireless HD video playback.
7
If you use a modem that supports IEEE
802.11B/G, video playback performance
may be poor when compared to a modem
that supports IEEE 802.11N since the data
transfer rate of IEEE 802.11B/G protocol is
lower.
NETWORK SETUP
-------------------------------------------------------------------------------------------
7
Please note that video playback perfor-
mance in a DLNA application on a wireless
local network and in a SMART Inter@ctive
TV 3.0 application on a network with inter-
net connection depends on the number of
users on the network as it is the case in every
wireless network.
7
It is recommended to switch off the equip-
ment that are not in use in home network in
order to avoid unnecessary network traffic.
7
Placing the modem or wireless network shar-
er on an elevated location will increase the
wireless connection reception strength.
7
Wireless connection reception strength may
vary depending on the type of the modem
and the distance between the modem and
television.
Wireless network settings
You have several ways to connect your TV to
your home network.
A
Automatic connection,
all data regarding connection settings (»IP Ad-
dress«, »Netmask«, »Gateway« and »DNS«)
are obtained from modem automatically.
Depending on the router, you can use the fol-
lowing options:
– Option “WPS-PBC” (Push Button Configura-
tion);
– Connecting with a WPS PIN;
–
Connecting by entering the network pass-
word.
B
Manual connection,
all data regarding connection settings (»IP Ad-
dress«, »Netmask«, »Gateway« and »DNS«)
must be configured manually.
Chassis KU
GR
UNDIG Ser
vice
1 - 38


