


-24-
Model G0580 (Mfd. Since 11/06)
Power Connection
After you have completed all previous setup
instructions and circuit requirements, the machine
is ready to be connected to the power supply.
To avoid unexpected startups or property dam-
age, use the following steps whenever connecting
or disconnecting the machine.
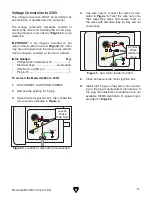
Connecting Power
Figure 29.
Connecting power.
1. Turn the machine power switch OFF.
2. Insert the power cord plug into a matching
power supply receptacle. The machine is
now connected to the power source.
Disconnecting Power
Figure 30.
Disconnecting power.
1. Turn the machine power switch OFF.
2. Grasp the molded plug and pull it completely
out of the receptacle. Do not pull by the cord
as this may damage the wires inside.
Test Run
Once the assembly is complete, test run your
machine to make sure it runs properly and is
ready for regular operation.
The test run consists of verifying the following:
1) The motor powers up and runs correctly, and
2) the safety disabling mechanism on the switch
works correctly.
If, during the test run, you cannot easily locate
the source of an unusual noise or vibration, stop
using the machine immediately, then review
Troubleshooting on Page 45.
If you still cannot remedy a problem, contact our
Tech Support at (570) 546-9663 for assistance.
To test run the machine:
1. Make sure you have read the safety instruc-
tions at the beginning of the manual, the
machine is set up properly, and you have per-
formed the
Blade Center Tracking instruc-
tions
on Page 23 before continuing.
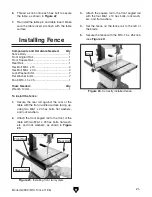
2. Make sure all tools and objects used during
setup are cleared away from the machine.
3. Connect the machine to the power source.
4. Verify that the machine is operating correctly
by turning the machine
ON.
—When operating correctly, the machine
runs smoothly with little or no vibration or
rubbing noises.
— Investigate and correct strange or unusual
noises or vibrations before operating the
machine further. Always disconnect the
machine from power when investigating or
correcting potential problems.
Summary of Contents for G0580
Page 15: ...Model G0580 Mfd Since 11 06 13 Hardware Recognition Chart...
Page 64: ......