


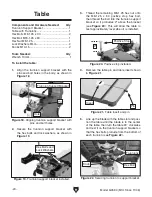


-22-
Model G0580 (Mfd. Since 11/06)
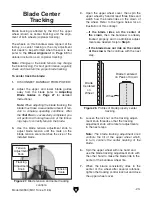
Adjusting Positive
Stop
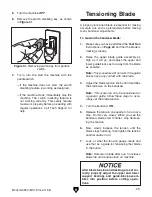
Figure 26. Squaring table to blade.
5. Adjust the positive stop bolt to the adjusted
height of the table and tighten the jam nut.
6. Rest the table on the positive stop bolt and
check for accuracy.
Note: See Calibrating Table Tilt Scale on
Page 28.
The positive stop allows the table to be reset 90˚
to the blade after tilting to the right.
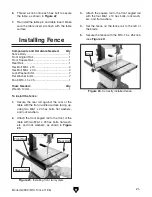
Tools
Needed: Qty
Wrenches 13mm ............................................... 2
Machinist's Square ............................................ 1
To set the positive stop:
1. Ensure the blade is correctly tensioned as
described in
Tensioning Blade instructions
on
Page 25.
2. DISCONNECT BANDSAW FROM POWER!
3. Loosen the jam nut that locks the positive
stop adjust bolt in place.
4. Raise the guide post and place a machin-
ist’s square on the table next to the side of
the blade, as illustrated in
Figure 26. Tilt
the table until it rests 90˚ to the blade, then
secure it with the table tilt knobs.
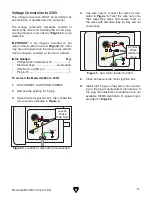
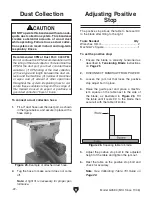
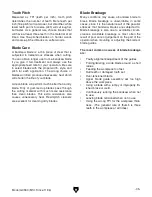
Figure 25. Example of attached dust hose.
Dust Collection
DO NOT operate this bandsaw without an ade-
quate dust collection system. This bandsaw
creates substantial amounts of wood dust
while operating. Failure to use a dust collec-
tion system can result in short and long-term
respiratory illness.
Recommended CFM at Dust Port: 400 CFM
Do not confuse this CFM recommendation with
the rating of the dust collector. To determine the
CFM at the dust port, you must consider these
variables: (1) CFM rating of the dust collector,
(2) hose type and length between the dust col-
lector and the machine, (3) number of branches
or wyes, and (4) amount of other open lines
throughout the system. Explaining how to cal-
culate these variables is beyond the scope of
this manual. Consult an expert or purchase a
good dust collection "how-to" book.
To connect a dust collection hose:
1. Fit a 4" dust hose over the dust port, as shown
in the figure below, and secure in place with a
hose clamp.
2. Tug the hose to make sure it does not come
off.
Note: A tight fit is necessary for proper per-
formance.
Summary of Contents for G0580
Page 15: ...Model G0580 Mfd Since 11 06 13 Hardware Recognition Chart...
Page 64: ......