❏
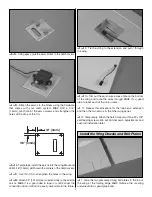
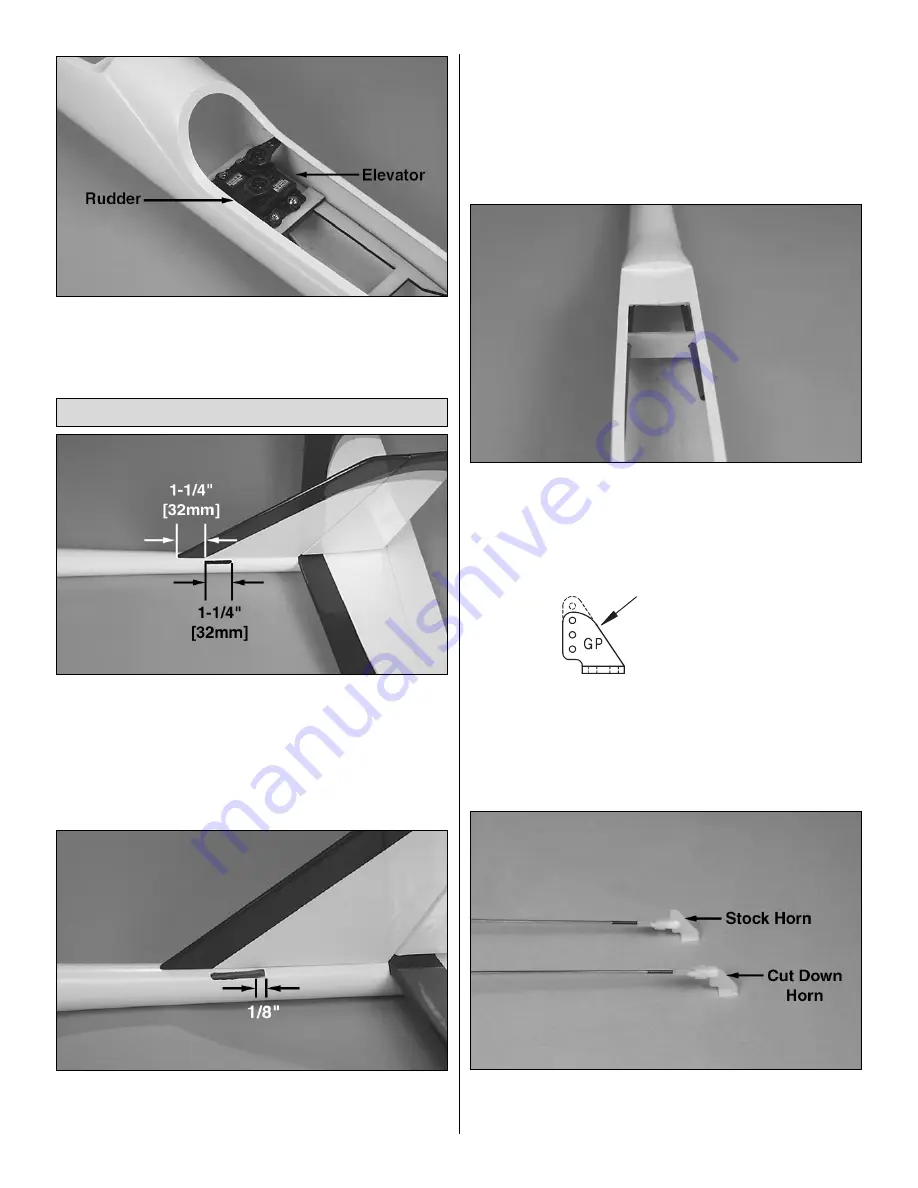
4. Install the elevator and rudder servos. Make sure they
are oriented as shown. Route the servo leads to the front of
the plane.
❏
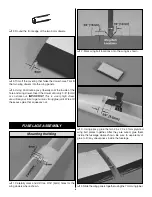
1. Carefully cut a slot on the left hand side of the fin. This
is for the rudder pushrod. A rotary tool is perfect for this job.
If you don't have one, drill several small holes and use your
hobby knife to finish the shape.
❏
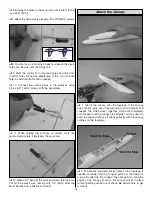
2. Cut the pushrod guide tubes so one is 22" [559mm]
and the other 28" [711mm].
❏
3. Route the shorter guide tube through the fuselage
starting from the slot you cut next to the fin. Position the tube
so it only protrudes 1/8" [3mm] past the slot.
❏
4. Roughen the end of the tube an inch or so [25mm] with
sandpaper. (This will provide a better gluing surface).
❏
5. Use epoxy to glue the tube to the fuselage at the slot.
❏
6. Route the 28" elevator pushrod guide tube into
the fuselage.
❏
7. Slide the plywood support over the guide tubes and
position it where shown. Do not glue this yet.
❏
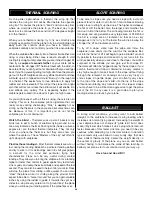
8. Modify one of the control horns for the elevator as
shown. It will need to be short enough so that it can go
inside the tail of the fuselage.
❏
9. Attach a clevis with retainer onto each of the wire
pushrods. Connect one to the modified control horn and the
other to a stock control horn as shown.
Cut Down the Horn
Install the Elevator and Rudder Pushrods
12


