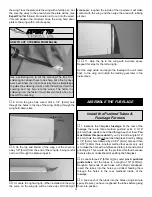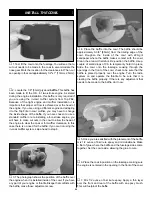
fuselage. The tray will rest between the wing bolt mounting
blocks and on the hardwood rail between the blocks. Place
the tray so that it is positioned 1/4" [6mm] behind the wing
saddle as shown in the photograph. (It is necessary to
position it here so there is room to re-install the rear former).
Once it is properly positioned, drill a 1/8" [3mm] hole
through the two holes you previously drilled in the wing
saddle and through the tray.
Important: When drilling the
holes through the tray, be sure the tray is being held firmly
against the hardwood rail in the fuselage and that the drill
remains perpendicular to the drilling surface.
❏
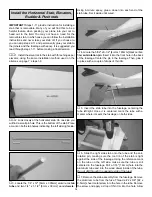
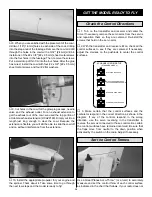
5. Remove the tray and insert a 4-40 blind nut into each
of the holes in the tray. Apply a small amount of CA to the
blind nut to help secure it to the wood. Be careful not to get
any glue into the threads!
❏
6. Locate two 4-40 x 5/8" [4-40 x 16mm] phillips pan head
screws. Using a small grinding bit and a high-speed rotary
tool, grind away enough of the fiberglass around the holes
you drilled in the wing saddle to allow the head of the
screws to sit down flush with the top of the saddle.
Countersinking the heads of the screws allows the wing to
be put in place in the wing saddle without the heads of the
screws protruding into the wing.
❏
7. Set the receiver/battery tray aside for now. You will
install it later.
❏
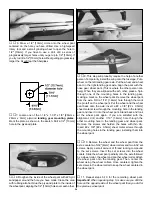
8. Locate the two plywood servo trays. Glue them together
forming one 1/4" [6mm] servo tray. Drill a 1/8" [3mm] hole
through each corner of the tray.
❏
9. If you did not remove the front and rear formers as you
were instructed earlier in this manual, remove them now.
❏
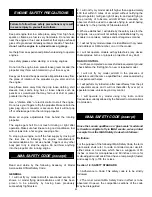
10. Insert the tray into the fuselage. The tray needs to rest
on the hardwood rails inside of the fuselage. Getting the tray
on top of the rails is a bit tricky. Insert the tray into the
fuselage, sliding it forward into the front of the fuselage,
almost up to the fuel tank. Raise the tray high enough to sit
on top of the rails. Then, slide the tray towards the back of
the fuselage, resting the tray on top of the hardwood rail.
Position the tray in the fuselage as shown in the photograph.
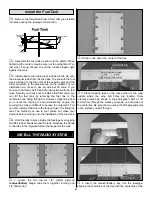
Through the holes previously drilled in the tray, drill a 1/16"
[1.6mm] hole into the hardwood rails. Thread a #2 x 1/2"
[13mm] screw into the holes in the rail, remove the screw
and put a drop of thin CA into the hole to harden it. Once the
glue has cured, install the tray to the rails using four #2 x
1/2" [13mm] sheet metal screws and four #2 washers. Re-
install the front and rear formers into position, inserting the
pushrod tubes into the holes in the formers.
26
Summary of Contents for Lancair ES
Page 40: ......


