❏
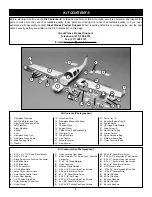
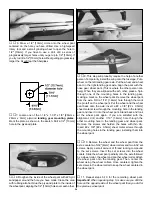
4. On the inside lines that you have drawn, cut that
portion of the fuselage and firewall away. After you have
removed it, test fit the exhaust air panel into the opening.
Because the exhaust air panel is a fiberglass lay up, there
may be some slight variations in manufacturing. Trim the
opening to fit your exhaust air panel.
❏
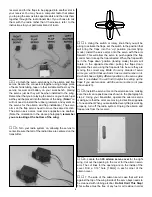
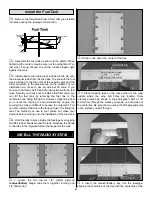
5. When you are satisfied with the fit, lightly sand the
backside of the exhaust air panel where it will contact the
fuselage and firewall. Lightly sand the part of the fuselage
where the panel will contact the fuselage. Wipe the areas
you have sanded with rubbing alcohol.
Failure to properly
prepare these parts will create a poor bond between the
panel and the fuselage. Using 6-minute epoxy, glue the
exhaust air panel into place on the fuselage, holding it in
place with masking tape while the epoxy is curing. Clean
any excess epoxy with a rag dampened with alcohol.
❏
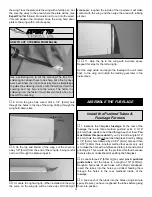
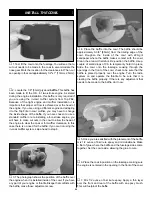
6. After the glue is completely cured, remove the tape.
With the panel in place you will see that it will conflict with
the cowl installation. Sand the corners of the panel so they
match the step in the fuselage that the cowl rests against.
This is easily done with the high speed rotary tool and the
reinforced fiberglass cut off wheel.
❏
7. Using a 5/32" [4mm] drill bit, drill through the hole
located in the engine mount.
❏
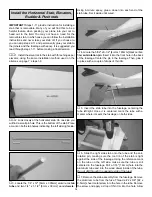
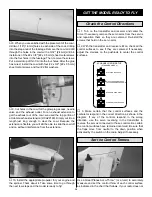
8. Locate the 3/16" x 3/4" x 1-1/4" [4.8mm x 19mm x
32mm] plywood nose gear mounting block. Temporarily
locate it on the fuselage, centered above the hole in the
engine mount. The bottom of the wood block should be even
with the edge of the air exhaust panel. Mark the location on
the firewall. Using 220-grit sandpaper, roughen the area on
the fuselage where it will be attached. Then, glue it to the
firewall with 6-minute epoxy.
❏
9. Locate the nylon nose gear bearing. Position it on the
wood block so the bottom of the nylon nose gear bearing is
flush with the bottom of the wood block. Mark the location of
the mounting holes. Then, drill two 5/64" [2mm] holes on the
marks in the wood block. Slide the nose gear wire into the
nose gear bearing and into the hole in the engine mount.
Harden the holes with thin CA. Mount the nose gear bearing
to the wood block with two #4 x 5/8" [#4 x 15.9mm] sheet
metal screws.
❏
10. Insert a 5/32" [4mm] wheel collar into the nylon nose
gear steering arm and a 6-32 x 1/4" [6-32 x 6mm] socket
20
Summary of Contents for Lancair ES
Page 40: ......

