7
❏
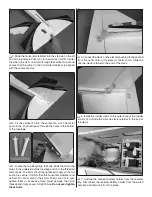
2. Slide the horizontal stabilizer into the stab slot in the aft
end of the fuselage. Push it as far forward as it will fi t. Center
the stab in the slot. Look down through the vertical fi n slot and
ensure that the cutout in the horizontal stabilizer is aligned
with the vertical fi n slot.
❏
3. Fit the vertical fi n into the vertical fi n slot. The metal
posts in the fi n should pass through the holes in the bottom
of the fuselage.
❏
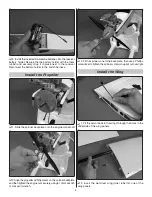
4. Locate the two EasyAlign tail bolts. Slide them into the
holes in the underside of the fuselage and onto the threaded
metal posts. The bolts should be tightened snugly so the tail
section is secure. Confi rm that the horizontal stabilizer and
vertical fi n cannot shift in their slots. Take care not to over-
tighten them as excessive force could damage the nylon
threads and it may cause in-fl ight failure.
Do not over tighten
these bolts
.
❏
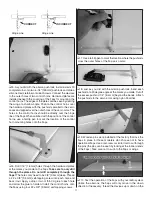
5. Connect the clevis on the elevator pushrod to the second
from the outer hole in the elevator control horn. Slide the
silicone clevis retainer to the end of the clevis.
❏
6. Install the rudder clevis to the outer hole of the rudder
control horn. Slide the silicone clevis retainer to the end of
the clevis.
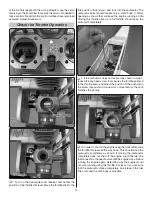
❏
7. Unstrap the receiver battery holder from the receiver
tray. Disconnect the receiver battery holder from the switch
harness and remove it from the plane.


