12
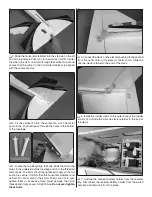
pushrods so that the fl aps are inline with the trailing edge of
the wings when the fl ap dial is rotated fully to its stop point.
When satisfi ed, slide the silicone clevis retainers to the end
of the clevises.
GET THE MODEL READY TO FLY
Check the Control Directions
❏
1. Refer to the manual included with the radio for specifi c
operating instructions. Turn on the transmitter and receiver
and center the trims. If necessary, remove the servo arms
from the servos and reposition them so they are centered.
Reinstall the screws that hold on the servo arms.
❏
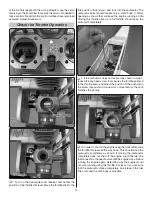
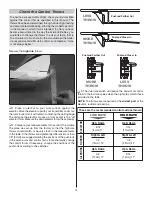
2. With the transmitter and receiver still on, view the elevator
and stab from the end. The elevator should be centered as
shown in the photo above. If the elevator is not centered with
the stab, disconnect the clevis from the elevator control horn.
Holding the end of the pushrod with pliers, screw or unscrew
the clevis as necessary until the elevator is centered when
reconnected to the pushrod.
❏
3. Center the rudder and ailerons by adjusting the clevises
on the pushrods as necessary.
❏
4. Once the rudder is centered, if necessary, center the
nose wheel by loosening the screw in the screw-lock pushrod
connector on the rudder servo arm. Move the pushrod forward
or back to center the wheel. Securely tighten the screw and
then push the airplane forward on a fl at surface to verify that
the airplane rolls straight.
❏
5. Make certain that the control surfaces and the throttle
respond in the correct direction as shown in the diagram. If any


