Page 14
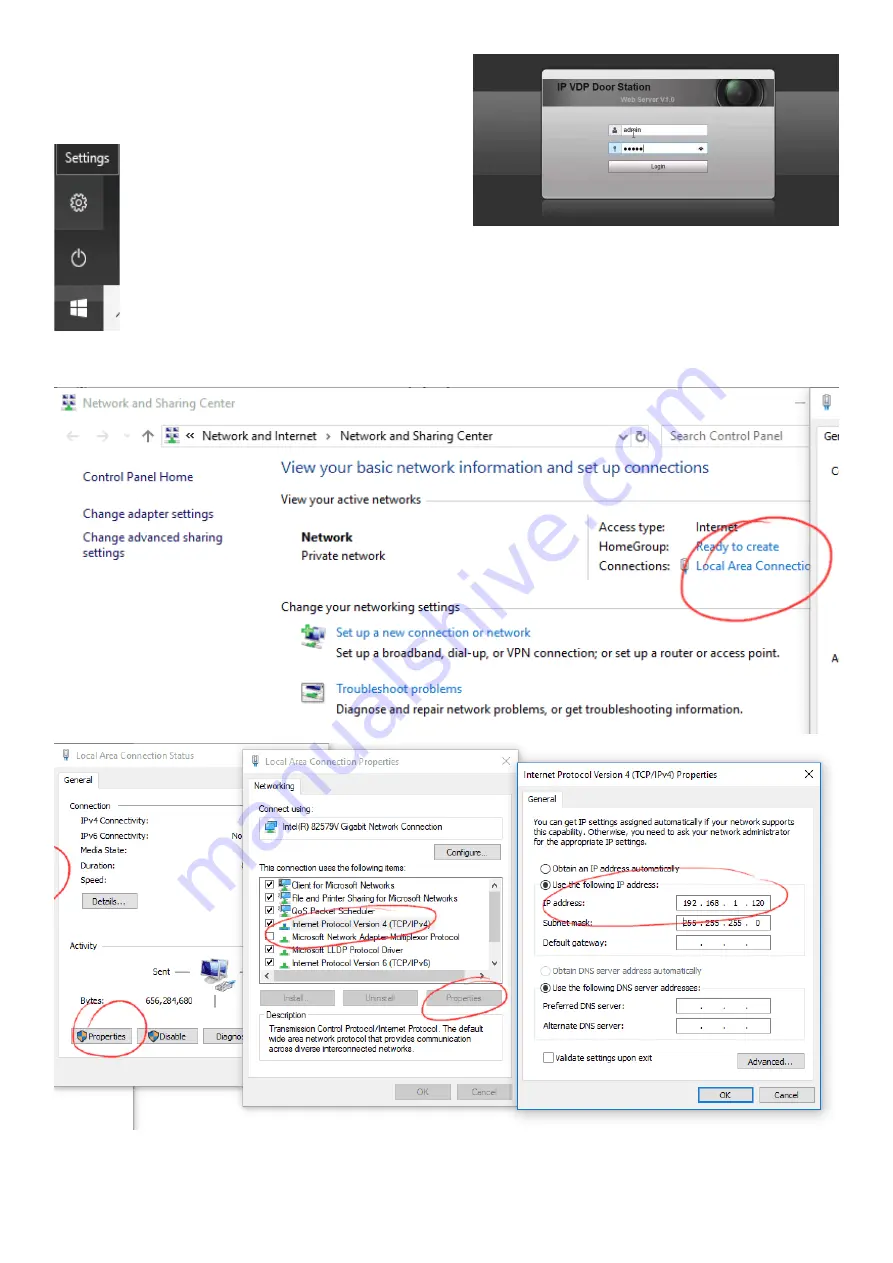
You will then need to open a web browser on the computer
and in the address bar enter “192.168.1.110”, which is the
default IP address for the IPI-101 and a login should appear.
If the login doesn’t appear it’s most likely because the com-
puters ethernet IP Address doesn’t have the same first three
numbers so you will need to change this first as
follows: For Windows 10 click the “Start” button
and choose “Settings”, in here click “Network and
Internet/Network and Sharing Center”. For older
versions of Windows from the Start menu open
the “Control Panel” and click “Network and Inter-
net” to find the “Network and Sharing Center”. In “Network and Sharing Center” click “Local Area Network”,
then in here click “Properties”, in here select “Internet Protocol Version 4 (TCP/IPv4)” and click “Properties”
for this. In here click “Use the following IP address:” and enter the IP address “192.168.1.120”, the subnet
mask should be: “255.255.255.0” and default gateway: “192.168.1.1” and click OK. This has temporarily
changed the computers IP address to one that will work with the IPI-101. If the login still doesn’t appear the
IPI-101 can be reset to its factory default using a small screw driver inserted into a hole in the back of the
unit and held for 10s until the blue light goes out. For Apple MAC’s Google how to do this.


