3
5. Hardware Overview
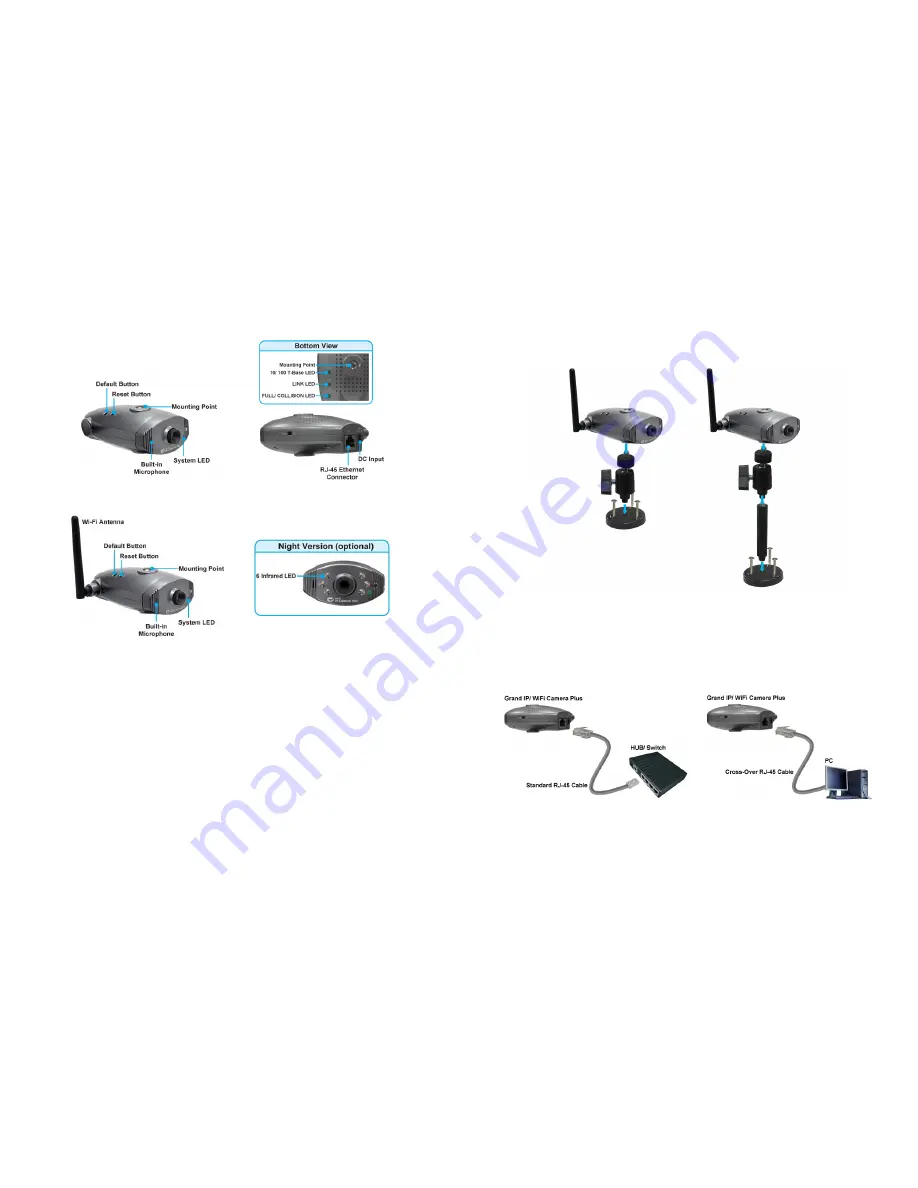
5.1 Grand IP Camera Plus
5.2 Grand Wi-Fi Camera Plus
Default Button:
Reset all settings to the original (factory) setting.
(Default IP Address: 192.168.1.100, Default User Name: root, Default Password: admin)
Reset Button:
Press the button to restart the camera.
Built-in Microphone:
For remotely listen in.
System LED:
Steady green indicates a proper connection to the power supply.
DC Input:
Connects to the power adapter. (DC 5V, 2A)
RJ-45 Ethernet Connector:
For connects to 10Base-T Ethernet cabling or 100Base-TX Fast
Ethernet cabling.
Wireless/ RJ-45 Switch:
Select your network connection Wireless/ RJ-45.
10/ 100 T-Base LED:
Steady green indicates the camera is connecting to 100Base-TX Fast
Ethernet.
LINK LED:
Steady green indicates the camera is connecting to the LAN.
FULL/ COLLISION LED:
Steady green indicates the camera is connecting to the LAN. The
will begin to flash to indicate that the camera is transmitting.
Night Version (optional):
Supports 6-LED infrared for night vision.
4
6. Hardware Installation
6.1 Assembling the Stand
Use the three screws and plugs provided to fix the stand bracket to a wall.
The stand can be adjusted to allow the camera a full 360
°
of rotation and a pan and tilt action.
6.2 Connecting to a Network
Connect the Grand Wi-Fi / IP Camera Plus to an Ethernet hub or switch by using a standard
cable. You can also connect directly to a computer by using the cross-over cable provided.


