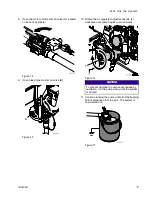
5.
Install tip on applicator by stretching rubber
retainer with a screwdriver or screwing on
retainer, depending on your application kit.
t
i14355a
Figure 26
6.
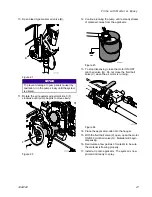
Open air assist valve (U) and adjust the air assist
needle valve (M). See
7.
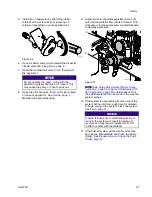
Open the material ball valve (V) on the base of
the applicator.
NOTICE
NOTICE
NOTICE
Do not operate the pump motor with the
applicator material ball valve (V) closed. This
may cause the pump or hose to pack out.
8.
Open the pilot ball valve for air motor (G) located
on base of applicator. See
Material will begin dispensing.
9.
Adjust air motor regulator adjustment knob (F)
until desired material flow rate is achieved. Turn
clockwise to increase pressure, counterclockwise
to decrease pressure.
E
F
ti21571a1
Figure 27
NOTE:
NOTE:
NOTE: See
Spray Adjustments (Mortar Spray
or
for details about all of
the adjustments that can be made to the way the
system sprays.
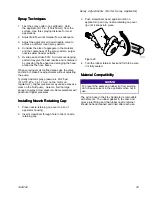
10. If the system is approaching its cure time or the
system will be idle for enough time for material
to begin curing in the system, Flush the system.
See
NOTICE
NOTICE
NOTICE
Failure to flush prior to material beginning to
cure in the system will result in damage to
system and may require replacement of all
parts in contact with the material.
11. If the flushed system will be idle for more than
90 minutes, Disassemble and Clean the Pump
(Daily). See
Disassemble and Clean the Pump
.
332612C
23


