27
(ID: 040708)
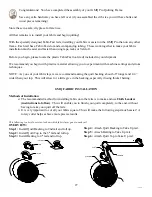
Take Up Leader
Backing
Top Fabric
Batting
1st
2nd
3rd
4th
Quilt Top
Quilt Batting
Quilt Backing
1st
2nd
3rd
4th
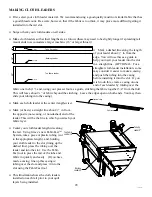
Step 4:
Attach Quilt Backing to Take Up rail.
Step 5:
Attach Batting to Take Up rail.
Step 6:
Attach Quilt Top to Take Up rail.
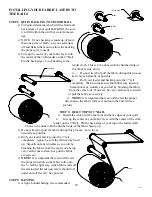
This following is a brief overview to show which fabric layer goes to each rail
OVERVIEW:
Step 1:
Install Quilt Backing to 2nd rail and roll up.
Step 2:
Install Quilt Top to the 3
rd
rail and roll up.
Step 3:
Install Batting to 4
th
rail and roll up.
Congratulations! You have completed the assembly of your GMQ Pro Quilting Frame.
Save any extra hardware you have left over (if you assembled the crib size you will have bolts and
wood pieces remaining).
Store these in a safe, dry place for later use.
All that remains is to install your fabric and begin quilting!
With the specially designed Fabri-Fast rails, installing your fabric is easier on the GMQ Pro than on any other
frame. Each rail has a Fabri-Fast slot and accompanying tubing. These work together to make your fabric
installation much easier and faster than using tape, tacks or Velcro®.
Before you begin, please locate the plastic Fabri-Fast tool (red) included in your shipment.
We recommend you begin with practice material allowing you to experiment with machine settings and stroke
techniques.
NOTE: As you cut your fabric layers, we recommend making the quilt backing about 6-8” longer and 2-4”
wider than your top. This will allow for a little give in the backing, especially if using thicker batting.
GMQ FABRIC INSTALLATION
Methods of Installation
The recommended method for installing fabric onto the rails is to make and use
Cloth Leaders
(instructions to follow)
. This will enable you to finish your quilt completely, to the end, without
having to take your quilt off the rails.
It is very important to cut all your fabric square. This will make the following steps much easier! A
rotary cutter helps achieve more precise results.


