


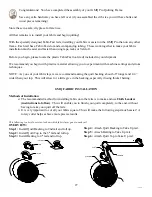
12
(ID: 040708)
1/4" X 2" Phillips
Pan Head Screw
3/16" Flat Washer
1/4" Jam Nut
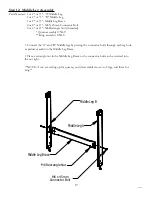
Middle Leg Spacer "B"
Middle Leg Spacer "A"
Queen Table Assembly
Crib Table Assembly
Track Support
Splice "B"
Track Support
Splice "A"
1/4-20 X 3/4"
Phillips Pan Head
Screw
1/4-20 X 3/4"
Phillips Pan Head
Screw
1/4-20 X 2"
Phillips Pan Head
Screw
1/4-20 Jam Nut
1/4" Flat Washer
1/4-20 X 3/4"
Phillips Pan Head
Screw
1/4-20 X 3/4"
Phillips Pan Head
Screw
1/4-20 X 2"
Phillips Pan Head
Screw
1/4-20 Jam Nut
1/4" Flat Washer
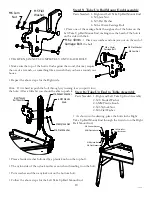
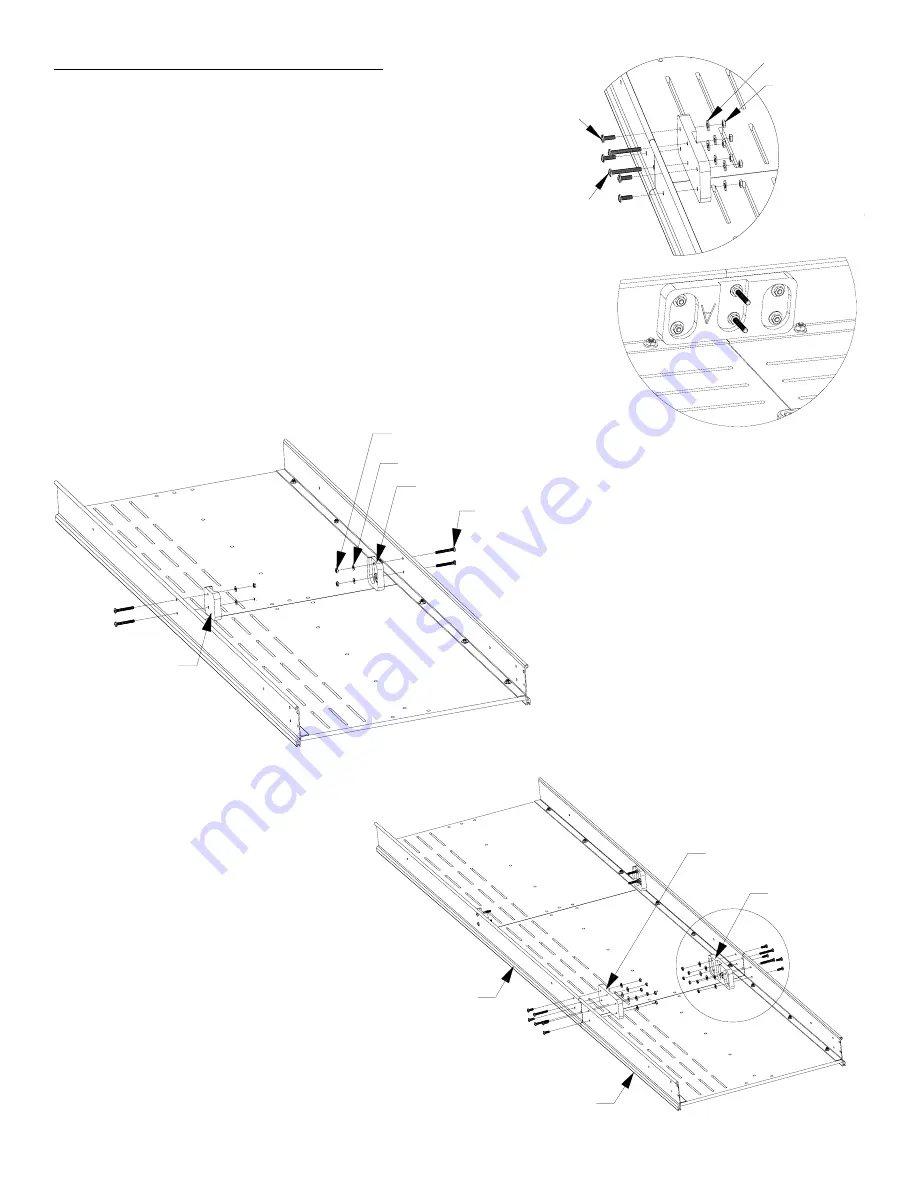
Step 5: Middle Leg Spacer Assembly
Parts Needed: 1- Crib Table (assembled)
1*- Queen Table (assembled)
1**- King Table (assembled)
1- Middle Leg Spacer A
1- Middle Leg Spacer B
1* or 2**- Track Support Splice A
1* or 2**- Track Support Splice B
4 or 8* or 12**- M6 x 50mm Phillips Pan Head Screw
8* or 16**- M6 x 20mm Phillips Pan Head Screw
4 or 12* or 24** M5 Flat Washer
4 or 12* or 24**- M6 Jam Nut
* Queen assembly ONLY
**King assembly ONLY
• Put two 50mm phillips pan head
screw through the two holes in the
front crib table aluminum track support,
which will then go through the Middle
Leg Spacer.
• Place a M5 flat washer on the end of
the screws, and then a jam nut. Tighten
all jam nuts completely as you go.
• Follow the above steps to attach the
Middle Leg Spacer to the back crib table
aluminum track support.
• Place the flat side of the Middle Leg Spacer
against the front crib table aluminum track
support (as show above right).
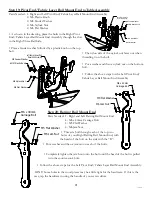
QUeeN ASSeMBLY:
• Place your Table #3 next to your Table
#1 & 2 assembly. (NOTe! Be sure the
“extra two holes” in the Track Supports are
on the end opposite from Tables #1 & 2).
• Where your Crib Table meets your
Queen table you will need to place a Table
Splice (flat end against the aluminum track
support).
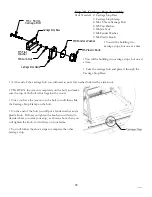
• Place a 50mm phillips pan head screw
through the
center two holes
(see close-up
next page) in the aluminum track support
and then through the Track Support Splice.
Place a washer and jam nut on the ends of
the screws and tighten completely.
• You will not want to completely tighten the nuts on this step until you have
completed track installation in step 9. Your tracks will go in easier if the bolts
are not tight.
M6 x 20mm Phillips
Pan Head Screw
M6 x 50mm Phillips
Pan Head Screw
M6 Flat Washer
M6-20 Jam
Nut
M6 Jam Nut
M6 Flat Washer
M6-20 x 50mm
Philips Pan
Head Screw


