background image

Press the

button. A beep will sound indicating the heater is now on and the setting will be

“AUTO”

mode. The current temperature will be displayed on the screen.

To turn the heater off, press the

button for at least 2 seconds until the heater switches off.

AUTO Mode
In

“AUTO”

mode you can set either Comfort or Economy settings as shown below. The default

temperature setting is 25

o

C. Set your desired temperature by pressing the UP or DOWN

buttons. The screen will return to the current temperature after a few seconds but the set
temperature will be retained unless changed by you.

Comfort mode can be set from 5

35

o

C

Economy mode can be set from 5 - 31

o

C (this is pre-set so there is always a 4

o

C

difference between Comfort and Economy settings)

You may want to set the economy temperature to a much lower level than the comfort
temperature and set the heater to economy when going to bed so that the room it is in stays
warm but not as hot as you would have it if you were in the room.

The heater will automatically set the best heat setting to reach the temperature you have set
and will adjust the heat setting to maintain the temperature you have set. The blue lights will
show which heat setting is currently in use.

USER mode
Press the

button to change from AUTO to USER mode. The power setting will go to high (all

blue lights illuminated). You can select the power setting you want. There are 5 levels. The blue
lights will decrease with each push. When it reaches the bottom light (lowest heat setting) the
heater will then go back into AUTO mode.

In

“USER”

mode you can set either Comfort or Economy settings as shown below. The default

temperature setting is 25

o

C. Set your desired temperature by pressing the UP or DOWN

buttons. The screen will return to the current temperature after a few seconds but the set
temperature will be retained unless changed by you.

Comfort mode can be set from 5

35

o

C

Economy mode can be set from 5 - 31

o

C (this is pre-set so there is always a 4

o

C

difference between Comfort and Economy settings)

You may want to set the economy temperature to a much lower level than the comfort
temperature and set the heater to economy when going to bed so that the room it is in stays
warm but not as hot as you would have it if you were in the room.

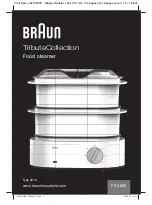
Check that the heater main power switch is in the OFF position before plugging into the mains
supply.
Turn the main power switch which is on the right hand side of the appliance just below the
control panel to the

“I”

position to turn the heater on. The heater will beep once and will be

stand by mode.

Operating Your Heater

Summary of Contents for Platinum GPPH610

Page 1: ...Electronic Inverter Panel Heater with WiFi Operating Instructions Model GPPH610 GPPH620 GPPH630 ...

Page 2: ... the unit WARNING Do not use this appliance in small rooms when they are occupied by persons not capable of leaving the room on their own unless constant supervision is provided WARNING To reduce the risk of fire keep textiles curtains or any flammable material a minimum distance of 1 metre from the air outlet General Care and Safety Guide Use only the voltage specified on the rating label of the ...

Page 3: ...e area and is unrolled before use It is recommended that this appliance is plugged directly into the wall socket Power boards are not rated to supply power to high wattage appliances A correctly specified undamaged extension cord may be used with this appliance provided it is used in a safe manner Do not remove plug from power socket until the appliance has been switched off Do not remove plug fro...

Page 4: ...s or other enclosed spaces as this may cause fire hazards This unit is not supposed to be used in or around locations where foodstuffs works of art or delicate articles of science etc are stored If your appliance does not work or is not working properly contact the place of purchase or the Customer Services Team General Care and Safety Guide ...

Page 5: ...Components CONTROL PANEL HEAT OUTLET AIR INLET CASTOR WHEELS X 4 CASTOR WHEEL BRACKETS X 2 MAIN POWER SWITCH WALL MOUNTING BRACKET SMALL FILTERS X 3 BIO FILTER ...

Page 6: ...able surface Be careful to prevent damage to the cosmetic finish or your floor surfacing 3 Align the screw hole on the Castor Wheel Bracket with the screw hole on the base of the appliance 4 Attach Castor Wheel Bracket with the 1 way screws provided and ensure the bracket sits firmly in place do not over tighten Firmly press Castor Wheels into the slots provided on the Castor Wheel Bracket until t...

Page 7: ...ce within one metre of a wall socket Do not mount in front of or below the wall socket Ensure there is at least 150mm clearance on all sides of the appliance 3 Detach the mounting bracket from the back of the panel appliance by unscrewing the two locking screws located on the top of the mounting bracket 4 Position the mounting bracket on the wall and mark the hole positions with a pen or pencil an...

Page 8: ... exists if the heater is covered or positioned incorrectly WARNING Never leave this heater unattended when in use If mounted on castors ensure heater is on a flat stable heat resistant surface Once the heater is in a safe operating position and all switches are in the off position insert the power plug into the mains outlet and switch on CAUTION Ensure the power cord is not tight because if pulled...

Page 9: ...ton 6 Power setting button 7 Power indicator lights 8 Comfort indicator light 9 Economy indicator light 10 Anti frost indicator light 11 Timer indicator light 12 Auto indicator light 13 User indicator light 14 WiFi button 8 9 10 4 5 11 1 12 13 7 6 3 2 14 Operating Your Heater ...

Page 10: ...ting is currently in use USER mode Press the button to change from AUTO to USER mode The power setting will go to high all blue lights illuminated You can select the power setting you want There are 5 levels The blue lights will decrease with each push When it reaches the bottom light lowest heat setting the heater will then go back into AUTO mode In USER mode you can set either Comfort or Economy...

Page 11: ... has to be turned on for this function to work To deactivate this mode press the MODE button again to go back to comfort or economy mode AUTO OFF TIMER Set the timing function by pressing the button twice in quick succession The TIMER symbol will light and the screen starts flashing use the UP or DOWN buttons to set the desired turn off time from 1 to 24 hours Once the set time has elapsed the hea...

Page 12: ...urn the heater on whilst you are not home You should never leave your heater unattended when in use Tap REGISTER in the centre of the screen If you already have an existing account then you can Log In Download Goldair mobile APP Open the APP Store or Google Play on your mobile phone Open Search and enter Goldair Click GET and begin to download and install Once downloaded to your phone open the APP...

Page 13: ...egister an email address or a phone number The APP defaults to email but you just need to tap the Register by Phone at top right of the screen to change XXXXXXXXXXXXXX XXXXXXXX Enter you email address or a phone number then press Get authentication code ...

Page 14: ...cation code that you will receive by email or text message Next you will be prompted to Set a Password The password must contain 6 20 characters and must be a mix of letters and numbers We recommend allowing the APP to access your location ...

Page 15: ...your phone tap the to connect to the heater Tap Confirm indicator rapidly blink on the phone Press the WiFi button on the control panel of the heater for 5 seconds until the WiFi indicator light starts flashing WiFi Set Button ...

Page 16: ...nect again as per the above process Choose confirm which WiFi to connect to Note your phone may pick up other WiFi signals e g neighbours so you will need to choose Enter your WiFi password and press Confirm The phone will then connect to the heater Ensure you have a good strong signal from your WiFi router Note The WiFi indicator on the heater may go off during this pairing process Once complete ...

Page 17: ...the number of the person you want to include or tap the phone icon to select the persons phone number Tap Confirm to complete the addition DEVICE SHARING CANCELLATION Open the GOLDAIR APP and tap the 3 dots in the top right of the screen Tap Add Sharing and delete the phone numbers of shared members to cancel the device sharing NOTE There can only be one user operating the heater at a time The APP...

Page 18: ...and the heater will revert to the dark screen TEMPERATURE SETTING Tap the or button to set the temperature When the set temperature is higher than the ambient temperature the heater begins to heat If the heater temperature setting is below ambient temperature the heater will be in standby mode and will not operate until the ambient temperature drops below the set temperature Depending on which mod...

Page 19: ...d the set level will be shown on the bottom of the APP It will also show on the heater display In AUTO the heater will adjust the heat settings automatically to suit the amount of power required to reach and then maintain the set temperature CHILD LOCK Tap the padlock icon to display the closed padlock and ON indicating that the child lock is active Tap the padlock icon again to unlock the child l...

Page 20: ...orner of the mobile phone interface is displaying ON and the heater is turned ON Tap the timer button and scroll to select the number of hours before the heater will turn OFF and tap OK to return to the heater operation interface The timer icon on the lower right will display how long before the timer will turn the heater OFF To cancel the timer touch the timer button again and the numbers will di...

Page 21: ...the additional filters at a time The heater requires regular cleaning to ensure trouble free operation Unplug the heater from the mains supply before cleaning Ensure that the heater has been allowed to cool down completely before cleaning The common cause of overheating is deposits of dust or fluff in the appliance Ensure these deposits are removed regularly by unplugging the appliance and vacuum ...

Page 22: ...s causing the appliance to overheat Thermal Fuse this disconnects the appliance permanently in case of overheating It is non resettable CAUTION The appliance generates heat during use Precautions must be taken to prevent the risk of burns scalds fires or other damage to persons CARE AND CLEANING The heater requires regular cleaning to ensure trouble free operation Unplug the heater from the mains ...

Page 23: ...ded under the Australian Consumer Law You are entitled to a replacement or refund for a major failure and compensation for any other reasonably foreseeable loss or damage You are also entitled to have the goods repaired or replaced if the goods fail to be of acceptable quality and the failure does not amount to a major failure In New Zealand this warranty is additional to the conditions and guaran...

Page 24: ...New Zealand PO Box 100707 North Shore Mail Centre Auckland 0745 www goldair co nz Australia PO Box 574 South Morang Victoria 3752 www goldair com au ...

Reviews: