background image

Part number: 310462   Drawing number: 44629-1                     

www.gme.net.au

a Division of


Standard communications Pty. Ltd.

Head Office: 

Sydney


Locked Bag 2086, North Ryde, NSW 1670, australia.  
T: +61 (0)2 9844 6666  F: +61 (0)2 9844 6600

Branches: 


MELBOURNE 

aDELaiDE 

PERTH


7 micro circuit,  

unit 1, 14 Phillips st ., 

unit 1, 10-12 Harvard Way, 

DanDenonG stH 3165 . 

tHeBaRton 5031 . 

canninG Vale 6155 . 

t: (03) 9798 0988 

t: (08) 8234 2633 

t: (08) 9455 5744 

F: (03) 9798 0177 

F: (08) 8234 5138 

F: (08) 9455 3110

BRiSBaNE 

SyDNEy 

aUcKLaND


unit 1, 89-101 Factory Rd ., 

unit B, 22-24 college st ., 

unit 2/24 Bishop Dunn Place, 

oXleY 4075 . 

GlaDesVille 2111 . 

east tamaki, manuKau 2013 nZ . 

t: (07) 3278 6444 

t: (02) 9879 8888 

t: (09) 274 0955 

F: (07) 3278 6555 

F: (02) 9816 4722 

F: (09) 274 0959

For customers outside australia and new Zealand please contact your local Gme retailer  
or email: export@gme .net .au

Summary of Contents for RCU9200 series

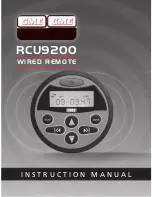
Page 1: ...GR9200 series instruction manual PAGE 1 I N S T R U C T I O N M A N U A L RCU9200 WIRED REMOTE...

Page 2: ...manual RCU9200 series contents CONTROLS 3 INSTALLATION 4 Mounting 4 Wiring 4 Operation 5 Power 5 Mute 5 Mode 5 MOUNTING DIAGRAM 6 INSTALLATION DIAGRAM 7 STANDARD COMMUNICATIONS CONTRACT WARRANTY 8 CU...

Page 3: ...GR9200 series instruction manual PAGE 3 controls 1 Power 2 LCD Window 3 Mute 4 Fast Foward Tune 5 Volume Up 6 Volume Down 7 Rewind Tune 8 Mode 1 2 3 4 5 6 7 8...

Page 4: ...nd the mounting surface Remove the two top nuts from the two bolts on the rear of the unit DO NOT remove the two bottom nuts as these are required to hold the bolts in place Slide the U Bracket over t...

Page 5: ...yer If an SD card or USB memory stick is fitted these will be included in the list of available Modes Rewind Tune In Tuner mode briefly press to manually tune downwards in frequency Press and HOLD to...

Page 6: ...PAGE 6 instruction manual RCU9200 series Nuts Cut outs Top mounting DIAGRAM U Bracket...

Page 7: ...GR9200 series instruction manual PAGE 7 Panel Front Facia Rubber Gasket Minimum Depth 60mm U Bracket Nut 12 V DC switched INSTALLATION DIAGRAM To GR9200...

Page 8: ...uivalent goods iv the payment of the cost of having the goods repaired or b in the case of services we supply to any one of the following as we decide i the supplying of the services again ii the paym...

Page 9: ...her direct indirect general special or consequential a arising out of any breach of any implied or express term condition or warranty or b suffered as a result of our negligence or that of our employe...

Page 10: ...DANDENONG STH 3165 THEBARTON 5031 CANNING VALE 6155 T 03 9798 0988 T 08 8234 2633 T 08 9455 5744 F 03 9798 0177 F 08 8234 5138 F 08 9455 3110 BRISBANE SYDNEY AUCKLAND Unit 1 89 101 Factory Rd Unit B...

Page 11: ...GR9200 series instruction manual PAGE 11 CUTTING TEMPLATE 76mm 90mm Mounting hole Push out Outer edge of wired remote Push out Tear off here...

Page 12: ...CUTTING TEMPLATE...

Reviews: