background image

G R 9 2 0 0   s e R i e s                   i n s t R u c t i o n   m a n ua l                   Pa G e   5

this to an accessory point in 
your vessel will ensure the back 
lighting turns on and off with your 
vessels accessory switch .

OPERATIOn

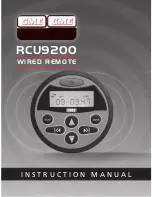
the Rcu9200 duplicates most of 
the functions of the main GR9200 
radio panel .

POWER

Press and hold the 

Power

 button 

to turn the GR9200 on or oFF .

Briefly press the 

Power

 button to 

adjust the display brightness on 
the GR9200 .

MUTE

Press the 

MUTE

 button to mute 

the sound . Press again to restore 
the previous volume settings .

MODE

the 

MOD

 button switches between 

the  various  signal  sources  such  as 
tuner,  auX  input  or  cD  player .  if 
an sD card or usB memory stick is 
fitted these will be included in the 
list of available modes .


Rewind/ Tune

in tuner mode, briefly press 


to manually tune downwards in 
frequency . Press and HolD 


to scan downwards in frequency . 
scanning will stop when a station 
is found .

When playing a cD or mP3, press 

 to step to the beginning of 

the current track .  Press 

 again 

to skip to the previous track . Press 
and HolD 

 to rewind through 

the current track .

   Fast Forward

in tuner mode, briefly press 


to manually tune upwards in 
frequency . Press and HolD 


to scan upwards in frequency . 
scanning will stop when a station 
is found .
When playing a cD or mP3, 
press 

 to advance to the next 

track . Press and HolD 

 to fast 

forward through the current track

   UP OR DOWN 

Press   to increase the volume or  

 to decrease the volume .

Summary of Contents for RCU9200 series

Page 1: ...GR9200 series instruction manual PAGE 1 I N S T R U C T I O N M A N U A L RCU9200 WIRED REMOTE...

Page 2: ...manual RCU9200 series contents CONTROLS 3 INSTALLATION 4 Mounting 4 Wiring 4 Operation 5 Power 5 Mute 5 Mode 5 MOUNTING DIAGRAM 6 INSTALLATION DIAGRAM 7 STANDARD COMMUNICATIONS CONTRACT WARRANTY 8 CU...

Page 3: ...GR9200 series instruction manual PAGE 3 controls 1 Power 2 LCD Window 3 Mute 4 Fast Foward Tune 5 Volume Up 6 Volume Down 7 Rewind Tune 8 Mode 1 2 3 4 5 6 7 8...

Page 4: ...nd the mounting surface Remove the two top nuts from the two bolts on the rear of the unit DO NOT remove the two bottom nuts as these are required to hold the bolts in place Slide the U Bracket over t...

Page 5: ...yer If an SD card or USB memory stick is fitted these will be included in the list of available Modes Rewind Tune In Tuner mode briefly press to manually tune downwards in frequency Press and HOLD to...

Page 6: ...PAGE 6 instruction manual RCU9200 series Nuts Cut outs Top mounting DIAGRAM U Bracket...

Page 7: ...GR9200 series instruction manual PAGE 7 Panel Front Facia Rubber Gasket Minimum Depth 60mm U Bracket Nut 12 V DC switched INSTALLATION DIAGRAM To GR9200...

Page 8: ...uivalent goods iv the payment of the cost of having the goods repaired or b in the case of services we supply to any one of the following as we decide i the supplying of the services again ii the paym...

Page 9: ...her direct indirect general special or consequential a arising out of any breach of any implied or express term condition or warranty or b suffered as a result of our negligence or that of our employe...

Page 10: ...DANDENONG STH 3165 THEBARTON 5031 CANNING VALE 6155 T 03 9798 0988 T 08 8234 2633 T 08 9455 5744 F 03 9798 0177 F 08 8234 5138 F 08 9455 3110 BRISBANE SYDNEY AUCKLAND Unit 1 89 101 Factory Rd Unit B...

Page 11: ...GR9200 series instruction manual PAGE 11 CUTTING TEMPLATE 76mm 90mm Mounting hole Push out Outer edge of wired remote Push out Tear off here...

Page 12: ...CUTTING TEMPLATE...

Reviews: