Accessing the Camera
16
4.
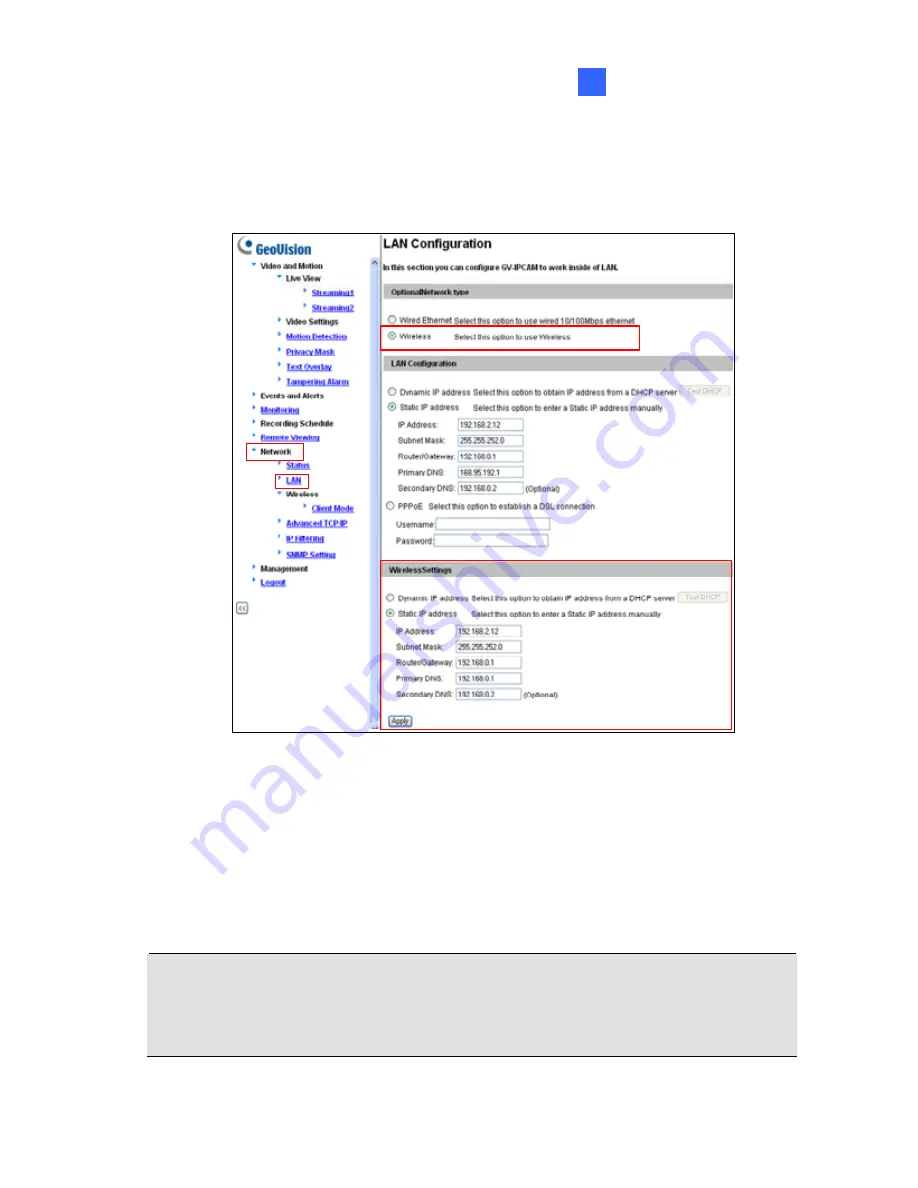
Enable wireless LAN.
A. On
the
Web
interface,
select
Network
and
LAN
. This page
appears.
B. Select
Wireless
for Optional Network Type.
C. To use a dynamic IP address assigned by the DHCP server,
select
Dynamic IP address
. To use a fixed IP address, select
Static IP address
and type the IP address information.
5. Click
Apply
. The camera will start creating a wireless connection to
the access point.
Note:
For GV-CBW120/220 and GV-CAW120/220, the LAN LED (No. 5,
13.2 Overview
and No.11,
14.2 Overview
in the
Quick Start Guide
) turns
blue when the connection is established.
163
Summary of Contents for GV-CBW120
Page 30: ...xxviii ...
Page 120: ...Unscrew thread lock Unscrew the inner housing Take out the camera body 90 ...
Page 134: ...11 2 Overview 1 2 3 4 5 6 8 7 9 10 12 11 13 104 ...
Page 144: ...Tilt Adjustment Rotational Adjustment 114 ...
Page 154: ...Pan Adjustment Tilt Adjustment Rotational Adjustment 124 ...
Page 177: ...PT Camera 15 15 2 Overview 1 2 3 4 5 6 7 8 9 10 11 12 147 ...
Page 194: ...6 Unplug the Ethernet cable 164 ...
Page 198: ...168 Do not leave a distance between the Focus Adjustment Cap and the camera ...
Page 199: ...17 The Web Interface 1 2 3 4 5 6 7 8 9 10 11 12 ...


