


10
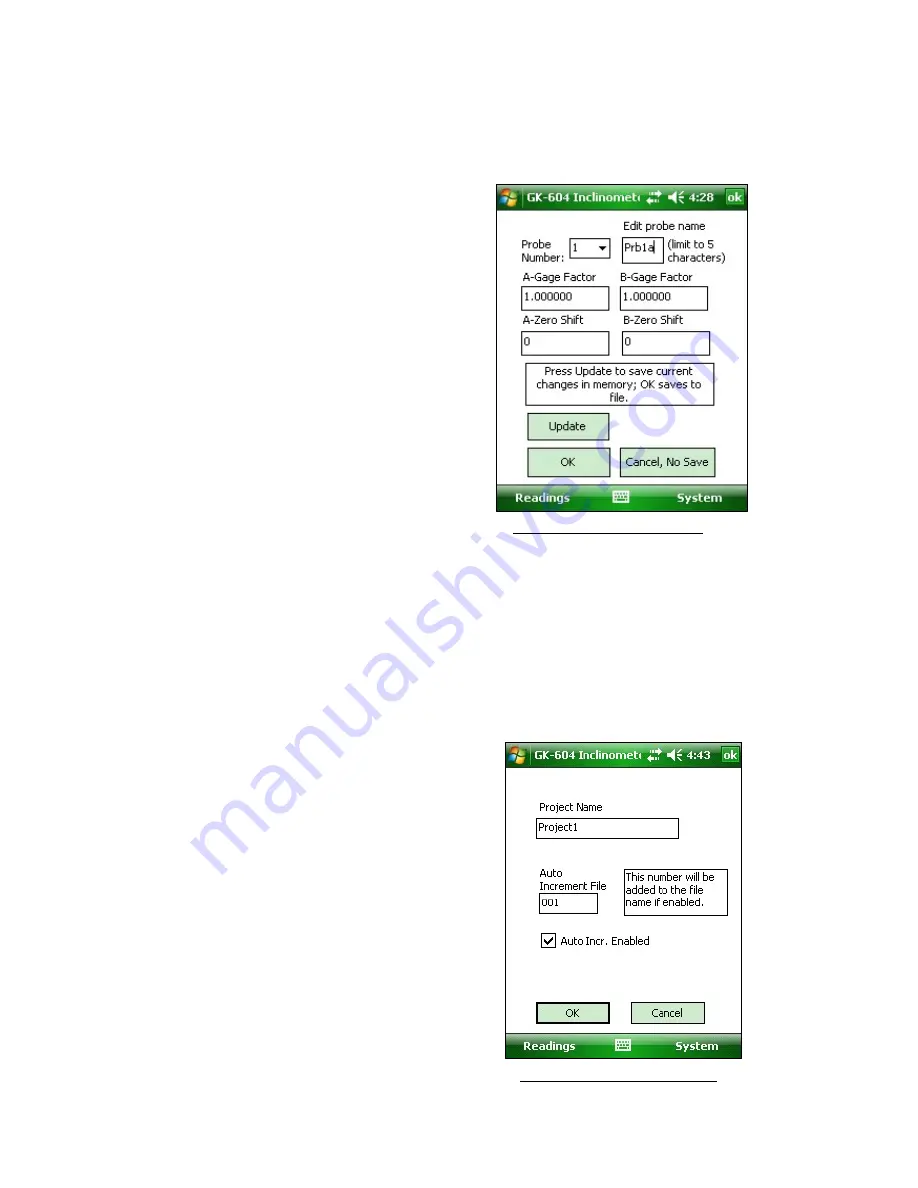
3.2 Probe Configuration
Select
System
→
Probe Configuration
and the screen depicted in figure 13 will be displayed:
- Probe
Number
Use the drop-down list to select 1 of 12 probes
- Edit probe name
Use the on-screen keyboard to enter a friendly
name
- A and B Channel Gage Factors
Using the on-screen keyboard, enter appropriate
numbers for the 2 gage factors (see the
Inclinometer Probe manual and Calibration sheet for
more information)
- A and B Channel Zero Shift
To compensate for any offset at zero enter
appropriate values for the Zero Shift values (see the
Inclinometer Probe manual and Calibration sheet for
more information)
- Update
Tapping “Update” causes the information to be
Figure
13
‐
Probe
Configuration
temporarily used for the current set of readings
(you’ll see the effect when you go to “Live Readings” and the readings which are saved in this
session”).
- OK
Tapping “OK” updates the current session and saves the information to the probe
configuration file (so it can be used in future sessions).
3.3 Project Configuration
Select
System
→
Project Configuration
and the screen
depicted in figure 14 will be displayed:
- Project Name
can be changed and is stored in the data file.
- Auto Increment File
The 3 digit value in this entry is added as a suffix to
data file names automatically if the
Auto Incr.
Enabled
box is checked. The 3 digit value is
automatically adjusted after every file is saved and
the value shown is the current value to be used. You
can lower this value to force overwrites of previously
saved files, or raise the value to skip file names.
- OK
Tapping “OK” updates the current values and saves
the information to the auto configuration file.
Figure
14
‐
Project
Configuration


