


Publication No. GEG-99054
Genicom
Mar 00
8-4
microLaser 210 User Guide
Testing the Envelope Feeder
4.
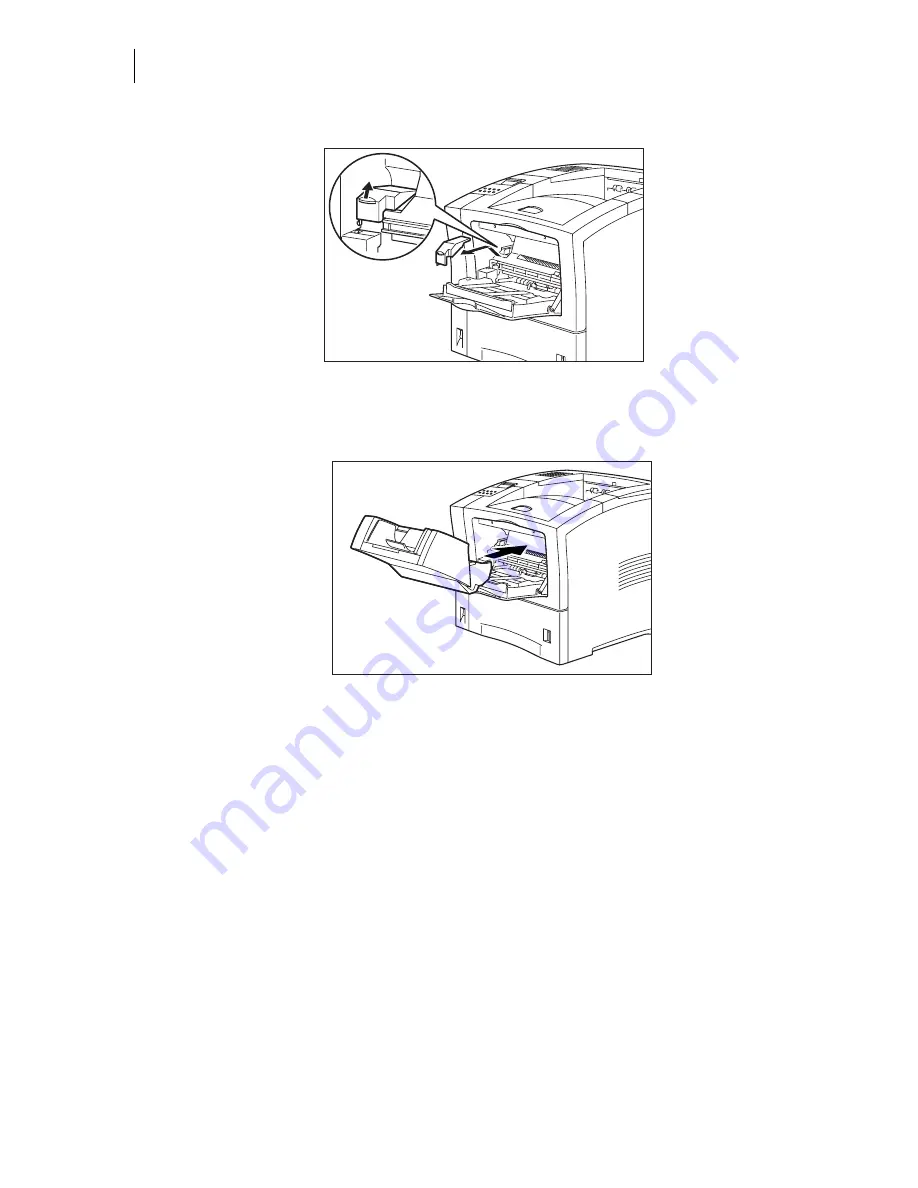
Remove the gear cover on the left side of the inside of the printer and store it in a safe place.
5.
Push the envelope feeder all the way into the printer until it stops, making sure it is seated
firmly inside the printer.
Testing the Envelope Feeder
After installing the envelope feeder, use the following test procedure to verify that the feeder is oper-
ating correctly.
1.
Turn the printer on by pressing the [ I ] on the power switch on the right side of the printer.
2.
Once the printer has warmed up and displays the “
Ready
” message on the control panel dis-
play, use any software application to print a few sheets from the envelope feeder.
3.
If the feeder does not feed paper or if the control panel displays an error message, refer
to
“Solving Envelope Feeder Problems” on page 7.
Selecting Print Media
Your printer can print on a variety of media, including plain paper, labels, transparencies, and enve-
lopes. Always use print media that meet the guidelines for use with this printer. Print media that is
not recommended for use with this printer may cause frequent paper jams or poor print quality.
Summary of Contents for microLaser 210
Page 1: ...Mar 00 Genicom Publication No GEG 99054 GENICOM microLaser 210 User Guide...
Page 10: ...Publication No GEG 99054 Genicom Mar 00 x microLaser 210 User Guide...
Page 16: ...Publication No GEG 99054 Genicom Mar 00 6 microLaser 210 User Guide About the Printer...
Page 44: ...Publication No GEG 99054 Genicom Mar 00 2 18 microLaser 210 User Guide Loading the Front Tray...
Page 62: ...Publication No GEG 99054 Genicom Mar 00 3 18 microLaser 210 User Guide Status Menu...
Page 172: ...Publication No GEG 99054 Genicom Mar 00 8 14 microLaser 210 User Guide...
Page 208: ...Publication No GEG 99054 Genicom Mar 00 A 8 microLaser 210 User Guide GENICOM Part Numbers...
Page 212: ...Publication No GEG 99054 Genicom Mar 00 B 4 microLaser 210 User Guide Regulatory Compliance...


