CHAPTER 3: TAKING AND
VIEWING PICTURES AND VIDEOS
Before you are able to take any pictures, make sure that
the handle grip and display units are both charged,
turned on and that the micro SD memory card is se-
curely plugged into the slot on the right of the display.
Make sure that the gold contacts are facing front and
inserted first. When the memory card is present, the X
will no longer appear over the blue SD icon in the upper
left corner of the display (
Fig.15
).
To take a picture (in other words, capture a still image),
first aim the tip of the probe at the area of interest then
press the black button with the camera icon at the far
left below the display. You’ll note that a yellow icon of a
camera briefly appears in the middle of the display
(
Fig.16
) to confirm that a picture was taken.
Similarly, to start video recording, press the right black
button below the display. The blinking “REC” symbol
(
Fig.17
) appears at the top left of the display. To the right
of this is a stopwatch that counts up from zero to indi-
cate the duration of the video captured. To stop record-
ing, again press the black button with the projector icon.
Each of the yellow buttons below the display has
a second function. The left button (
Fig.11
#7) will invert
the image on the screen and the right button (
Fig.11
#8)
will zoom in and out up to 4x.
Note that either a yellow camera icon (
Fig.18
) indicat-
ing a still picture or an orange projector icon (
Fig.19
) in-
dicating a video appears in the upper left corner. Your
pictures and video will appear in the sequence that you
took them. To review your pictures use both right and
left black buttons below the display to move left and
right, just as you would with a digital camera. When an
orange projector icon appears you can play the video
PLAYBACK MODE
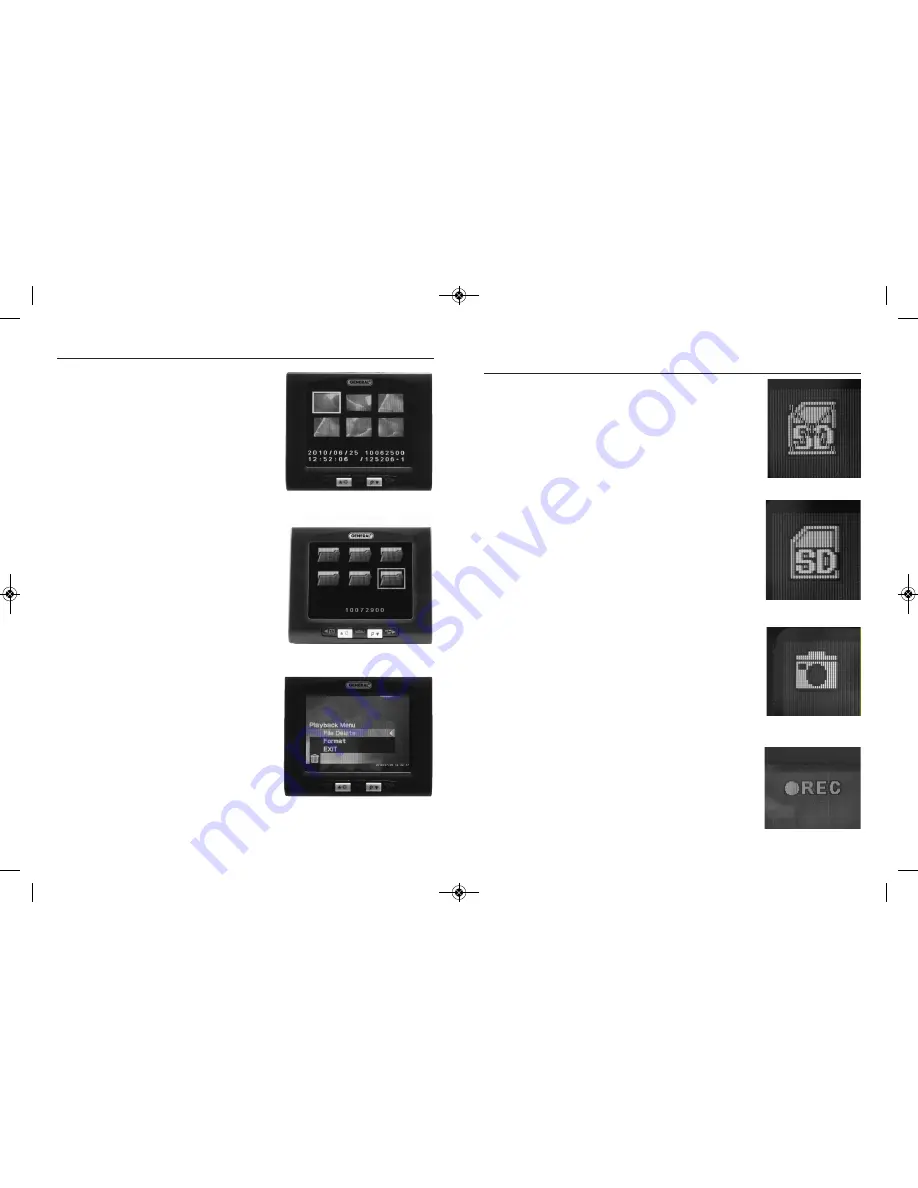
Once you are in the playback mode (after
briefly pressing the ON/OFF button on the
top of the monitor), the controls have the fol-
lowing functions:
1. Pressing the left or right outer black but-
tons (#9 or #10) scrolls through your set of
stored pictures and video one step either
left or right in their order of capture.
2. Pressing the left yellow button (#7) when
a projector icon is on-screen controls the
playing of that particular video.
3. Pressing the right yellow button (#8) con-
trols the file menu of the pictures and
videos. The first press displays thumbnails
of the media captured so far (
Fig.12
).
Pressing it again reveals the folder struc-
ture storing your pictures and video
(
Fig.13
). Each folder handles only so much
data so there will be multiple folders de-
pending on how many images you have
stored. Pressing the MENU button (#6)
after selecting a folder will open that
folder. Pressing the MENU button again
after selecting an image will open that pic-
ture or video for viewing.
4. Finally, by pressing the center Menu but-
ton (#6) (while in normal ‘playback’ mode)
you will open the ‘Playback’ menu (
Fig.14
)
where you can format and delete the
images.
16
17
Fig.15
Fig.17
Fig.16
Fig.14
Fig.13
Fig.12
DCS400_NEW_082610_AWB13P:Layout 1 8/26/10 10:47 AM Page 16


