x
Model FL4000H
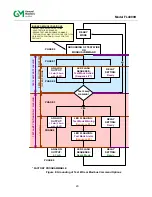
Testing the Detector Using a Test Lamp
Test the integrity of your system by using a Test Lamp. The original configuration (i.e.
sensitivity and relay options) can be changed by referring to Section 3.7 , and then changing
the dipswitch settings located on the bottom of the power board (SW1).
The instrument is now ready to operate. Please consult the Test Lamp manual for more
information on the instrument’s many features. If you have any problems in the set-up or testing
of the detector, please refer to the “Trouble Shooting Section”, or call the factory direct.
About This Manual
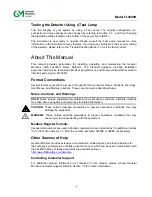
This manual provides instructions for installing, operating, and maintaining the General
Monitors (GM) FL4000H Flame Detector. The intended audience includes installation
personnel, field service technicians, Modbus programmers, and other technical staff involved in
installing and using an FL4000H.
Format Conventions
Several format conventions are used throughout this manual for Notes, Cautions, Warnings,
User Menus, and Modbus notations. These conventions are described below.
Notes, Cautions, and Warnings
NOTE:
Notes provide supplementary details such as exception conditions, alternate methods
for a task, time saving tips, and references to related information.
CAUTION:
These notices describe precautions to prevent hazardous conditions that may
damage the equipment.
WARNING:
These notices describe precautions to prevent hazardous conditions that may
cause injury to people working with the equipment.
Modbus Register Formats
Hexadecimal numbers are used in Modbus registers and are indicated by the addition of either
“0x” in front of a number or “h” after the number (example: 0x000E or 000Eh, respectively).
Other Sources of Help
General Monitors provides extensive documentation, white papers, and product literature for
the company’s complete line of safety products, many of which can be used in combination with
the FL4000H. Many of these documents are available online at
http://www.MSAsafety.com/detection
.
Contacting Customer Support
For additional product information not contained in this manual, please contact General
Monitors Customer Support. Refer to Section 7.0 for contact information.
Summary of Contents for FL4000H
Page 2: ...ii Model FL4000H This page intentionally left blank ...
Page 8: ...viii Model FL4000H Figure 2 Mounting Instruction Figure 3 Wall Mounting Assembly ...
Page 28: ...28 Model FL4000H Figure 16 Detector Mounting and Installation ...
Page 61: ...61 Model FL4000H 6 2 Final Assembly Figure 26 FL4000H Cross Section View ...

