background image

(4D Stress Echo – cont.)

7.  Press 

Store to capture 4D acquisition

8.  Continue steps 7 & 8 for each additional level
9.   You will be prompted “Do you want to start protocol analysis now?”  

Answer yes

Note: Use rotary knob to review images from page to page
10. End exam 

4D Stress Echo

(4D Stress Echo – cont.)

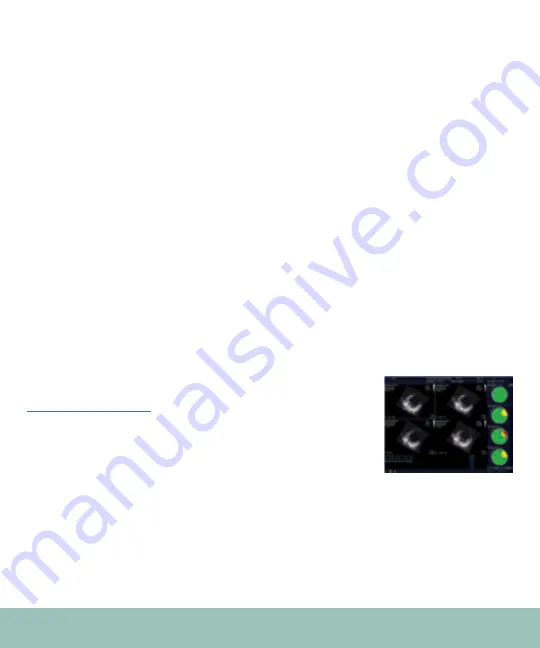
To Analyze from E9
1.  Select Patient from Patient Archive
2.  Select Exam and press 

Protocol, then press Analyze

3.  Rotate 

Page select/Review page to view next image 

Tips: Use Crop to enlarge all your images
Use trackball to activate either one from the quad view
Use Rotate/Translate for fine adjustments in viewing images
Use Rotary to select Top 1, Bottom 1, Top 2 for fine adjustments

Summary of Contents for Vivid E9

Page 1: ...erves the right to make changes in specifications and features shown herein or discontinue the product described at any time without notice or obligation GE GE Monogram and Vivid are trademarks of General Electric Company GE Medical Systems Ultrasound Primary Care Diagnostics LLC a General Electric company doing business as GE Healthcare Trademark of General Electric Company ...

Page 2: ...Volume Acquisition n Color Acquisition n 4D Views n 4D Auto LVQ Vivid E9 Quick Cards Index n 4D LV Mass n 4D Strain n 4D Stress Echo n Scan Assist Pro n 4D Manual Crop Tool n RV Volume Acquisition n Configuration of Footswitch and 6VT D Probe n MV TomTec Analysis n 4D Workflow Tools ...

Page 3: ...5 Probe ports Only use far right port for 4D imaging transducer 6 Wheels and brakes Left pedal swivel lock Right pedal brake Middle pedal brake release 7 Monitor lock on adjustable arm Turn release counter clockwise to unlock Turn release clockwise to lock Grab top of monitor to adjust angle for viewing DO NOT transport system with LCD in free position 8 Start a new exam Press Patient on control p...

Page 4: ...hing Shuttle search DVR cont DVR Quick Steps Recording 1 To start recording insert a DVD R W media no other media types supported in the lower CD DVD tray The system will prepare the media for up to 60 seconds at which time the Ejected symbol is shown 2 A patient name ID must be entered prior to recording 3 When the Stopped symbol in the title bar is shown press the Record button on the keyboard o...

Page 5: ... button on the touch panel under Config Utility this will finalize the media so don t do this until you are ready to eject it 7 Press Eject DVR when ready Disk will be ejected immediately if Stop Recording has been performed DVR DVR cont Clearing the DVD media overwriting used disks 1 The DVD R W media is a rewritable disk that allows clearing overwriting 2 To clear press the Clear DVR button on t...

Page 6: ...after the media is recognized as a DVR recording type of media 2 Playback starts automatically A Video menu will appear on the touch panel DVR 3 Press Go To Search and use the drop down menu to select the title patient you wish to review 4 After having selected the patient you can quickly jump to the next chapter next recording after a pause 5 Use the trackball to control speed rewind fast forward...

Page 7: ...fore after a pause DVR DVR cont DVR Quick Steps Review on a DVD player 1 Insert the DVD into the player 2 The DVD contains a built in media player It will launch automatically after the DVD loading period is over 3 Click the Menu or Display button on the player remote control 4 You will now see a screen with a title list and chapter list and can quickly jump from title patient to title 5 Use your ...

Page 8: ...t corner Auto EF has been performed and approved on this image and process will display results 2D Auto EF Auto EF cont 1 Select approve under image if agree with tracking 2 If results are not suitable select one of the following recalc to edit again Select EF dual to edit simultaneously in ESV EDV ES frame ED frame to adjust frame by frame 3 If results are edited manually on EDS ESV an will appea...

Page 9: ... 2D Auto EF Auto EF cont Auto EF Pitfalls 1 Frame Rates must be 40 80 fps 2 Heart rate limitations depending on Frame Rate 120bpm 3 If heart rate is too fast tracking may not be accurate 4 Recommend to select 2 or more heart cycles or expand time before and after heart cycle 100ms recommended 5 Select 3 cycles on soft menu before storing or set in config when transferring to DICOM server to avoid ...

Page 10: ... least 100 ms buffer around each beat should be acquired Can be set up as default in Config Imaging Global time before and after heart cycle to help promote good ECG AFI AFI cont Measurement 1 Load APLAX view press Measure and select AFI folder define APLAX view 2 Define ROI by following guide text on cursor with 3 points indicated ...

Page 11: ...FI AFI cont Analysis 1 Default screen is bull s eye and traces 2 Other choices on touch panel for display are BE only Quad displays PSS regionally bottom left curves top right curved AMM bottom right global strain top left Single displays A2Ch loop with GS 3 Cine Stop Play available in single and quad screen 4 Recalc button corrects ROI by moving endocardial points 5 Select Approve to confirm new ...

Page 12: ... screen shot only not raw data 2 To store the bull s eye press Exit prompts to store bull s eye press Yes this is stored in raw data this transfers the measurement to the worksheet 3 Exit AFI folder AFI cont New color map 1 Once AFI is performed bull s eye is displayed on the screen 2 Press BE maps 3 Select the BE maps and choose the map you want to be displayed on the screen AFI ...

Page 13: ... Mark AoV Closure Tri plane AFI cont Acquisition 1 Select 4D probe 2 Press Multi D button 3 Select Tri plane on touch panel 4 Press Image Store Tips Set as default in Config Imaging Global time before and after heart cycle should be 100 ms Ensure a full good ECG signal cycle during acquisition or in application tab set default to 3 cycles Ensure all 3 views are aligned before storing the loops ...

Page 14: ...ompts Note click for tips is available for more detailed instruction Tri plane AFI cont 4 Assess tracking press Approve if ok 5 Press Select button to set AVC to event timing already defined in doppler or automatic if event timing is not defined or scroll to set AVC manually Tip Select Next View on touch panel 6 Repeat steps 3 and 4 to finish all 3 views ...

Page 15: ...ed as raw data and measurements are transferred to the worksheet Note Further details for Triplane AFI please refer to User s Manual Tri plane AFI cont Analysis 1 Default screen is BE traces 2 Other choices on touch panel for display are Single displays Apical 2Ch loop with GS Quad displays Apical 2 Ch loop with GS regional PSS tracing and curved AMM BE Only Bull s eye display BE Review displays t...

Page 16: ...sed for better accuracy and follows ASE guidelines 4 Optimize IQ settings Tip Make sure intima is visible with proper gain settings Carotid IMT Carotid IMT cont 5 Press Image Store Tip Use trackball to scroll to desired frame Optional Select R Wave frame for best accuracy and ASE Standard Image Store ...

Page 17: ...at start point within vessel above intima if measuring Posterior or below intima for Anterior 11 Place second caliper a minimum of 50 pts from start point and set caliper IMT values will automatically calculate and will be displayed in results window on the screen Tip If IMT trace is not correct double click on end point arrow and shorten distance Trace fit can also re optimize the auto trace tool...

Page 18: ... touch panel Small Medium or Large Tip Volume size displayed is the angle of sector in both azimuth and elevation Lowest is 25 highest is 90 3 Ensure structure is contained in single beat volume size Tips Front Back steers volume towards structure Use Angle button SAX volume view allows centering of the LV in the capturing of LV volumes use Angle to help visualize entirety of target structures 4D ...

Page 19: ...Volume Acquisition Single beat 4D LV Volume Acquisition Single beat cont 5 Optimize image controls Step 1 Start by adjusting 2D gain in 2D mode Use the TGC s to help make sure that the image is uniform from apex to base in brightness as well as in azimuth and elevation planes Step 2 Enter 4D to help ensure that 2D gain is correct by looking at cut planes Step 3 If necessary adjust 4D gain Turn 4D ...

Page 20: ...crease crispness recommended at 25 4D LV Volume Acquisition Single beat 4D LV Volume Acquisition Single beat cont 6 Press Image Store or Freeze Tips There may be an image quality boost upon storing This is UD Clarity giving its final image processing boost to the image quality prior to storing This can be adjusted upwards in preview mode to help increase crispness If preview on Use rotary knob for...

Page 21: ... LV in the capturing volume press Angle for other views which may be appropriate for different target structures FlexiZoom There are 2 possible workflows for FlexiZoom Workflow 1 1 Scan in regular 2D mode 2 Press 4D Zoom Prepare on touch panel 3 A biplane image appears on the screen Number of cycles and frame rate can be adjusted on the fly Optimal anterior wall visualization Sub optimal anterior ...

Page 22: ...3 Press 4D Zoom Prepare on touch panel Flexi Zoom cont To adjust Zoom of interest 1 Adjust the zoom ROI using trackball by default it is set to Position 2 Press Set button to change from Position to ROI Size and adjust The biplane image with the Zoom of interest is displayed 4CH 2CH A biplane image appears on the screen ...

Page 23: ...t MV button is available only with 6VT D probe Temporal Resolution If higher resolution is needed a multi beat acquisition is necessary 1 Adjust single beat acquisition according to preference 2 Then select the number of heart cycles 2 3 4 or 6 cycles 3 Press Multi Beat to start the stitched acquisition 4 Press Image store if satisfied with the dataset Note If user is only working on single 2D ima...

Page 24: ...V D or 6VT D probe press 2D and press Color 2 Press 4D 3 Press Small Medium or Large for Color ROI Size Color Acquisition Single beat 4D Color Acquisition Single beat 4D cont 4 Position the ROI with the trackball 5 Press 4D again or Acquire Volume ...

Page 25: ...parallel 2D slices at any angle Color Acquisition Multi beat 4D Color Acquisition Multi beat 4D 1 Select 3V 4V D or 6VT D press 2D and press Color 2 Press 4D and Multi beat 3 Press Small Medium or Large for Color ROI Size 4 Position ROI of color 5 Adjust Num Cycles Tip Increasing number of cycles will increase frame rate of color flow ...

Page 26: ...ew on Use rotary knob for Cycle Select to pick desired loop If Freeze is pressed then press Cine to review loop options When desired cycle loop is playing press Image Store again to store Color Acquisition Multi beat 4D Color Acquisition Multi beat 4D cont Tip To re size and re position the color ROI while in multi beat acquisition mode Press 4D CF Prepare ...

Page 27: ... angle Color Acquisition Single Multi beat 4D 4D Color Rendering Single beat and Multi beat 4D 1 Recall a 4D color dataset 2 Press Angle for best view 3 Use trackball for Translate or Rotate Tip Use trackball key to highlight Rot Transl option and use Select key to toggle between rotate and translate functions for the trackball ...

Page 28: ...scuring tissue 6 Press Image Store or Freeze Tips If Freeze is pressed then press Cine to review loop options Pressing the rotary knob toggles its function 4D Views 4D Views TTE for 3V D and 4V D probes 1 Open a 4D dataset 2 Press Apical Align which will display the slice alignment screen Tip Apical Align must be done once per volume saved no need to repeat for other views or auto LVQ measurements...

Page 29: ...lick and drag of the horizontal line in one of the apical views or by using the rotary knob 5 Press Approve 4D Views cont 3 Tilt or translate laterally using the rotary knobs or the trackball until the left ventricle is centered with respect to the vertical lines 4D Views ...

Page 30: ... Press 4D Views 7 Select the desired standard view 4ch 2ch APLAX Mitral Valve Aortic Valve Note Press Flip Crop to see the opposite direction of the default Vivid E9 EchoPAC Select 4D Views from the Menu bar 4D Views Note 4D TEE dataset needs to be manually aligned unlike in 4D TTE dataset can be aligned automatically or manually too ...

Page 31: ...le needs to be aligned with the center red line 2 LV axis should be straight down in the middle of the image 3 The blue line needs to be positioned on the MV annulus 4 Use the trackball or mouse to control the datasets Use the to move and to position the data set Use the to tilt the views Grab the blue lines and move it to the MV annulus 5 Once alignment is done press Approve button Vivid E9 EchoP...

Page 32: ...EE cont 7 To get a quick view of LV function press Multi Slice 4D Views TEE cont 6 Press one of the LV views to get rendered image of the LV from the standard projections Vivid E9 EchoPAC Vivid E9 EchoPAC 4D Views ...

Page 33: ...4D Views 4D Views TEE cont 4D Views TEE cont If you need to view the MV from the LV press Flip crop Vivid E9 EchoPAC Vivid E9 EchoPAC ...

Page 34: ... view from Aortic valve from LVOT or AO and for the Septum view from LV or RV Aortic valve Septum 4D Auto LVQ 4D Auto LVQ for TTE 3V D or 4V D probe and TEE 6VT D probe 1 Open a 4D volume dataset 2 Press Measure 3 Select Volume 4D Auto LVQ The apical slice alignment screen is now displayed ...

Page 35: ...l 4D Auto LVQ cont 5 Select EDV End Diastolic Volume In each apical view place three points at the endocardial border two at the mitral annulus and one at the apex Apical points should be on the same line Basal points should be at corners between atrio ventricular plane and LV wall Center axis Center axis APLAX 2 ch 4 ch Center axis ç ç ç ç ç ç ç ç ç MV AV junction ...

Page 36: ...dial border two at the mitral annulus and one at the apex 9 Press Volume Waveform 10 If needed edit the contour and press volume waveform again 11 Press Image store 12 Press Approve and Exit to store the measurement Note The 4D TEE dataset can only be manually aligned unlike 4D TTE data set can be aligned manually or automatically 4D Auto LVQ ...

Page 37: ...es are useful for reviewing borders for edits 4D Auto LVQ cont How to edit Contour Adjustment To edit place the cursor on the location to edit Press Select key To delete an adjustment double click on the point Tips Use an image with a volume rate higher than 12fps The measurement should not be approved if a significant part of the LV wall or the detected contours are outside the sector Example of ...

Page 38: ...hould be on this edit Endo border was originated from EDV stage therefore should already be edited by user 4D Strain 4D Strain Note 25 FPS is recommended lower limit for 4D Strain or results may not be accurate 1 Select 4D Strain ROI 2 Contour will appear on all three views 3 Review tracing quality and Edit if needed 4 To edit Select Epi Endo or Endo Epi on touch panel to determine which needs to ...

Page 39: ...ls Eye To view each frame value use rotary to move frame by frame for values Select Parameter on touch panel to chose preferred strain parameter 4D Strain cont 7 Select Approve Exit Tips Frame Rate for 4D strain is 40 of the HR therefore a Normal HR should have 25FPS If Frame Rate increase is needed using multi beat is recommended and reducing depth for the best image quality Higher Frame Rate giv...

Page 40: ... capture acquisition 8 Use or to move or skip to next cell Tips Press Protocol Pause to orient your 4D image Select Multi beat or Single beat for 4D in template editor 4D Stress Echo 4D Stress Echo cont Pharmacological 1 Select 4D probe exercise application 2 Press Protocol 3 Select Stress on touch panel 4 Select Template Pharm 4 X 5 2D 4D 5 Press Begin Cont to start the procedure 6 Press Store to...

Page 41: ...to page 10 End exam 4D Stress Echo 4D Stress Echo cont To Analyze from E9 1 Select Patient from Patient Archive 2 Select Exam and press Protocol then press Analyze 3 Rotate Page select Review page to view next image Tips Use Crop to enlarge all your images Use trackball to activate either one from the quad view Use Rotate Translate for fine adjustments in viewing images Use Rotary to select Top 1 ...

Page 42: ...use Use Rotate Translate for fine adjustments Click CC images in protocol screen to select continous captured images 4D Stress Echo 4D Stress Echo cont Template Editor 2D Multi Dimension and 4D 1 Press Protocol 2 Press Template 3 Select Template editor Change number of level Change number of projections Select Scan mode 2D M mode CFM Doppler Qstress TVI 4D Select number of cycles number of cycles ...

Page 43: ...ber your Depth Gain Frequency Focus position number of MB cycles in 4D Template Editor Defining Analysis Groups To update 4 Select predefined groups like PLAX SAX 4D 5 Click the cell to be in the group 6 Press Update 4D Stress Echo 4D Stress Echo cont To make NEW group 1 Select the cell to be included 2 Click New Group 3 Specify group name and OK To DELETE group 4 Select predefined group then clic...

Page 44: ...st Pro Scan Assist Pro Using Scan Assist Pro 1 Select protocol 2 Select Category select protocol 3 Scan Assist Pro will appear on bottom right of screen to begin protocol 4 Follow steps commands located at bottom of image 5 To move to next step enter trigger button image store or freeze recommended Trigger button must be configured in protocol template Note all modes necessary will automatically a...

Page 45: ...ointer 7 After completion done will appear near protocol name above steps 8 Select Protocol button and select OK Scan Assist Pro Scan Assist Pro cont Creating a Protocol 1 Select Protocol button on keyboard 2 Select Config from Scan Assist tab 3 Select an existing protocol you would like to begin with to edit from the left side of screen 4 Select edit Scan Assist Creator will open 5 Select new tab...

Page 46: ...elect a category it will be placed under 12 Name protocol with extension file of uep Scan Assist Pro Scan Assist Pro cont 13 Select OK and exit creator Note to place new protocol on touch screen select custom folder on left side of menu Select Category you would like new protocol to be under on right side of menu then highlight new protocol on left and press arrow indicating to move to right side ...

Page 47: ...will open 4 Select step you would like to edit 5 Use icons to the left of steps to do the following Scan Assist Pro Scan Assist Pro cont 1 Delete step X 2 Move step up or down in the protocol arrow up before step or down after the current step 3 To insert a step above or below the current selected step use the top 2 icons with blue insert ion indicating before or after the step ...

Page 48: ...r measure will be 11 Determine what side and location of measurement only if needed for applications selected Scan Assist Pro Scan Assist Pro cont 12 Add comments to step to be viewed at bottom of image under comments section 13 Change location of comment if necessary Note measurements are associated with imaging mode chosen therefore mode must be selected prior to adding measurements under measur...

Page 49: ...is a way of pre cropping the 4D image and can help avoid manual cropping steps See Single beat and Multi beat Volume Acquisition Quick Cards 2 Press Crop Tool on touch panel 4D Manual Crop Tool 4D Manual Crop Tool cont The following screens are displayed Touch Panel Areas Orange Adding Removing Resetting Crop Planes Green Special Quick Cropping Tools Yellow Translate Rotate Crop Plane tools Worksp...

Page 50: ...s which are parallel to the green reference box plane sides Yellow 1 2 and White 1 2 are also parallel crop planes respective to the outer colored box sides Touch Panel 4D Crop Tool Reference Image w crop plane 4D Manual Crop Tool 4D Manual Crop Tool cont Rotate the volume with the rot function for the trackball to best see the crop plane s Work area in Crop Tool ...

Page 51: ... rotation Green 1 may be on top and Green 2 may be on bottom or any side if volume has been rotated 4D Manual Crop Tool 4D Manual Crop Tool cont Amber planes designate active crop plane in reference images dark blue on Touch panel As crops are applied a yellow check is marked on touch panel ...

Page 52: ...ckness 4D Manual Crop Tool 4D Manual Crop Tool cont 6 Press Rotate Crop Rotate Crop changes the function of the trackball to rotate the crop plane s Rot on trackball rotates the volume not crop plane If parallel crop applied both planes rotate 7 Move the trackball left right or up down to rotate crop plane s ...

Page 53: ...iew to the crop plane 4D Manual Crop Tool 4D Manual Crop Tool cont Additional Crop Planes 9 Press New Crop Plane Color to become active Use trackball function rot to rotate the volume and see best perspective when cropping Viewing direction is given by bold arrows see appendix White lines in reference images are non active crop planes amber line is active crop plane Outside of X s represents what ...

Page 54: ...or fine edge cropping use the rotary knobs spin red blue rotate red rotate blue to do precise oblique angle cropping in any direction Red and blue spin controls will only be visible on amber colored active crop planes that are in the foreground If active crop plane is faced away from the front first rotate the volume so that red and blue rotate levers on the active crop plane become visible then u...

Page 55: ...ctive press the color and number of the plane you wish to become active or re active 4D Manual Crop Tool To remove an active crop plane press the checked view to make it active then press it again to remove it To move an active crop plane to its starting place press Reset Active while it is active or just remove it and reactivate it by pressing it twice Clear button will erase all crops and bring ...

Page 56: ...ropped 4D image and not increase file size Virtual Store will store an image pointer which points to the original 4D dataset and does not duplicate it in the study saving on file size 4D Manual Crop Tool 4D Manual Crop Tool cont Appendix Yellow Viewing Arrow Looking at the inferior wall of the LV Verification Yellow cut plane is 4 ch White cut plane is 90 degrees Viewing direction is yellow bold a...

Page 57: ...as become shorter on White ref image Arrow has moved around towards the septum Green ref image 4D Manual Crop Tool 4D Manual Crop Tool cont Yellow Viewing Arrow Rotate Volume 70 degrees Looking at RV free wall Verification Arrow has moved to the left on Yellow ref image and is longer Arrow has become much shorter on White ref image Arrow has moved around towards the RV Green ref image ...

Page 58: ...nce plane also slightly shorter yellow ref image dimming corner 4D Manual Crop Tool 4D Manual Crop Tool cont Yellow Viewing Arrow Rotate Volume 180 degrees Looking at LV and Ao Verification On 4D image Ao is seen Yellow image shows we are looking from anterior septal side of LV perpendicular to the 4Ch view White image shows we are looking slightly in front of this white plane almost perpendicular...

Page 59: ...ing anteriorly towards the RVOT and or up an inter costal space Smaller RV s may require moving the probe more medially Sub optimal RV centering and size Optimal RV centering and size RV Volume Acquisition RV Volume Acquisition cont 3 Use the reference images to assure that A clear 4Ch view of the RV is seen on the left top panel In the orthogonal view in the left lower panel is the RV free wall a...

Page 60: ...e is a lot of noise in the left ventricular cavity that obscures the back wall Turn 4D gain down if there are black holes in the wall Choose best color depth render map RV Volume Acquisition Step 4 If necessary adjust the volume optimize and or transparency page 2 of touch panel Increasing these may help you see through any cavity noise Step 5 It is recommended to be conservative with both smoothi...

Page 61: ... size setting Volume size may need to be adjusted to larger than Large and can be adjusted higher with volume size rotary RV Volume Acquisition RV Volume Acquisition cont 6 Adjust number of cycles to 2 3 or 4 Tip Patient s ability to hold breath may affect this choice Translation of the heart must be kept at a minimum during multi beat acquisition The more cycles used the longer the patient must h...

Page 62: ...igher frame rates in order to use the RV Vol tool accurately If using single beat skip steps 6 7 6 7 RV Volume Acquisition RV Volume Acquisition cont 8 Press Image Store or Freeze Tip If preview on Use rotary knob for Cycle Select to pick desired loop If Freeze is pressed then press Cine to review loop options When desired cycle loop is playing Press Image Store again to store 9 Recall image and a...

Page 63: ...e touch panel 3 While on Config go to Imaging 4 Select Application tab Footswitch has three pedals that can be configured Footswitch Functions that can be selected Configuration of Footswitch and 6VT D Probe No function Select Image Store Pointer Rotate 90 Previous cycle Next cycle Freeze 2D Color 4D Multi D Print Print Alt Rec Pause Quick Rotate Note Configuration of the footswitch is preset depe...

Page 64: ...ode or while in Freeze mode 2 Freeze mode functionality when Press Freeze Press Image store or previous cycle Note Configuration of the TEE button is NOT preset dependent unlike Footswitch configuration The button configuration is a general set up for all presets running on the TEE probe The 6VT D probe has three buttons that can be configured 6VT D probe Functions that can be selected No function...

Page 65: ...d systolic frame and mark it by pressing the icon MV has to be closed MV TomTec analysis for 4D TEE Image Acquisition 1 Only images acquired with 6VT D probe can be analyzed 2 During acquisition MV and MV annulus should be complete as well as part of the AV 3 For dynamic measurement frame rate should not be too low 4 Image is optimized for best viewing at MV Image Analysis 1 Recall a 4D TEE MV dat...

Page 66: ...menu on the right side Step 6 Dynamic Analysis Select next step from the menu on the right side MV TomTec analysis Set MV Annulus Landmarks Position the green bar in the middle of the systolic range Set MV annulus with two points in Azimuth plane and two points in Elevation plane Set LVOT Landmark From the three SAX views check out the one where LVOT is seen best and set the landmark in the middle...

Page 67: ...LL FRAME analysis is automatically transferred into the patient s worksheet MV assessment cont To Store Images Store images to clipboard Press Alt P To Store AVI or bmp outside EchoPAC Use this icon on the upper left side to store either loop or still frame im ages to another media To Store a screenshot on your hard drive Use this icon to store a screenshot to your computer hard drive _ EchoPAC_PC...

Page 68: ...tate Quick Rotate The system can do the rotation inside the probe while the user keeps the probe still at the same position without any movement Steps are always 30 1 Press from touch panel by clicking on the right clockwise rotation or left arrow counter clockwise rotation 2 From PLAX view press Quick rotate 3X to the right to get to 90 degree SAX 4D Workflow Tools Rotate In addition the rotary k...

Page 69: ...p down to tilt the second plane either back and forth Biplane Tilt and Rotate In biplane mode by default planes are orthogonal to each other starting at 0 90 Press Quick rotate planes are still orthogonal in position but can be rotated to a different angle Default 0 90 30 120 Tilt With rotation of 30 clockwise Default Tilted 4D Workflow Tools ...

Page 70: ...5 Use trackball to move RIGHT clockwise or LEFT counter clockwise 6 Use also trackball to tilt UP or DOWN Biplane Prepare The tool uses the 4D render image to orientate and obtain biplane images with high frame rate and high spatial resolution 1 While in 4D imaging press Biplane prepare button on the touch panel 2 Adjust the position of the Laser lines either by using rotary knob or by trackball 4...

Page 71: ...Middle Red Right Color Biplane Prepare cont 7 Once the position of the Laser lines is set properly press Biplane button on the touch panel The image switches to a standard biplane mode with high frame rate and high resolution of 2D image 4D Workflow Tools Note This tool is available only in LIVE mode during scanning When using the 3V D and 4V probe Biplane prepare mode button is on the 2nd page of...

Page 72: ...anner select 2 Click Crop You can use either the 2D slice images or the render image to do the cropping Laser Lines cont Note Laser lines tool can be applied on 4D images for 3V 4V D and 6VT D probe Red Color Vivid E9 EchoPAC 4D Workflow Tools Note This tool can be use during Live scanning and during post processing 2 Click Crop tool can be applied on all 4D images from 3V D 4V D and 6VT D probe ...

Page 73: ...ool Note Parallel crop is turned ON since 2 Click Crop is using a parallel line 2 Click Crop cont 2 Press 2 Click Crop set the 1st point on the position where you want to start 3 Adjust the cursor to visualize the structure you want to see 4 Move the cursor to the final position and set the 2nd point 1st Click 2nd Click Adjust 4D Workflow Tools ...

Page 74: ...exit it kept the view of interest Layout overview Laser lines are following color scheme as indicated by the colored corner Designated solid frames indicates the same view as the rendered image Vivid E9 EchoPAC 2 Click Crop cont You may use the rendered image to set the 2 Click crop Note Be aware depth is not taken into account Selection Result 4D Workflow Tools ...

Page 75: ...ne until desired position FlexiSlice cont 4D Workflow Tools Viewing direction Image and line to manipulate BEFORE AFTER Old and new position of the line 2D slice belonging to the line The NEW 2D slice belonging to the line Orange X shows from which side of the plane the image is cropped ...

Page 76: ...otate the image FlexiSlice cont Use to TILT end of the line until desired position Image and line to manipulate BEFORE AFTER BEFORE Rotation 2D Slices belonging to the lines Image and lines to manipulate Old and new position of the line 2D slice belonging to the line The NEW 2D slice belonging to the line 4D Workflow Tools ...

Page 77: ...together until you achieve desired image position FlexiSlice cont AFTER Rotation The NEW 2D Slices belonging to the lines Old and new position of the lines 4D Workflow Tools BEFORE 2D Slices belonging to the lines Image and lines to manipulate ...

Page 78: ...er image will be updated accordingly Note This tool is available during Live scanning and post processing This tool can also be used to perform measurements on 2D slices or on the 4D render image The tool can be applied on 4D images from 3V D 4V D and 6VT probe FlexiSlice cont AFTER The NEW 2D Slices belonging to the lines Old and new position of the lines 4D Workflow Tools ...

Page 79: ...out or select WHITE as the reference plane Changing the reference plane To change the reference image plane simply select the color that corresponds to the image To activate the YELLOW as reference plane 4D Workflow Tools ...

Page 80: ... regular 2D measurements 2 For render image press Generic Folder 3 Select Caliper Crop plane or Area Crop plane Render Depth Mode This tool provides the 2D views within a specific depth of the 4D rendered image The system takes into account the depth inside the heart 1 Press Depth mode on the touch panel Example 1 Position the intersection of the Laser lines set on the tip of the posterior MV leaf...

Reviews: