background image

– 4 –

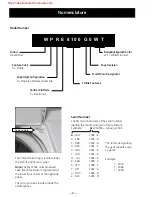
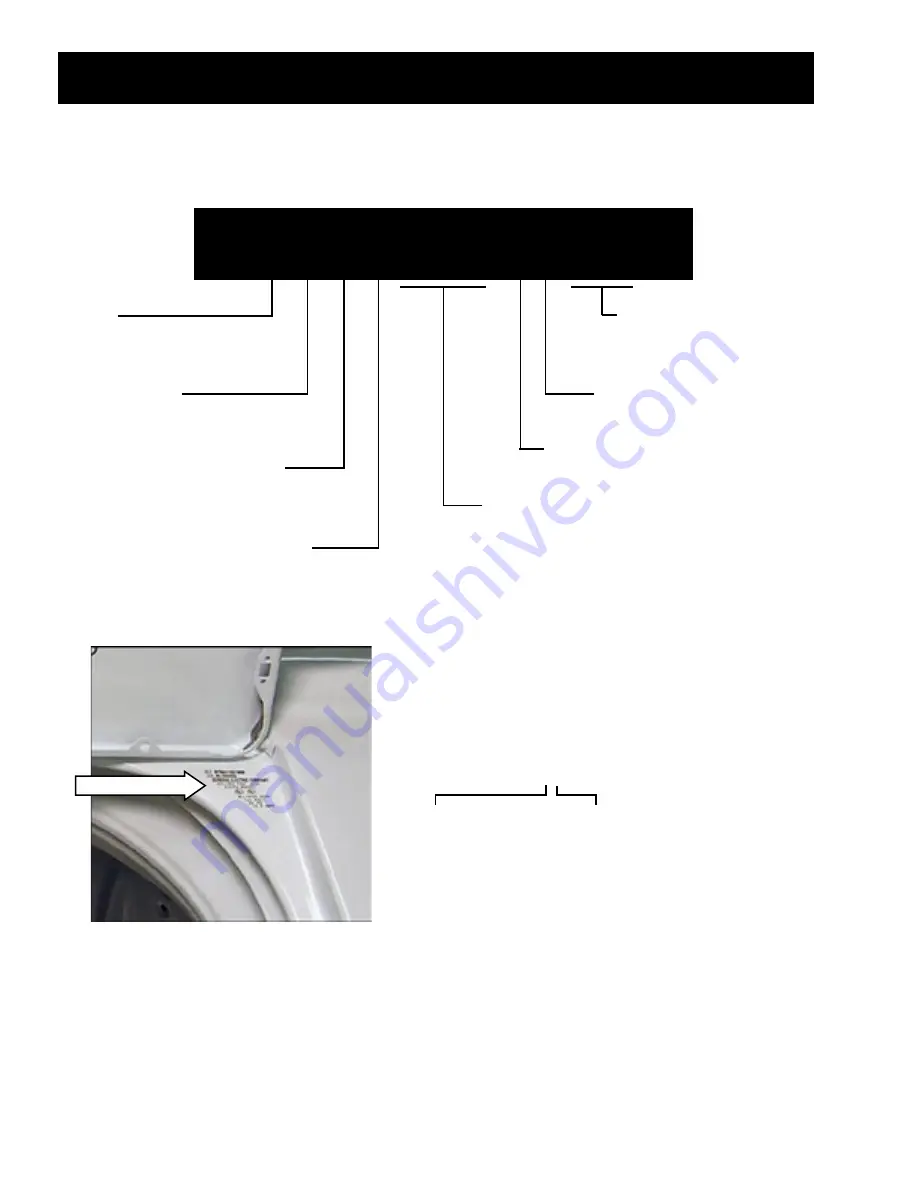
Control Platform

E = Electronics

W  P  R  E  8 1 0 0   G 0  W  T

Brand

GE Washer

Feature Pack       

P = Profile

Body/Backsplash Color 

WT = White/Titanium

Model Year Designator

Model Number

The nomenclature tag is located under 

the lid in the right rear corner. 

Note: 

The first 1500 units produced 

have the nomenclature tag located at 

the lower front corner of the right side 

panel.

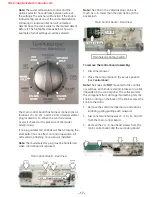
The mini-manual is located inside the 

control panel.

Nomenclature

The  letter  designating 

the year repeats every 

12 years.

Example:
 

T - 1974


T - 1986


T - 1998

Serial Number

The first two characters of the serial number 

identify the month and year of manufacture.                                

Example: 

 AL

123456S = January, 2006

A

 - JAN  

2006 - 

L


D - FEB  

2005 - H

F - MAR  

2004 - G

G - APR  

2003 - F

H - MAY 

2002 - D

L - JUN  

2001 - A

M - JUL  

2000 - Z

R - AUG  

1999 - V

S - SEP   

1998 - T

T - OCT  

1997 - S

V - NOV  

1996 - R

Z - DEC  

1995 - M


Capacity/Configuration

R = King Size Stainless Steel Tub

Profile Features

Nomenclature

Engr. Revision

https://appliancetechmanuals.com

Summary of Contents for PROFILE WASHERS WPRE6100

Page 1: ... Washers With Electronic Control and Mode Shifter Assembly Technical Service Guide October 2006 GE Consumer Industrial WPRE6100 WPRE8100 LOAD SIZE Profile TEMPERATURE OPTIONS START PAUSE COTTONS CASUALS PREWASH HANDWASH DELICATES EASY CARE SPEEDWASH https appliancetechmanuals com ...

Page 2: ... injury disconnect power before servicing this product If electrical power is required for diagnosis or test purposes disconnect the power immediately after performing the necessary checks RECONNECT ALL GROUNDING DEVICES If grounding wires screws straps clips nuts or washers used to complete a path to ground are removed for service they must be returned to their original position and properly fast...

Page 3: ...Field Service Mode 34 Front Panel 21 Harness Fuse 26 Introduction 5 Inverter Motor 25 Inverter Motor Error Codes 37 Inverter Motor Test 39 Leveling Legs 15 Lid Switch 20 Mode Shifter Coil Test 39 Motor and Drive System 7 Nomenclature 4 Schematic 41 Shaft and Mode Shifter Assembly 29 Shaft and Mode Shifter Overview 8 Shipping Rod 15 Suspension 26 Tub Assembly 27 Tub Cover 27 Warranty 42 Washer Comp...

Page 4: ...e mini manual is located inside the control panel Nomenclature The letter designating the year repeats every 12 years Example T 1974 T 1986 T 1998 Serial Number The first two characters of the serial number identify the month and year of manufacture Example AL123456S January 2006 A JAN 2006 L D FEB 2005 H F MAR 2004 G G APR 2003 F H MAY 2002 D L JUN 2001 A M JUL 2000 Z R AUG 1999 V S SEP 1998 T T O...

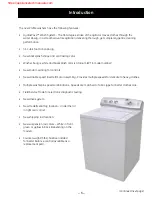
Page 5: ...or controls New variable speed inverter motor assembly Provides multiple speeds for delicate to heavy clothes Multiple wash spin speed combinations Speeds are matched to fabric type for better clothes care Field Service Mode for electronic diagnostic testing New drive system New model serial tag location Under the lid in right rear corner New shipping rod location New suspension rod colors White i...

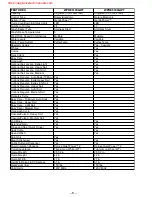
Page 6: ...Yes Cottons Regular Extra Heavy Soil Yes Cottons Regular Extra Light Soil Yes Cottons Regular Heavy Soil Yes Cottons Regular Light Soil Yes Cottons Regular Medium Soil Yes Delicates Cycle Yes Easy Care 15 Minute Auto Soak Yes Easy Care Heavy Soil Yes Easy Care Light Soil Yes Easy Care Medium Soil Yes Handwash Cycle Yes Casuals Pulsed Heavy Soil Yes Casuals Pulsed Medium Soil Yes 2nd Rinse Yes Yes ...

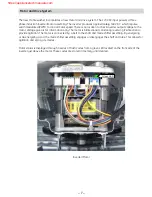
Page 7: ...mation only The motor is bidirectional constantly reversing it s direction to provide agitation The motor is connected by a belt to the shaft and mode shifter assembly By energizing or de energizing a coil the mode shifter assembly engages or disengages the shaft and tube This allows for agitation and spin cycle modes Motor status is displayed through a series of flash codes from a green LED locate...

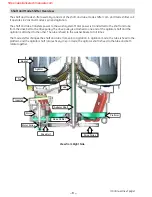
Page 8: ...s attached to one end of the agitator shaft and the agitator is attached to the other The tube is fixed to the washer basket at all times The mode shifter changes the shaft and tube from spin to agitation In agitation mode the tube is fixed to the platform and the agitator shaft rotates freely In spin mode the agitator shaft is fixed to the tube and both rotate together Basket Motor Agitator Motor Pu...

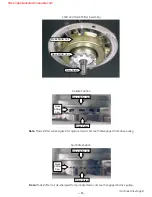
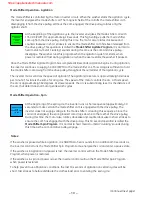
Page 9: ...m Mode Shifter Coil Drive Pulley Mode Shifter Cam Continued next page Drive Shaft Note Mode shifter coil energized for agitate mode cam teeth disengaged from drive pulley Shaft and Mode Shifter Assembly Note Mode shifter coil de energized for spin idle mode cam teeth engaged in drive pulley https appliancetechmanuals com ...

Page 10: ...y 30 strokes per minute This rate is the same for all cycles The speed of the motor controls the arc At fast speed the arc is approximately 360 degrees At slower speeds the arc is substantially less It is the distance of the arc that determines normal or gentle wash cycles Mode Shifter Operation Spin At the beginning of the spin cycle the inverter runs a short sequence approximately 30 seconds to ...

Page 11: ...R 24 HRS WASHER DRAINS RUNS FINAL SPIN CYCLE ENDS MODE SHIFTER AGITATE PROGRAM RUNS 18 SEC MODE SHIFTER SPIN PROGRAM RUNS 30 SEC SPIN CYCLE BEGINS CYCLE COMPLETED POWER IS RESTORED POWER IS LOST SPIN BASKET STOPS 7 SEC LID SWITCH OPENS SPIN BASKET STOPS 7 SEC USER PRESSES PAUSE BUTTON SPIN BASKET COASTS TO A STOP MODE SHIFTER SPIN PROGRAM RUNS 30 SEC LID SWITCH CLOSED MAIN CONTROL CONTINUES TO COU...

Page 12: ...is colder or for locations with very cold water year round use the PerfecTemp plus COLD to help dissolve powdered detergents and to improve the cleaning of your clothes The TAP COLD feature turns the PerfecTemp feature on your washer off and uses your household tap water temperature for a COLD wash This can provide energy savings by reducing the amount of hot water used in your wash Options Autoso...

Page 13: ...shortest cycle time and wash intensity PREWASH For removing surface dirt from heavily soiled clothes Make sure to follow with a regular wash cycle CASUALS For wrinkle free and permanent press items and knits COTTONS For heavy to lightly soiled cottons household linens work and play clothes EASY CARE For wrinkle free and permanent press items and knits DELICATES For lingerie and special care fabric...

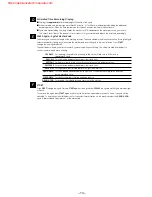
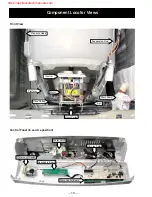
Page 14: ... Pump Suspension Rod Pressure Hose Drive Pulley Belt Platform Motor Pulley Inverter Water Valve AC Line Filter Water Level Switch Main Control Board Secondary Board Front View Control Panel in service position https appliancetechmanuals com ...

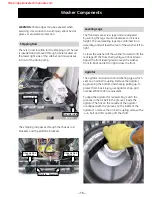
Page 15: ...vel the washer tilt the washer forward to lift the rear legs off the floor then gently set it back down Adjust the front leveling legs to level the washer front to back and left to right across the front Rod Inlet Hole Chassis Rod Bracket Chassis Rod Bracket Agitator The agitator is a dual action ratcheting type which sets on an air bell coupling Remove the agitator by grasping the bottom and sharp...

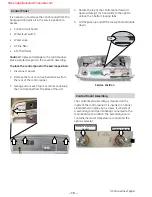
Page 16: ...n the cover lid assembly To place the control panel in the service position Disconnect power Remove the four in hex head screws from the rear of the control panel Gently pull out each top rear corner to unsnap the control panel from the sides of the unit 1 2 3 Unsnap Control Board Assembly The control board assembly is mounted on the inside of the control panel It is inserted in 3 panel slots and ...

Page 17: ... J14 When the control receives power it checks for the presence of the model selector plug If no plug is detected all LEDs will flash Pressing the start button has no effect on control operation All LEDs will stop flashing once a plug is installed Note The model selector plug must be transferred when control board is replaced Main Control Board Rear View Main Control Board Front View Main Selector R...

Page 18: ... Press the plastic locking tab rotate the switch counterclockwise and pull the switch out of the control panel 5 To remove the water level switch Disconnect power Note The water level switch knob is mounted to the backsplash not the switch Remove the water level switch knob by gently pulling it outward Place the control panel in the service position See Control Panel 1 2 3 Minimum Fill Level Note ...

Page 19: ... is difficult to remove Remove the fill funnel hose Squeeze the clamp and slide it back Carefully break the hose loose by inserting a small flat blade screwdriver under the hose to break the seal 1 2 3 4 5 6 Disconnect Fill Funnel Hose Remove the two in hex head screws that hold the valve to the cabinet 7 AC Line Filter The potential exists for the washer to cause electronic devices in the vicinity t...

Page 20: ...zed When the lid switch closes while still in agitation the washer will resume agitation Opens during the execution of the mode shifter agitate program the control will stop the agitate program and drop the mode shifter voltage to 0 VDC When the lid switch is closed again the control will run the mode shifter spin program and then re run the agitate program from the beginning Opens during the mode...

Page 21: ...lifting up the front edge to release the side catches Slide the top cover to the left to release from the 3 tabs 4 Front Panel The front panel is a removable galvanized sheet metal section The front panel is fastened at the top by 2 metal spring clips and at the bottom by 2 metal tabs which protrude from the base of the unit into slots in the panel bottom Most major mechanical components can be ac...

Page 22: ...e decreases The thermistor is located in the outlet of the fill funnel and will measure 50K Ω at room temperature 77 F 25 C If the thermistor reads outside the expected range 10K 120K Ω the main control will default to the following pre programmed fill temperature settings Tap Cold cold water valve only Cold cold water valve only Cool hot and cold water valves Colors hot and cold water valves Warm h...

Page 23: ...in hex head screws 1 2 3 4 5 6 7 Sump Hose Drain Pump Pump Wires Belt Install Tool Kit To replace the drive belt using the tool kit Note If not using the belt install tool follow steps 1 through 3 and 6 through 7 Remove wire tie after step 7 Disconnect power Remove the front panel See Front Panel Center belt on drive pulley and secure tightly with wire tie as shown on following page Align wire tie...

Page 24: ...maller than the drive pulley A belt that has been installed on the drive pulley will stretch to the diameter of the pulley over time This is normal and does not indicate a bad belt New Belt on Pulley Wire Tie https appliancetechmanuals com ...

Page 25: ...er count down on the display and drain If during an agitation cycle water leaks from the tub and resets the pressure switch the main control stops the motor the inverter goes through the mode shifter spin program to de energize the cam and the washer starts to refill with water The motor will not run again until the pressure switch is satisfied at which time the inverter control will run the mode sh...

Page 26: ...to residue on the belt or pulleys Suspension The tub and motor assembly spin basket outer tub inverter motor shaft and mode shifter assembly and platform is suspended by four rod and spring assemblies The rod and spring assemblies are attached to each corner of the cabinet They extend down and connect to the platform This arrangement provides limited movement to the tub and motor assembly independ...

Page 27: ... Note The motor can be replaced without removing the tub See Inverter Motor The tub assembly must be removed when replacing the spin basket outer tub or certain speed drive components To remove the tub assembly Disconnect power Lower the drain hose into a small bucket to remove any water remaining in the tub Remove the front panel See Front Panel Remove the cover lid assembly See Cover Lid Assembl...

Page 28: ... the nut sufficiently Continued next page Remove the water pressure switch hose from the outer tub Pinch off the black sump hose to prevent water spills Loosen the 5 16 in screw type hose clamp and remove the sump hose at the tub 12 13 14 Disconnect Platform Ground Wire WARNING Exposed terminals inverter board and rotating parts may cause injury and or electrical shock To reduce the risk of electri...

Page 29: ...sing the tub and removing the spring assemblies from the platform 15 Remove the tub assembly from the cabinet and place it on a protected surface 18 Rod and Spring Assembly Shaft and Mode Shifter Assembly The shaft and mode shifter assembly consists of the shaft and tube mode shifter cam and mode shifter coil These parts come only as an assembly WARNING Do not attempt to disassemble the shaft and ...

Page 30: ... the mode shifter coil wire harness retainer to the front of the platform 4 5 Center Core of Pulley Note When replacing pulley tighten pulley nut to 275 in lbs of torque Note In the following step after removing the pulley nut it may be helpful to grab the center core of the drive pulley with one hand and gently tap one of the drive pulley arms with a hammer The drive pulley will pop off the taper...

Page 31: ...om of the platform 8 Remove the four in hex head bolts that attach the platform to the tub 9 Place the platform upright on a protected surface and remove the tub bearing washer from the tube 11 Tub Bearing Washer Lift the platform from the tub 10 https appliancetechmanuals com ...

Page 32: ...om the platform 13 Shaft and Mode Shifter Assembly Remove the inverted single 3 8 in hex head bolt from the top of the platform Note Torque the four 3 8 in hex head bolts to 90 in lbs when reinstalling 12 Inverted Bolt https appliancetechmanuals com ...

Page 33: ... 62 57 HEAVY 41 54 47 56 69 62 MED 38 51 44 53 66 59 LIGHT 35 48 41 50 63 56 HEAVY 38 51 44 53 66 59 MED 35 48 41 50 63 56 LIGHT 32 45 38 47 60 53 MED 38 51 44 53 66 59 LIGHT 35 48 41 50 63 56 32 45 38 47 60 53 25 36 28 40 51 43 16 29 22 31 44 37 DRAIN SPIN HANDWASH DELICATES SPEEDWASH QUICK RINSE PREWASH COTTONS CASUALS EASY CARE CYCLE TIME WITH OPTIONS CYCLE TIME 6 6 6 6 12 12 https appliancetec...

Page 34: ...ime The washer power does not have to be cycled before entering service mode The starting position of the Cycle Selector Knob will not affect entrance into the field service mode Immediately following the release of the START PAUSE button all LED s will activate This is Knob Position 0 Initial on the field service mode chart Rotating the Cycle Selector Knob clockwise will result in the washer perfor...

Page 35: ...e chart below indicates only those areas of the chart that will be displayed for Profile models The display column refers to the 2 digit display 88 The Soak Wash and Rinse columns refer to the 3 LEDs to the right of the 2 digit display The 1 in each column indicates what LED may be lit Soak Wash or Rinse The 2 in the Rinse column indicates the Rinse LED will be lit while the knob is in position 4 1...

Page 36: ...ash LED On No Pump Error If the pump detection circuit indicates no water is being pumped while the pump is energized and the pressure switch is open water in tub the no pump error will be recorded The control uses current amplitude of the drain pump motor to determine whether water is being pumped Position 3 Soak LED On Push Button Error If any button is closed for 1 minute or longer the push but...

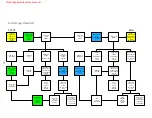
Page 37: ...econds for a specified number of times during a 6 second period The 6 second cycle repeats continuously Inverter Motor Signal LED Inverter Motor Error Codes LED On FIELD SERVICE MODE ROTATE THE CYCLE SELECTOR KNOB TO A LOCATION WHERE ALL LEDs ARE LIT 88 PRESS THE START PAUSE BUTTON ONCE IDLE 30 MINUTE TIMEOUT FROM START OF SERVICE MODE LOSS OF POWER TO CONTROL ROTATE THE CYCLE SELECTOR KNOB TO ANY ...

Page 38: ... a lid error is detected by the lid switch counter 4 agitate spin pairs with no change in state of lid switch the LED blinks 7 times at a rate of second on and second off for the remainder of a 6 second period When an over temperature condition is detected in motor the LED blinks 8 times at a rate of second on and second off for the remainder of a 6 second period The motor continues to operate at ...

Page 39: ... specified pins main control is OK If motor runs in spin test inverter motor and wiring harness are OK 135 VDC is present for approximately 15 seconds at the beginning of the agitate program 30 VDC is present during the remainder of the agitate cycle Note All electrical testing is done at harness plugs Note The mode shift coil connects to C7 connector on inverter motor assembly Unplug C7 connector ...

Page 40: ...coasts to stop brake resistor has failed and inverter motor assembly must be replaced If the tub takes longer than 25 seconds to stop the inverter will initiate a brake resistor error code See Inverter Motor Error Codes Brake Test The brake resistor is permanently molded into the underside of the inverter cover https appliancetechmanuals com ...

Page 41: ... Label all wires prior to disconnection Wiring errors can cause improper and dangerous operation Verify operation after servicing Schematic Note For suspected control problems first disconnect and re connect all circuit board connectors https appliancetechmanuals com ...

Page 42: ...esponsible for any labor or related service costs original purchase Lifetime of Product The washer basket if it should fail due to a defect in materials or workmanship During this From the date of the product lifetime limited warranty you will be responsible for any labor or related service costs original purchase Service trips to your home to teach you how to use the product Improper installation...

Reviews: