DuraStation™ EV Charger User Manual
13
GE Industrial Solutions
©2014 GE Company All Rights Reserved
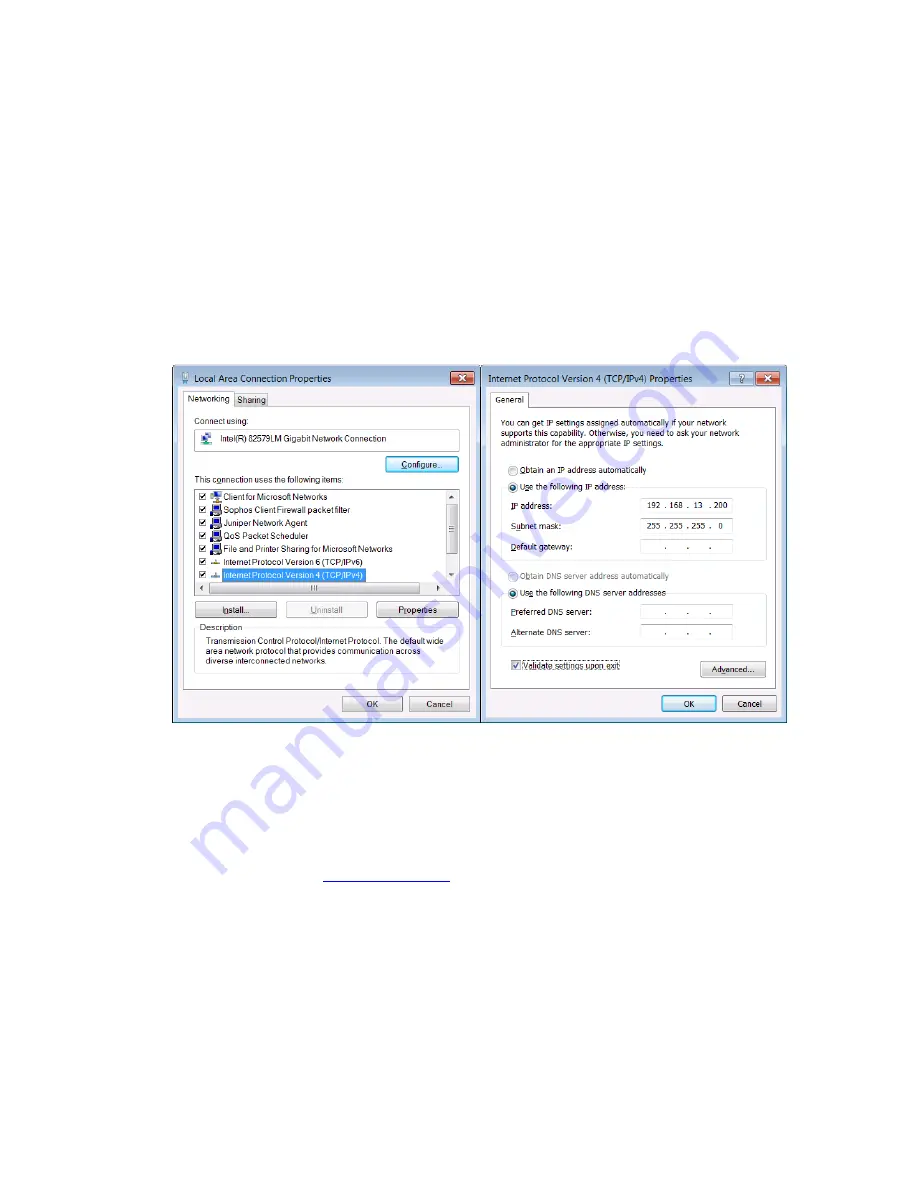
If the DuraStation is not connected to a network with a DHCP server then it will default to an IP
address of 192.168.13.1. Before connecting to the tool, ensure your computer has an IP address
on the same subnet as the DuraStation. The method to do this varies by operating system. Pull
up a menu that lets you modify the Local Area Connection properties (see below). On Windows
machines this is done through the Control Panel, then selecting Network, then selecting Adapter
settings. Then right click on Local Area Connection and select Properties.
The next step is to select IPv4 and click properties (on some older operating systems that don’t
support IPv6 this might just be TCP/IP settings or something similar). Uncheck “Obtain an IP
address automatically” and instead assign a static IP address on the same subnet as the
DuraStation and subnet mask as shown below.
Figure – 4.1
Figure – 4.2
After saving settings reboot the computer or otherwise verify that its IP settings have changed.
Connect the computer’s Ethernet port to the DuraStation’s single-board computer RJ45
connector with a CAT5 cable. Connection to the configuration tool can now be made by typing
the following into the browser’s URL window.
Type into URL window:
https://192.168.13.1
The web browser will likely respond with a screen questioning the security of the DuraStation’s
https server. This is fine and to be expected (see Section 4.2.2 – Accepting Connection to the
Configuration Tool).


