16
M1110150 006
© 2007 by General Electric Company. All rights reserved.
Chapter 5: Replacement/Checkout Procedures
Accessing/Replacing Other Internal Components
Figure
Procedure
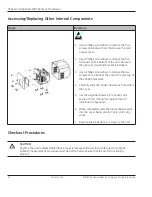
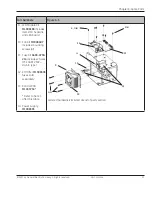
1. Use a Phillips screwdriver to remove the four
screws and lockwashers that secure the rear
access cover.
2.
Use a Phillips screwdriver to remove the five
foot pads on the bottom of the unit. Remove
the optional mounting bracket if installed.
3. Use a Phillips screwdriver to remove the two
screws on the back of the unit at the very top of
the sheet metal plate.
4. Carefully slide the inside chassis out from within
the cover.
5. Use the exploded views in the Spare Parts
section of this manual for replacement of
individual components.
6. When completed, slide the inside chassis back
into the cover being careful not to pinch any
wires.
7. Reverse the steps above to close up the unit.
Checkout Procedures
CAUTION
Anytime the unit is disassembled (back cover is removed) the electrical safety tests and light
intensity measurement procedure must be performed to assure that the unit is functioning
properly.

