


www.gateway.com
17
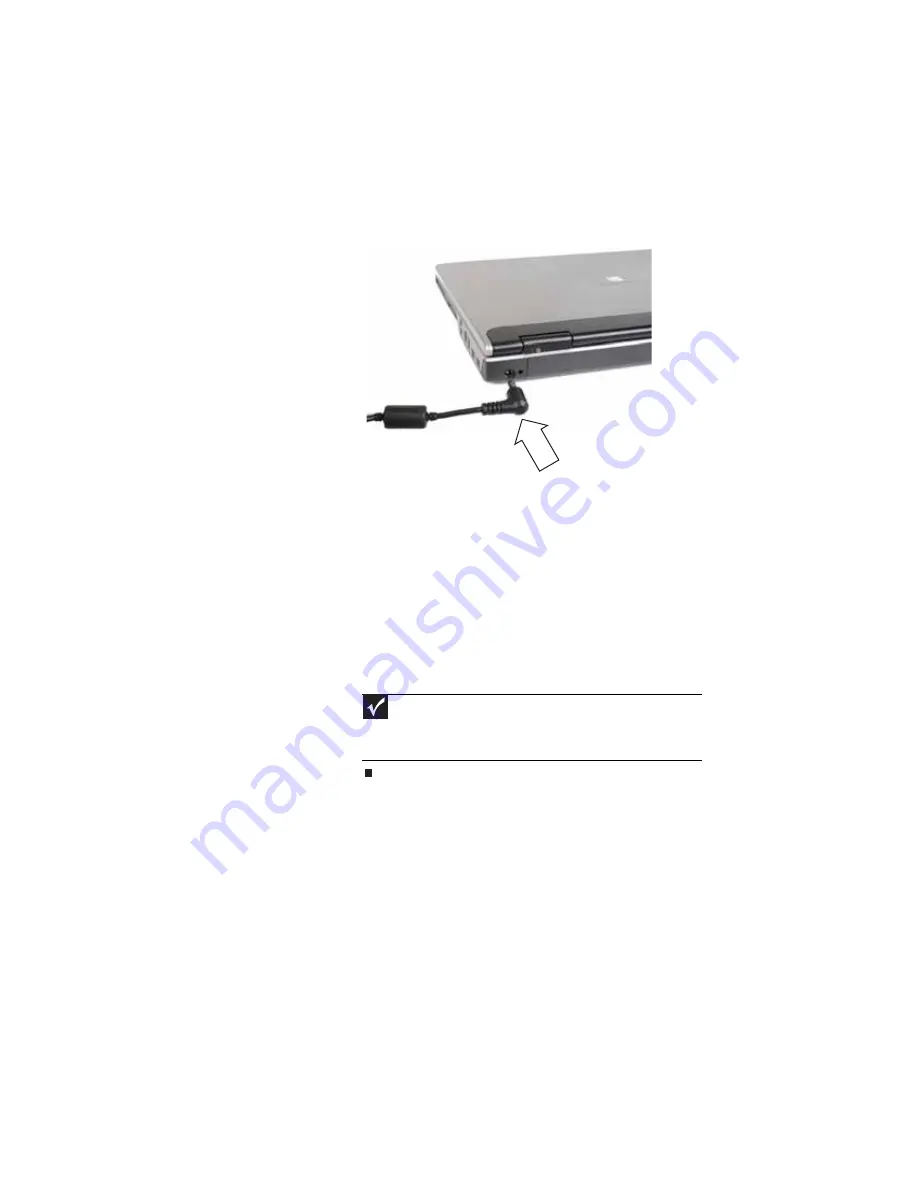
2
Connect the AC adapter to your notebook’s power
connector.
3
Plug the power cord into a wall outlet. The battery
charge indicator turns on (see
for the
location of the battery charge indicator). If the battery
charge indicator does not turn on, complete the
following steps until it turns on:
a
Unplug the adapter from your notebook, then plug
it back in.
b
Press
F
N
+
F1
to toggle the status lights on and off.
4
When you finish using your notebook for the first time,
turn off your notebook and leave your notebook
connected to AC power until the battery charge
indicator turns blue.
Important
If the battery charge indicator does not turn blue after three
hours, contact Gateway Customer Care at the location shown on the
Customer Care label. For more information, see
.
Summary of Contents for 200E
Page 1: ...NOTEBOOK REFERENCEGUIDE...
Page 2: ......
Page 7: ...www gateway com v Appendix A Legal Information 133 Index 143...
Page 8: ...Contents vi...
Page 13: ...CHAPTER2 5 Checking Out Your Notebook Front Left Right Back Bottom Keyboard area...
Page 64: ...CHAPTER 4 Using Drives and Accessories 56...
Page 110: ...CHAPTER 8 Upgrading Your Notebook 102...
Page 111: ...CHAPTER9 103 Troubleshooting Safety guidelines First steps Troubleshooting Telephone support...
Page 140: ...CHAPTER 9 Troubleshooting 132...
Page 161: ...153 www gateway com troubleshooting 123 working safely 14...
Page 162: ...154 Index...
Page 163: ......
Page 164: ...MAN MYSTIQUE REF GDE V R1 4 07...


