


Electrical Control System
Dimple Grinder User’s Guide
29
6.0 Electrical Control System
The Dimple Grinder is powered by a 24 Vdc desktop power module that oper-
ates on input voltages ranging from 90 to 260 VAC at frequencies of 50 or 60
Hz. It is also current limited at 1.25 A, so there is no need for a fuse in the sys-
tem.
A molded power cord is supplied with the unit to fit the local standard power
socket. If the power cord supplied is not compatible with local standards, the
plug should be replaced with a suitable one. Before connecting the new plug,
make sure the voltage requirement conforms to that specified on the label on the
rear panel of the unit. The wiring color codes should conform as shown:
Live
Black or
Brown
Neutral
White
or
Blue
Ground
Green or Green/Yellow
To access the baseplate and PCB
1. Unplug the DC plug from the rear of the Dimple Grinder.
2. Remove the single flathead socket screw on the base.
Raise the Platform to its vertical position to expose the flathead socket
screw. Use the 3/32 hex wrench to remove this screw.
3. Expose the PC board.
Pull off the
S
PEED
control knob and lift off the Control Panel to expose the
PC board.
4. Remove the two mounting screws in the electrical connector at the back
of the PC board.
5. The upper casing of the Dimple Grinder will now lift completely off.
The main PC board is fixed to the Dimple Grinder baseplate and contains the
transmission illuminator, the motor speed control, 1.5V supply, and the Auto-
Terminator circuit. When AUTO (S4) is depressed, capacitor C2 charges pull-
ing in the relay K1 closing contacts K1-1. These contacts apply holding
(latching) power to K1 (via dropping resistor R6) and also the motor power to
switches S1 and S2. As the specimen reaches the grinding limit, the stylus S6
goes to ground, shorting out the holding power for K1 causing it to drop out
thus removing power from the motors. To reset the relay the capacitor C2 must
be discharged by pressing the AUTO switch to the UP position.
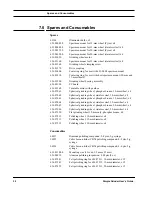
Summary of Contents for 656
Page 2: ...Part Number 656 82002...
Page 6: ...iv Dimple Grinder User s Guide...
Page 10: ...viii Dimple Grinder User s Guide...
Page 42: ...Spares and Consumables 32 Dimple Grinder User s Guide...
Page 44: ...I 2 Dimple Grinder User s Guide...
Page 48: ......