Initial Start-up and Operation
Remove all remaining packaging and check your InductWarm
®
200 device for external damage. Do not start up
the device, if there are any signs of damage. The rotary switch must be readily accessible. Do not cover the air
inlet area on the front of the device. The air inlet temperature must be lower than 40°C. There must be a gap of at
least 5 cm between the rear of the device (air outlet area) and the wall or the closest object.
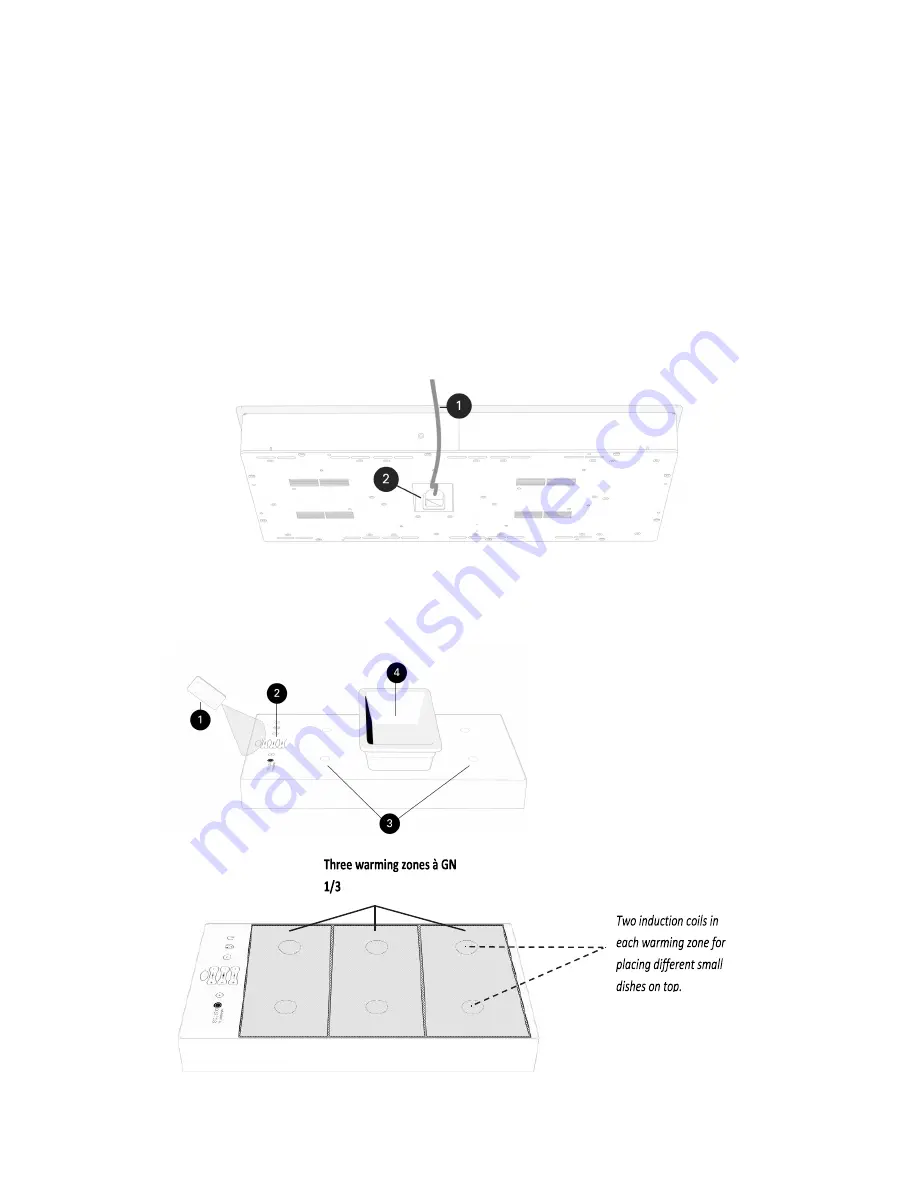
The power socket (2) can be found at the bottom side of the device. Just plug the provided power cable (1) into
the socket. Make sure that your electric circuit provides an electric fuse protection of at least 12 A. The
InductWarm
®
200 can be switched on with the on / off button on the top of the device or on the supplied infrared
remote control. The device is turned on, when the red LED of the on / off button is shining and the LEDs of the
warming zones on the panel are shining as well. If all of these requirements have been met, press the desired
button on the touch-panel or remote control and the warming device will carry out the function requested. You
will hear a sound indicating the successful turning-on of the device.
The warming zones (3) can be controlled via the remote control (1) or the integrated touch-panel (2). These
warming zones use induction to keep warm any induction-capable pot (4). There are three warming zones (3),
each with two marking circles to indicate the center of the underlying induction coils.


