Gasmate Ignite BQIG10 Manual Download Page 2

2

3

Gas Installation Codes

• Barbecues must be used in accordance with the


installation requirements of your gas supply  
authority, or the Australian Standard AS 5601.

• Barbecues for use with bottled gas are labelled 


‘Propane’ or ‘ULPG’ gas.

• Barbecues for use with natural gas are labelled 


‘natural gas’ and must be installed by an  

authorised person. Check the gas type sticker 


attached to the barbecue. 

• For converting a Propane appliance to Natural 

Gas information for your plumber has been 
included at the back of this booklet.

Clearances

Minimum Clearances from combustible materials 

must be: 

Above - 500mm  Sides - 150mm  Below - 200mm

Hose & Regulator Safety

The regulator and hose assembly supplied with 
the barbecue are suitable for propane gas only. A 

gas regulator adjusted to have an outlet pressure 

of 2.75kPA is supplied for connection to the 
propane gas cylinder. The pressure regulator and 
hose assembly supplied with the barbecue must 
be used. Replacement pressure regulators and 

hose assemblies must be those specified by the 

barbecue manufacturer. 
When connecting the hose and regulator assembly 

to the gas cylinder, take care to avoid unnecessary 
twisting or kinking of the flexible hose.

After the assembly has been secured, turn on the 
gas and check for leaks by brushing a soap and 

water solution over all connections.

If you are unable to correct the leak by tightening 
the connections, turn off the gas and contact the 
supplier immediately.
Always ensure the barbecue is kept away from 

flammable materials and the gas cylinder clear 
of any heat source. When changing over from 

an empty gas cylinder to a full one make sure 

this procedure is carried out in a flame free 

atmosphere.

Specifications

Barbecue specifications can be found on the 


data label attached to the door panel or the 
barbecue body. Hose connection thread at gas 

inlet is 1/4” - BSP.

Gas Cylinder Use & Safety

This is a low pressure barbecue and must only be 
used with the hose and regulator supplied. Your 
barbecue is designed for use with 9Kg propane 

gas cylinders certified to AS 2469.

GENERAL INFORMATION

For any queries or assistance call

Customer Service

Australia Only

1300 174 876

Hours of operation: 

Monday to Friday 8.30am - 5.30pm EST

Do not return to place of purchase.

Keep your purchase receipt, this will be 

required to make any claims under the 12 

month warranty.

Section

Page

General information

2

General assembly

4

Exploded diagram

5

Parts list

6

Assembly instructions

7-10

Operating procedure

11

Lighting instructions

12

Care and maintenance

13

Checking for leaks

14

Natural gas conversion

15

Safe appliance locations

16

CONTENTS

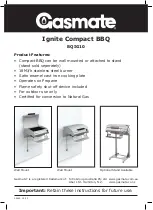
Summary of Contents for Ignite BQIG10

Page 1: ...Z www gasmate co nz Ignite Compact BBQ BQIG10 Product Features Compact BBQ can be wall mounted or attached to stand stand sold seperately 18MJ h stainless steel burner Satin enamel cast iron cooking plate Operates on Propane Flame safety shut off device included For outdoor use only Certified for conversion to Natural Gas Wall Mount Wall Mount Optional Stand Available ...

Page 2: ...has been secured turn on the gas and check for leaks by brushing a soap and water solution over all connections If you are unable to correct the leak by tightening the connections turn off the gas and contact the supplier immediately Always ensure the barbecue is kept away from flammable materials and the gas cylinder clear of any heat source When changing over from an empty gas cylinder to a full...

Page 3: ...onnect an unregulated gas cylinder to your barbecue Read carefully before assembling and operating your barbecue Location of your Barbecue DO NOT use your barbecue in garages porches sheds breezeways or other enclosed areas Your barbecue is to be used OUTDOORS The barbecue should not be placed under any surface that will burn Do not obstruct the flow of combustion and ventilation air around the ba...

Page 4: ...hen the barbecue is not in use the gas must be turned off at the cylinder Important The appliance control knob must be in the OFF position before opening the cylinder valve Check performance of burner prior to installing barbecue plates Do not smoke when attempting to ignite the barbecue Never use volcanic rock heatbeads or other material Always use protective gloves when handling hot components N...

Page 5: ...5 EXPLODED DIAGRAM ...

Page 6: ...ner Assembly 1 pc 22 Hot Plate 1 pc 27 Big Washer Outer Diameter 38mm 2 pc 3 M6 Special Screw 2 pcs 8 Washer 2 pcs 13 Thermocouple 1 pc 18 Ignitor Needle 1 pc 23 Manifold 1 pc 28 Hose Regulator 1 pc 4 M6 Special Nut 2 pcs 9 Firebox Assembly 1 pc 14 Tilt Switch 1 pc 19 Fat Catcher 1 pc 24 Orifice Assembly 1 pc 5 M6 Shoulder Screw 6 pcs 10 Latch Stopper 2 pcs 15 Control Knob 1 pc 20 Wall Bracket 1 p...

Page 7: ...nt to position the BBQ whilst you fix it to the wall bracket 880mm STEP 1 Unpack the BBQ and remove all packaging material For wall mounting use the bracket as a template to mark where holes will be made on the wall The top of the bracket must be 880mm from the floor see pic When the BBQ is folded this will allow for the clearance of a 9kg gas bottle and give a cooking surface height of 900mm For ...

Page 8: ...cent slot in the wall bracket through the Large washer Item 27 then into the lowest hole in the BBQ side panel Repeat on the opposite side ensuring to catch the large washer between the BBQ and the wall bracket Once there is a screw inserted in each side the BBQ can swivel on these first 2 screws and it will be easier to get the last 2 screws in Have your assistant Lift the front of the BBQ upward...

Page 9: ...h the hotplate backwards then lower the front edge into the front tabs and pull the hotplate forward into position The BBQ is now in its position for use STEP 5 To fold the BBQ down first fold up the tray shelf onto the hotplate and then fold down the hood so that the handle locks into the tray shelf ...

Page 10: ...push slightly backward and downward until the BBQ folds away To fit the Ignite BBQ Vinyl cover slip over the top of the folded BBQ and then secure with the Velcro at the bottom of the BBQ keeping the fabric on the top of the BBQ taut so the water will run off without pooling STEP 7 Use retention cord to anchor cylinder to BBQ ...

Page 11: ...d the cooking temperature Food that requires a low cooking temperature needs only a period of 2 3 minutes preheating Cooking Temperatures The temperatures will vary with outside temperatures and prevailing winds In windy conditions cook with the hood down NOTE that with the Hood down the LOW setting must be used LOW setting Use this setting when roasting meats for longer periods of time MEDIUM set...

Page 12: ...ain from the start Allow 30 seconds between ignition attempts for gas to dissapate Several attempts may be necessary Step 4 With the burner alight keep control knob depressed for 15 seconds Step 5 For minimum heat turn the control knob to LOW Step 6 To turn BBQ off turn the control knob to OFF Nominal Hourly Gas Consumption Gas Type Number of BBQ Burners Injector Size BBQ Burner Total Gas Consumpt...

Page 13: ...that you wash the grill plate in a mild soap and warm water solution You can use a wash cloth to clean your barbecue plate Care of Cooking Surface Use and care of the easy clean cooking surface is important Do not use metal utensils or cut food on the cooking surface Use only plastic cooking utensils Do not use pans on the cooking surface Do not overheat the cooking surface with the hood down or w...

Page 14: ...hing sound turn the LP gas cylinder valve OFF or CLOSED immediately There is a leak at a connection Tighten the fitting Turn the LP gas cylinder valve to ON or OPEN 7 Brush the soap solution over each connection point 8 If using a connection hose and regulator brush the whole fuel hose and look for cracks or frays 9 If using an LP gas cylinder brush the soapy water on the welds around the LP gas t...

Page 15: ... codes regarding sizing of the gas lines 3 All gas pipe connections must be sealed with a gas pipe compound resistant to Natural Gas 4 Installation of a drip leg if required in the gas supply line must conform to AS5601 5 When checking for gas leaks do not use an open flame Use a soap and water solution and check for bubbles indicating gas leakage 6 Installation of 1 8 NPT pluggedtapping accessibl...

Page 16: ...artial enclosure that includes an overhead cover and no more than two walls see Example 2 3 Within a partial enclosure that includes an overhead cover and more than two walls the following will apply at least 25 of the total wall area is completely open and at least 30 of the remaining wall area is open and unrestricted see Example 4 5 In the case of balconies at least 20 of the total wall area sh...

Reviews: