background image

Reference

49

Finding an Address

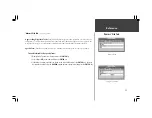
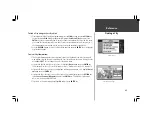
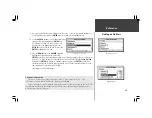
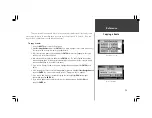
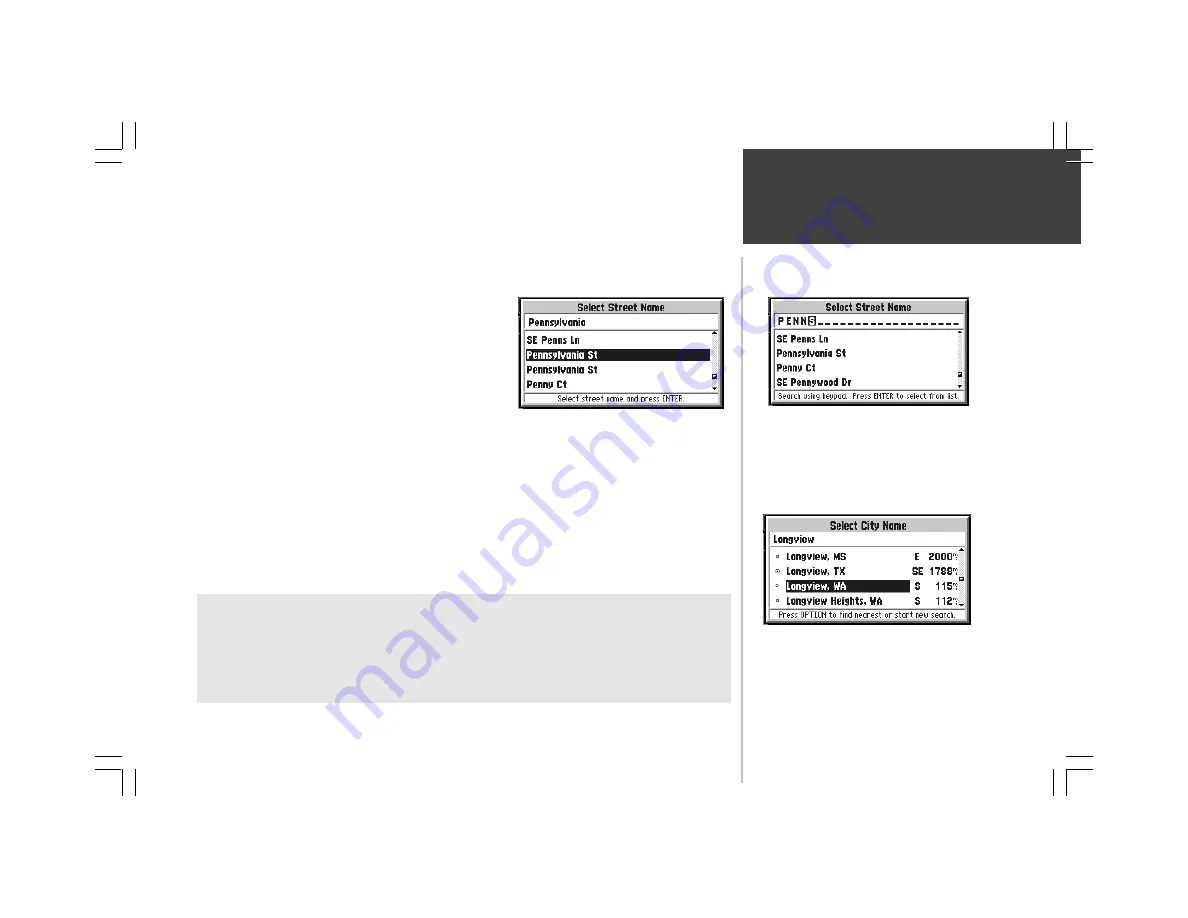
9. Once you see the Street you are looking for on the screen, or can see that you are getting close

to it (top right picture), press the 

ENTER 

key to move down to the alphabetical list.

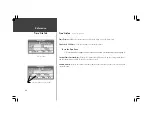
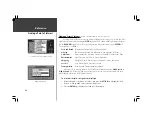
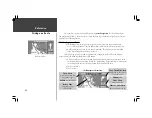
          10. Use the 

ROCKER 

keypad to select the desired Street

(picture to the right) and press the  

ENTER 

key.

If you decide the Street you are looking for is in
another area of the alphabetical list, press the

OPTION 

key, select ‘Start New Search’, press the

ENTER 

key and go back to step 7.

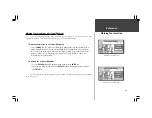
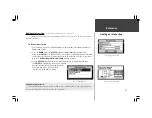
    11. Press the 

DOWN 

area of the 

ROCKER 

keypad to

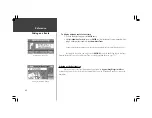
highlight the City and if necessary, press the

ENTER 

key to edit it.  If a City name was filled in, the StreetPilot gives you the choice to enter a

new City, or to leave it blank.  If you would like it to search all Cities, highlight 

Leave it Blank

and press the 

ENTER 

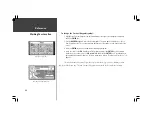
key. Otherwise, highlight Change City, press the 

ENTER 

key, and use a

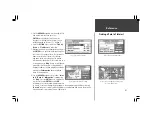
similar procedure used to find the Street to find the correct City (bottom right picture). Use the
same procedure to enter the postal code (Zip).

(Continued on the following page.)

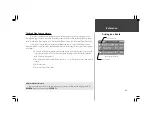
Selecting the Desired Street

Identifying the Street

Additional Information

      Streets are searched according to their “base names”. For example, ‘Hwy 10’, ‘I-10’,
‘SW 10th St’, and ‘Co Rd 10’ would all be found by entering 

10

.

Step 11 is optional. It may be useful in reducing the number of addresses found by the search. The

location shown on the map for an address may differ from the actual location, particularly in areas
where spacing of streets is irregular.

Highlighting a City

Summary of Contents for StreetPilot GPS StreetPilot GPS

Page 1: ...owner s manual and reference guide StreetPilot TM GPS...

Page 2: ...for personal use provided that such electronic or printed copy of this manual contains the complete text of this copyright notice and provided further that any unauthorized commercial distribution of...

Page 3: ...to read through this owner s manual in order to understand the operating features of the StreetPilot This manual is organized into four sections for your convenience The Introduction section provides...

Page 4: ...rs are likely to impact it in an accident or collision The mounting hardware provided by GARMIN is not warranted against collision damage or the consequences thereof WARNING When used in vehicles it i...

Page 5: ...Y USING THE STREETPILOT YOU AGREE TO BE BOUND BY THE TERMS AND CONDI TIONS OF THE FOLLOWING SOFTWARE LICENSE AGREEMENT PLEASE READ THIS AGREE MENT CAREFULLY GARMIN Corporation GARMIN grants you a limi...

Page 6: ...cating the receiving antenna Consult an authorized dealer or other qualified service technician for additional help if these remedies do not correct the problem Operation is subject to the following c...

Page 7: ...YOU SPECIFIC LEGAL RIGHTS WHICH MAY VARY FROM STATE TO STATE IN NO EVENT SHALL GARMIN BE LIABLE FOR ANY INCIDENTAL SPECIAL INDIRECT OR CONSEQUENTIAL DAMAGES WHETHER RESULTING FROM THE USE MISUSE OR I...

Page 8: ...to 52 Section Three REFERENCE The Map Page 15 Zooming 16 Driving Status 17 Navigation Information 17 Map Panning 18 Personal Waypoints 19 Goto a Waypoint 20 Map Page Options 21 Customizing the Map 22...

Page 9: ...12 Change the Map Page display 20 Create and use a route 54 Find an address or intersection 48 51 Find nearest cities or waypoints 14 41 44 InitializetheGPSreceiver firsttimeuse 6 Install batteries 1...

Page 10: ...it LCD Display 16 Color DSTN LCD with Backlighting Map Page shown Compartment Door Insert AA Batteries and optional Map Data Cards here Antenna Rotate upright for best satellite reception Keypad Refer...

Page 11: ...data from a MapSource CD ROM plug a blank card into the slot next to the battery compartment with the label facing toward the front of the StreetPilot picture at right 4 Close the battery compartment...

Page 12: ...ata Also controls movement of cursor on the Map Page The Zoom OUT Key Adjusts the map scale to show a larger area with less detail The Zoom IN Key Adjusts the map scale to show a smaller area with mor...

Page 13: ...ht picture 3 If there is an optional Map Data Card installed in the StreetPilot a page showing the mapping region and the effective date is displayed on the screen bottom right picture Press the ENTER...

Page 14: ...lighting conditions Moving the control to the left causes the screen to appear more faint while moving the control to the right causes all areas of the screen including pixels that are intended to be...

Page 15: ...onents General instructions are included here for your convenience To install the cigarette lighter adapter locate the connector on the rear of the StreetPilot unit behind the rubber weather cap The c...

Page 16: ...movement At times additional satellites may be needed to determine your location Your GPS receiver can only receive signals from satellites which are above the horizon so it needs to know what satell...

Page 17: ...and 3 If you chose Set New Location a new box appears asking what method you would like to use for aiding the StreetPilot in determining your location 4 If you know the general area of the continent w...

Page 18: ...he OPTION key twice The StreetPilot displays the System Setup menu The General file tab should be displayed and the cursor should be on the Simulator field If not use the ROCKER keypad to select the S...

Page 19: ...PAGE or QUIT key to switch back and forth between the two main pages If the StreetPilot is navigating to a destination there is a third page called the Road Sign Page The diagram below shows the rela...

Page 20: ...take time to experiment with the Zoom IN and OUT keys Notice that the further you zoom in the more map features that are shown to the point where every street in the memory is displayed If you zoom o...

Page 21: ...e viewing As an example reset the Trip Computer as you would at the beginning of a trip using the StreetPilot To reset the Trip Computer 1 With the Trip Computer view of the Dashboard Page on the scre...

Page 22: ...page use the UP area of the ROCKER keypad to highlight a file tab 3 Use the LEFT or RIGHT area of the ROCKER keypad to select the Time file tab 4 Use the DOWN area of the ROCKER keypad to highlight t...

Page 23: ...and numbers to get the one you are looking for 4 Press the RIGHT area of the keypad to move on to the next digit or press the LEFT area of the keypad to move back to the left and change a digit that y...

Page 24: ...s ENTER A list of the 25 nearest cities is displayed on the screen including the direction and approximate distance Keep in mind that the specified cities shown will vary depending on your actual loca...

Page 25: ...set to North Up orientation north is always at the top and the pointer turns different directions as you drive When using the Track up option the map automatically rotates as you make turns keeping t...

Page 26: ...the left the map scale is 1 4 mile between the two tick marks If the map page is displaying MetroGuide information from the Map Data Card the word metroguide is inserted below the map scale as shown...

Page 27: ...is not navigating to a destination the Navigation Information area displays a compass indicating your direction of travel at the top your speed and the current time of day Note The driving direction s...

Page 28: ...ress ENTER to remove the panning arrow The arrow serves as a target marker for the map When placed on a map feature the name of the feature will be highlighted This applies to Personal Waypoints roads...

Page 29: ...as a city or road the name of that feature is displayed with a box around it top right picture 2 Press the ENTER key to create a Personal Waypoint where the panning arrow was located If a map object...

Page 30: ...are shown on the screen bottom left picture and are as follows Show Map Full Screen or Show Map and Nav Info To enable a larger map display select Show Map Full Screen which removes the Driving Statu...

Page 31: ...the desired reference point the point you want to measure from top right picture and press the ENTER key 4 Move the paning arrow to the second point to which you want to measure The direction and dis...

Page 32: ...non urban areas in order to see more information in urban areas you may want to decrease the map detail for increased map clarity Orientation Allows you to set the orientation of the map display You c...

Page 33: ...ge The unit stores the most recently recorded points To empty the memory select Clear and the Track Log will be turned On if it was previously turned Off Lat Lon When On the Map Page includes a displa...

Page 34: ...causes waypoint symbols to be displayed on the Map Page only when that scale or a smaller scale is selected You may also select Off if you do not want to display waypoints on any map scale 3 Press th...

Page 35: ...hat type will be included in the display if the map is at a scale setting where Points of Interest are displayed Vehicle File Tab lower right picture Vehicle icon Allows you to view your vehicle as an...

Page 36: ...page it usually will be displaying the Trip Computer top left picture To display the Satellite Status View of the Dashboard Page 1 While the StreetPilot is displaying the Trip Computer view of the Das...

Page 37: ...ul statistics about your trip The following are useful suggestions to aid in maximizing the use of the Trip Computer Be certain to reset the Trip Computer before beginning the trip Instruction on rese...

Page 38: ...g from an external power source a power plug symbol is shown Driving Avg Your average speed of travel during the time the vehicle has been in motion since the Trip Computer was last set Overall Avg Yo...

Page 39: ...N keys to highlight Reset Trip Computer 3 Press the ENTER key 4 To reset the Maximum Speed only highlight Reset Max Speed Only and then press the ENTER key Resetting the Max Speed Additional Informati...

Page 40: ...attery gauge is shown Satellites are indicated on the sky view by a satellite icon Satellites that have been acquired appear green those that are being acquired sending data to the StreetPilot appear...

Page 41: ...quickly if you set the approximate initial location To set the initial location 1 From the Satellite Status page press the OPTION key 2 Highlight Set Initial Location and press the ENTER key 3 Use th...

Page 42: ...or the desired function The associated information and options are automatically displayed when the file tab is highlighted 2 Once the desired file tab has been selected use the DOWN key to highlight...

Page 43: ...Only the settings for that file tab are modified 4 If desired repeat steps 1 through 3 for other file tabs The file tab headings and System Setup functions are General Simulator Night Mode Battery Typ...

Page 44: ...or Auto Auto mode activates the Night Mode feature between sunset and sunrise using the GPS clock for the current day of the year Battery Type Used to designate the type of batteries currently being u...

Page 45: ...message occurs when your estimated arrival time is within the alarm time entered Speed Alarm Provides an alarm message as a reminder when your speed exceeds a preset limit To enable disable the speed...

Page 46: ...To set the Time Zone 1 Follow instructions on page 12 and use the Universal Time Coordinate Offset Chart on page 72 Current Time Current Date Display the current time and date based on the settings m...

Page 47: ...t output of standard NMEA 0183 version 2 3 data None provides no interfacing capabilities DGPS RTCM NMEA allows Differential GPS DGPS input using a standard RTCM format and also provides NMEA 0183 ver...

Page 48: ...provided Frequency and bit rate will be automatically entered By selecting Other you can enter the beacon frequency and bit rate on the StreetPilot and the information will be used to tune the beacon...

Page 49: ...Waypoint in the upper left portion of the page The StreetPilot remembers the location from the instant at which you pressed the Menu key so you do not need to be concerned about moving around or losi...

Page 50: ...Press the ENTER key when you find the most appropriate symbol 4 Move the cursor to the OK field bottom left picture and press the ENTER key An alternate method is to move the cursor to the Go to it f...

Page 51: ...2 Use the ROCKER keypad to highlight Cities top right picture and press the ENTER key 3 If the Cities by Name list is on the screen press the OPTION key highlight Find Nearest and press the ENTER key...

Page 52: ...ttom left picture press the ENTER key to move down to the alphabetical list 5 Use the ROCKER keypad to select the desired item picture below and press the ENTER key to display the City Information pag...

Page 53: ...formation page bottom left picture shows the City name at the top of the page A map window showing the area surrounding the City is shown below the name You may use the zoom IN and OUT keys to change...

Page 54: ...a Personal Waypoint press the FIND key select Personal Waypoints from the Find List and then select the desired waypoint from the Waypoint List and press the ENTER key 3 Both Go to it and Point to it...

Page 55: ...ad to pan to an exit on a highway and when in proximity to the exit the icons for various services will highlight or move the map pointer to the general area of an exit then press the FIND key to disp...

Page 56: ...RV Parks Attractions Amusement Parks Museums Libraries Landmarks Schools Parks Zoos Entertainment Movie Theatres Live Theatre Bars Nightclubs Shopping Shopping Centers Grocery Stores Convenience Stor...

Page 57: ...Drink and name at the top of the page The window below may be changed to show the selection on a local map when the Map button is selected and pressed bottom left picture or toggled back to display t...

Page 58: ...necessary press the ENTER key to edit the Number 3 Use UP and DOWN areas of the ROCKER keypad to select the first digit of the desired Number 4 Press the RIGHT area of the ROCKER keypad to move to the...

Page 59: ...ives you the choice to enter a new City or to leave it blank If you would like it to search all Cities highlight Leave it Blank and press the ENTER key Otherwise highlight Change City press the ENTER...

Page 60: ...ne matching Address is found the results of the search areshown with the best matches at the top of the list top left picture 13 Use the ROCKER keypad to select the desired Address and press the ENTER...

Page 61: ...rsection is found the results of the search are shown with the best matches at the top of the list If there are no matches a No Matching Intersections Found message is shown 3 Use the ROCKER keypad to...

Page 62: ...the mode A bold line connects your current location and your destination Note that this line doesn t follow roads it is simply the shortest distance between the two points If the Map Page is set up to...

Page 63: ...l as the name of the destination and the address in some cases The Distance to Go The Arrival Time or Time to Go To change the time displayed on the Road Sign Page 1 With the Road Sign Page displayed...

Page 64: ...g arrow 3 Use the ROCKER keypad to point to the desired starting point for the route bottom left picture It is often desirable to highlight a map object for the route starting and ending points althou...

Page 65: ...mediate turns points on the route repeat step 5 as necessary Continued on page 56 Zoom out if necessary Note How Route Line follows HWY 101 Zoom Back in to point at ramp Point to road intersections Fi...

Page 66: ...te highlight Edit and press the ENTER key 11 To approve the route without using it for driving guidance highlight OK and press the ENTER key To edit an existing route 1 Press the ROUTE key to view the...

Page 67: ...with the route name bottom right picture 9 If you wish to change the name of the route highlight the name and press the ENTER key to edit When ready to use the route for driving guidance highlight Sta...

Page 68: ...ress the ENTER key You are now using the selected route For detailed information refer to Driving on a Route page 60 To stop route navigation 1 Press the ROUTE key to view the Route menu 2 Highlight S...

Page 69: ...ll appear on the screen asking you to Select Route Direction 4 Select the desired route direction and press the ENTER key The Route Copied box is shown with an assigned name for the new route basicall...

Page 70: ...g on how the route was built If the Map Page is set up to show Navigation Info as opposed to the Full Screen Map see picture below the following information is also shown A Direction to Go pointer the...

Page 71: ...ime to Go information to all of the turns along the route refer to the picture at the right A Direction to Turn pointer shows the direction to turn at the next waypoint based on the current leg of the...

Page 72: ...ange from bold to faint on the Road Sign Page Just as on a Direct Goto you can press the OPTION key on the Road Sign Page to alternate between display of Time to Go and Arrival Time or Stop Navigation...

Page 73: ...t Base Temporary Adhesive Disks 5 ea Part Number 291 00037 00 Data Transfer Cable Notshown Part Number 010 10142 00 PCInterfaceCablewithCigaretteLighterAdapter RS232SerialPort NotShown Part Number 010...

Page 74: ...hough 16 MB Data Cards allow you to download maps containing more data the maximum number of maps than can be used by the StreetPilot remains at 50 Many MapSource maps such as MetroGuides contain larg...

Page 75: ...eceiver Differential ready PhaseTrac12 Acquisition Time Approx 15 seconds warm start Approx 45 seconds cold start or user initialized Approx 5 minutes AutoLocate Update Rate Once per second continuous...

Page 76: ...range of some batteries Alkaline batteries can rupture at high temperatures 2 With optional GARMIN GBR 21 Beacon Receiver Input 3 Subject to accuracy degradation to 100m 2DRMS under the U S DOD impos...

Page 77: ...bles the unit to drive up to three NMEA devices NMEA 0183 version 2 0 Approved sentences GPGGA GPGLL GPGSA GPGSV GPRMB GPRMC GPRTE GPWPL GPBOD GARMIN proprietary sentences PGRME estimated error PGRMM...

Page 78: ...WARNING the terms of the GARMIN Warranty require that the Power Data Cable with bare wire leads be installed by experienced installers at a qualified installation facility i e electrical accessory ins...

Page 79: ...d submersion can cause damage to the unit After submersion be certain to remove the batteries and map cartridge and dry the compartments before reuse Trouble Shooting Guide Symptom Probable Cause Reme...

Page 80: ...d try again at a different location RAM Failed The unit has detected a failure in its internal memory If the message persists service is required Receiver Has Failed The unit has detected a failure Po...

Page 81: ...our average speed of travel including time stopped during the time the StreetPilot has been tracking your location since the Trip Computer was last reset Speed The current velocity at which you are tr...

Page 82: ...hange the UTC Universal Time Coordinate Offset if necessary press the OPTION key to access the Options Menu Then scroll down to the System Setup option press ENTER to access and then tab over to the T...

Page 83: ...43 Comm Port 37 Contrast Screen 4 Copying a Route 59 Current Time 17 36 D Dashboard Page 9 26 Dashboard Mounting 5 Data Entry 12 Date and Time Setup 12 36 Deleting a Route 58 Direct Goto Cancelling 20...

Page 84: ...71 Resetting 29 Measuring Distances 21 Messages 70 Mounting 5 O Odometer 27 71 On Off 3 OPTION Key 2 11 Optional Accessories 63 Orientation Map 22 OUT Key 2 16 Output Setup 37 Overall Average Speed 28...

Page 85: ...ting 56 List 58 59 Naming 56 Starting Navigation 58 Stopping Navigation 21 53 58 Standard Accessories 63 Starting Navigation 58 Street Names 49 Stopping Navigation 22 53 58 Stopped Time 28 71 Sunrise...

Page 86: ...76 Notes Use this space to record landmarks that you want to retain for future use but are deleting from the waypoint list contained in the StreetPilot to make space for new more active waypoints...

Page 87: ...previously registered your GARMIN product purchase using a mail in registration card we invite you to re register using our NEW on line system Many services provided by our new product registration s...

Page 88: ...nal 1200 E 151st Street Olathe KS 66062 U S A GARMIN Europe Ltd Unit 5 The Quadrangle Abbey Park Industrial Estate Romsey SO51 9AQ U K GARMIN Asia Corp No 68 Jangshu 2nd Road Shijr Taipei County Taiwa...

Reviews: