background image

11

Note: The default setting on the Geko 
301 has the Compass turned OFF.

Navigation Page

Options

Navigation Options

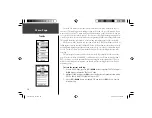
When you are not on an active GOTO, Track, or Route (not traveling to a recorded des-

tination), the status at the top of the page displays the status of the GPS Receiver and the ap-
proximate accuracy of our current position.  The Compass Ring displays your heading while 
you are moving, but the data fi eld at the bottom of the page will not display any destination 
related information, such as Estimated Time of Arrival.

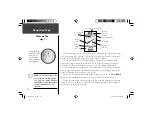
Turning the  Electronic Compass On and Off:

1.   Press and hold the 

PAGE

 Button to turn the Electronic Compass On or Off.

2.  When the Electronic Compass is on, hold the Geko 301 level to get an accurate Com-

pass reading.

To use  Sight ‘N Go to navigate:

1.   On the Navigation Page, with the compass turned on and ‘READY TO NAVIGATE’, press 

the

OK

 Button and select the option Sight ‘N Go by pressing the 

OK

 Button again. Note 

that the compass ring with the pointer is in-line with the two sighting marks on the 
case.

2.   Hold the Geko 301 eye-level and line up the two sighting marks with a distant object, 

press the 

OK

 Button and select ‘SET COURSE’ to lock the heading in place.  

3.   Begin traveling to your destination using the compass pointer as a guide.

4.   To view the Sight ‘N Go options, press the 

OK

 Button to ‘SET (New) COURSE’, ‘PROJECT 

(Waypoint)’, and ‘RE-SIGHT’.

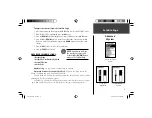
When using a Sight ‘N Go, the compass displays a broken course pointer.  What this 

means is as you are moving, if you were to stray left or right of your pre-set course, the 
middle section of the course pointer moves to the left or right of the center.  To get back on 
course, travel in the direction that moves the middle line back to the center and lines up 
proper with the pointer.  You want to keep the middle line in the center as best as possible 
when traveling. For an example, look at the picture in the right column.

This user is 107 ft off course to 
the right or east. To get back on 
course, the user needs to bear to 
their left or west.

190-00297-02_0A.indd   11

5/19/2003, 4:20:15 PM

Summary of Contents for Geko 301 - Hiking GPS Receiver

Page 1: ...owner s manual and reference guide Geko 301 Personal Navigator Geko 301 Cover indd 1 5 19 2003 4 21 53 PM ...

Page 2: ...tice Garmin reserves the right to change or improve its products and to make changes in the content without obligation to notify any person or organization of such changes or improvements Web Site address www garmin com Garmin TracBack Personal Navigator and MapSource are registered trademarks and Geko PanTrack Gekoids Geko Smak Nibbons and Virtua Maze are trademarks of Garmin Ltd or its subsidiar...

Page 3: ...igned to provide all that you need to know to operate your Geko 301 Let the adventure begin PRODUCT REGISTRATION Help us better support you by completing your on line registration today Connect to our Web Site www garmin com and look for the Product Registration link on the home page Your unit s serial number is in the battery compartment Thanks for choosing the Garmin Geko 301 If you have any que...

Page 4: ...anges 15 Options 16 View Points 16 Reset 16 Calibrate Altimeter 17 Data Fields 18 TRIP COMPUTER 19 20 Data Field Options 20 MENU PAGE 21 33 Menu Navigation 21 Waypoints 22 Mark Waypoint Page 22 Review Waypoint Page 24 Tracks 26 Routes 29 Games 32 SETUP PAGE 34 44 Time Page 34 Time Zone 34 Daylight Savings Time 35 Display 36 Light Timeout 36 Contrast 36 Units 37 Position Format 37 Map Datums 37 Uni...

Page 5: ... interference will not occur in a particular installation If this equipment does cause harmful interference to radio or television reception which can be determined by turning the equipment off and on the user is encouraged to try to correct the interference by one of the following measures Reorient or relocate the receiving antenna Increase the separation between the equipment and the receiver Co...

Page 6: ...oning System GPS is operated by the United States government which is solely responsible for its accuracy and maintenance The system is subject to changes which could affect the accuracy and performance of all GPS equipment Although the Garmin GPS receiver is a precision electronic NAVigation AID NAVAID any NAVAID can be misused or misinterpreted and therefore become unsafe WARNING For use in vehi...

Page 7: ...g safety precautions contained in the vehicle s owner manual Do not mount the Geko 301 in a place where the driver or passengers are likely to impact it in an accident or collision The mounting hard ware provided by Garmin is not warranted against collision damage or the consequences thereof WARNING This product its packaging and its components contain chemicals known to the State of California to...

Page 8: ... Garmin retains the exclusive right to repair or replace the unit or software or offer a full refund of the purchase price at its sole discretion SUCH REMEDY SHALL BE YOUR SOLE AND EXCLUSIVE REMEDY FOR ANY BREACH OF WARRANTY To obtain warranty service call your local Garmin authorized dealer Or call Garmin Customer Service at one of the numbers listed below for shipping instructions and an RMA tra...

Page 9: ... is the property of Garmin and is protected under the United States of America copyright laws and international copyright treaties You further acknowledge that the structure organization and code of the Software are valuable trade secrets of Garmin and that the Software in source code form remains a valuable trade secret of Garmin You agree not to decompile disassemble modify reverse assemble reve...

Page 10: ...ch as in the trunk of a car as permanent damage may result User information such as waypoints routes etc will be retained in the unit s memory without the need for external power It is always a good practice to back up important user data by manually recording it or downloading it to a PC transferring it to MapSource WATER IMMERSION The Geko 301 is waterproof to IEC Standard 529 IPX7 It can withst...

Page 11: ...until the clip catches Alkaline batteries should last as long as 9 hours Rechargeable Alkaline NiMH NiCad or Lithium batteries may be used but cannot be charged while in the unit Battery Compartment NOTE If you intend to store your Geko 301 for an extended period of time remove the batteries Follow the battery manufacturer s instructions for the proper care and handling of the batteries Battery us...

Page 12: ... and menus Press to adjust display contrast on the Satellite Page Press to Zoom out UP and Zoom in DOWN on the Map Page Press to cycle through the data fields on the Navigation Page Geko 301 Features 500 alphanumeric waypoints with name selectable icons 20 reversible routes with up to 125 waypoints each 10 000 Track points 10 Saved Tracks with up to 500 points each PanTrack feature that allows you ...

Page 13: ... pages or display screens These pages are the Satellite Map Navigation Elevation Trip Computer and Menu Press the PAGE Button to cycle through the six pages Down to the Basics Main Pages Satellite Trip Computer Map Elevation Navigation Main Menu 190 00297 02_0A indd 1 5 19 2003 4 20 06 PM ...

Page 14: ...C Normal Skyview 6 2 D About Geko 6 3 About Geko 6 Map Page p 7 1 Pan Track Log 8 2 Clear Track Log 9 3 Measure Distance 8 4 Map Setup 8 4 A Orient Map 8 4 B Auto Zoom 8 4 C Waypoints 8 4 D Goto Line 8 Navigation Page p 10 1 Sight N Go 11 2 Calibrate the compass 13 Elevation Page p 14 1 Plot Over Time Distance 15 2 Zoom Time Distance 16 3 Zoom Elevation 16 4 View Points 17 5 Reset Max Elevation 17...

Page 15: ...current position and their individual strengths The outer circle of the display represents the horizon and the center represents the sky directly overhead to help you determine the location of the satellites When you see the READY TO NAVIGATE message the Geko 301 has found your loca tion and you are ready to go Location Accuracy estimated Satellites Satellite Signal Strength Bars a D stands for di...

Page 16: ... of the screen To adjust the backlight timeout setting 1 In Normal or Advanced Skyview press the OK Button to access the OPTIONS menu 2 With DISPLAY SETUP highlighted press the OK Button 3 With LIGHT TIMEOUT field highlighted press the OK Button 4 Press the UP or DOWN Button to highlight the length of time and then press the OK Button to return to the LIGHT TIMEOUT field 5 Press the PAGE Button to e...

Page 17: ...NS Display Setup Orient Sky Northward Sky Ahead Normal Skyview About Geko Display Setup See page 4 under Normal Skyview Options Orient Sky Northward or Orient Sky Ahead You have the choice to view the Advanced Skyview two ways Northward and Ahead Orient Northward displays the satellite positions in a fixed position North is always pointing up Satellite rings do not rotate Orient Ahead displays the ...

Page 18: ...n to select the field 4 Press the PAGE Button to exit Normal Skyview Select this option to return to Normal Skyview About Geko This option allows you to see what software version the Geko 301 is currently using Visit www garmin com for the latest software updates A PC compatible computer and Power Data cable not included are required for transfer Orient Sky Northward Orient Sky Ahead About Geko 190...

Page 19: ...re always displayed in front of the animated figure The Heading Indicator shows the direction you are heading To make sure you can see your entire route you can change the map scale from 50 feet to 800 miles by pressing the UP Button to view a larger area and the DOWN Button for viewing a smaller area hold down buttons for a faster zoom You your location Heading Indicator Map Scale Trail track log ...

Page 20: ...n you are currently moving When NORTHWARD is selected the map is always oriented to the North Auto Zoom On or Off When AUTO ZOOM is turned on the map automati cally adjusts its scale to display your entire navigating route until you manually change the zoom level When it s turned off you must press the UP or DOWN Button to select the appropriate map scale Waypoints Show or Hide Allows you to view ...

Page 21: ... log that you left behind allowing you to return along a traveled path without marking any waypoints For the best results clear the track log before you start traveling because when the track log is full the new track points will overwrite the oldest track points GOTO guides you from your current location to the waypoint selected while MARK creates a waypoint on the selected track point ZOOM adjus...

Page 22: ...time See page 40 One Data Field is available at the bottom of the screen and you can use the UP and DOWN Buttons to scroll through the menu choices A list of the fields can be found on page 13 The Bent Bearing Pointer arrow alerts you to the upcoming turn while you are navigating a route When you get within 15 seconds of the current point the pointer bends to indicate the direction of the turn to t...

Page 23: ...tton again Note that the compass ring with the pointer is in line with the two sighting marks on the case 2 Hold the Geko 301 eye level and line up the two sighting marks with a distant object press the OK Button and select SET COURSE to lock the heading in place 3 Begin traveling to your destination using the compass pointer as a guide 4 To view the Sight N Go options press the OK Button to SET N...

Page 24: ...e the current time and date based on your Time Zone settings Trip Odometer the total distance you ve gone since the last reset Heading the direction you are traveling The following fields display only when navigating Bearing the compass direction from your current location to your destination Course the direction from your starting location to a destination Time To Go the estimated time at your cur...

Page 25: ... necessary Press the OK Button to begin calibrating the compass The unit displays a JUST RIGHT TOO FAST or TOO SLOW message for you to adjust your turning speed as needed The CALIBRATION COMPLETED SUCCESSFULLY message displays when finished If a CALIBRATION FAIL message appears repeat the process A HOLD LEVEL reminder displays if you are not holding the Geko 301 level or if the compass is not prope...

Page 26: ...data field allows you to display a variety of current and recorded pressure and elevation related data The Elevation Page provides you with a variety of elevation information A Status Win dow that displays current elevation and current rate of ascent descent a profile of elevation changes over distance or time and one user selectable data field What is my elevation Elevation Page Elevation Status Ele...

Page 27: ...m the page and to begin recording new data PLOT OVER TIME DISTANCE These two measurement options changes over a set period of time or changes over a set distance apply only to the Elevation Plot while the Pressure Plot is measured by time and pressure only The Pressure Plot is only available as one of the user selectable fields at the bottom of the screen ZOOM RANGES You can set the Zoom Ranges for...

Page 28: ... to scroll through the stored elevation profile and to view a single point along the profile When the pointer is stopped at a location along the profile the display shows the elevation time of day and date the point was created To use the VIEW POINTS option 1 From the Elevation Page press the OK Button and select the VIEW POINTS option 2 Use the UP or DOWN Buttons to move the pointer across the eleva...

Page 29: ...btain from a map or other reliable source To manually calibrate the altimeter 1 Press the PAGE Button to access the Main Menu 2 Press the UP or DOWN Button to highlight the CALIBRATE option and press the OK Button Select the ALTIMETER option 3 At the message stating DO YOU KNOW THE CORRECT ELEVATION highlight the on screen YES button and press the OK Button 4 Use the UP DOWN and OK Buttons to ente...

Page 30: ...t which you are descending to your destination altitude Active Navigation Only Gld Rt Dest Glide Ration Destination The Glide Ratio required to descend from current location and altitude to the location and altitude of your destination Active Navigation Only Glide Ratio The ratio of horizontal distance travelled to vertical descent For example a 6 1 glide ratio indicates a 1000 vertical descent fo...

Page 31: ...e OK Button 3 Press the UP or DOWN Button to highlight one of the four fields to change and press the OK Button to display the data field options 4 Press the UP or DOWN Button to scroll through the list highlight an option and press the OK Button to accept that option 5 Repeat Steps 3 and 4 as necessary When finished press the PAGE Button to return to the Trip Computer Page The complete list of optio...

Page 32: ...e of altitude gain loss over time The following fields display figures only when navigating Bearing the compass direction from your location to your destination Course the direction from your starting location to a destination Final Dest Final Destination the last waypoint on your route Final Distance the distance from your current location to your destination Final ETA the estimated time you will a...

Page 33: ...List All 22 1 C Nearest 23 1 D Delete All 23 2 Tracks 26 3 Routes 29 4 Games 32 4 A Gekoids 32 4 B Geko Smak 32 4 C Memory Race 33 4 D Nibbons 33 4 E Virtua Maze 33 5 Calibrate 5 A Compass 13 5 B Altimeter 17 6 Setup 34 1 Time 34 1 A Time Format 34 1 B Time Zone 34 1 C UTC Offset 34 1 D Daylight Saving 35 2 Display 36 3 Units 37 3 A Position Format 37 3 B Map Datum 37 3 C Distance Spd 38 3 D Eleva...

Page 34: ...hted press the OK Button to display the MARK Page With OK highlighted press the OK Button again to accept the waypoint 2 To change the position data press the UP or DOWN Button and highlight the POSITION DATA field and press the OK Button to display the EDIT LOCATION Page 3 Scroll through the position coordinate places using the UP or DOWN Button UP Button to move right to left DOWN Button to move ...

Page 35: ...nts for that tab 4 Press the UP or DOWN Button to highlight the waypoint on the list and press the OK Button to display the REVIEW WAYPOINT Page To view the NEAREST waypoints page 1 From the MENU Page press the UP or DOWN Button to highlight WAYPOINTS then press the OK Button 2 Select NEAREST and press the OK Button to see a listing of the nine closest waypoints by name and distance from your loca...

Page 36: ...e the waypoint If you do press the UP or DOWN Button to highlight YES and press OK If you do not want to delete the waypoint press the UP or DOWN Button to highlight NO and press the OK Button To start a Goto 1 From the REVIEW WAYPOINT Page press the UP or DOWN Button to highlight GOTO 2 Press the OK Button to activate the Goto with the selected waypoint as the destina tion To view the selected wa...

Page 37: ... the next number in the field Select the digit you wish to change and press the OK Button to display the drop down number list 5 Press the UP or DOWN Button to highlight the correct number and press the OK Button When all numbers are entered correctly highlight OK and press the OK Button 6 Use the DOWN Button to highlight the bearing field and press the OK Button to display the EDIT ANGLE Page 7 Pre...

Page 38: ...u want to keep a record of a certain track log or use the TracBack feature it is recommended that you clear the track log before you start traveling The percentage of memory used by the current track log is displayed at the top of the page After the track log is CLEARED it will show zero percent When the display shows 99 the most recent track points will start overwriting the earliest track points...

Page 39: ...and then press the OK Button to delete this track NAVIGATE and then press the OK Button to begin navigation from either point To rename a saved track log 1 From the MENU Page highlight TRACKS and press the OK Button to display the TRACK LOG Page 2 Press the UP or DOWN Button to highlight a saved track and press the OK Button to display the track on a map 3 Press the UP or DOWN Button as needed to ...

Page 40: ...ess the UP or DOWN Button to highlight YES and press the OK Button to complete the process If you change your mind press the UP or DOWN Button to highlight NO and press the OK Button to keep the tracks in memory or press PAGE to exit at any time To start TracBack navigation 1 On the TRACK LOG Page press the UP or DOWN Button and highlight the saved track from the SAVED TRACKS that you want to trav...

Page 41: ...ct the next waypoint before you start moving When you plan a trip you can select waypoints from a waypoint list and put them into the Geko 301 s memory At least two waypoints up to a maximum of 125 are linked together to form a route When you start your trip you activate the route feature and the receiver points the way you should travel to get from the first waypoint to the second You can then use...

Page 42: ... press the OK Button to display the ROUTES Page 2 Press the OK Button to create a New Route If there is no information in the route area press the OK Button to display the ADD WAYPOINT TO ROUTE Page 3 Press the UP or DOWN Button to highlight the waypoint of your choice and press the OK Button to place the waypoint in the first field on the ROUTES Page 4 Repeat Step 3 until all of the waypoints you w...

Page 43: ...aypoint from the list To clear all route waypoints 1 From the MENU Page press the UP or DOWN Button to highlight ROUTES and press the OK Button to display the ROUTES Page 2 Press the UP or DOWN Button to highlight DELETE ALL and press the OK Button to display the confirmation window asking you if you really want to clear all of the route waypoints If you do press the UP or DOWN Button to highlight ...

Page 44: ...around your ship Your ship always points up Geko Smak Geko Smak features you as the triangular shaped player In measured rhythm Gekos will appear on the screen Before the Geko disappears move toward the Geko and press the OK Button to smack the Geko If you get the Geko an displays above the hammer otherwise just a hammer displays momentarily Field size choices are small medium and large with small...

Page 45: ... appear Through time your tail will grow You may travel anywhere on the screen but you cannot walk into your tail or you will lose a life Virtua Maze This game creates a virtual maze on the screen You are placed at a central position in the maze and must explore the maze collecting flags The lower right corner of the game screen tells you how many flags remain The lower left corner is a timer tellin...

Page 46: ...t 1 From the MENU Page press the UP or DOWN Button to highlight TIME and press the OK Button to display the TIME Page 2 Press the UP or DOWN Button to highlight the TIME FORMAT field and press the OK Button 3 Press the UP or DOWN Button to highlight 12 or 24 hour and press the OK Button 4 Press the PAGE Button to return to the page of your choice Time Zone The time zone can be set to any one of the...

Page 47: ...rd time To change the daylight saving field 1 Press the PAGE Button and switch to the MENU Page Press the UP or DOWN Button to highlight TIME and press the OK Button to display the TIME Page 2 Press the UP or DOWN Button to highlight the DAYLIGHT SAVING field and press the OK Button 3 Press the UP or DOWN Button highlight AUTO YES or NO and press OK Press the PAGE Button to return to the page of you...

Page 48: ...WN Button and highlight your selection and press the OK Button 4 Press the PAGE Button to return to the SETUP Page Contrast The CONTRAST option allows you to adjust the display contrast To adjust the Display contrast 1 From the SETUP Page press the UP or DOWN Button to highlight DISPLAY Press the OK Button to display the DISPLAY Page 2 Press the UP or DOWN Button to highlight the CONTRAST Slider a...

Page 49: ...t http www nima mil To change the Position Format grid 1 From the UNITS Page press the UP or DOWN Button to highlight the POSITION FRMT field and press the OK Button 2 Press the UP or DOWN Button to highlight the desired format and press the OK Button 3 Press the PAGE Button to return to the MENU Page Map Datums A map datum is a reference model of the Earth s shape Every map uses a map datum which ...

Page 50: ...for elevation readouts inches Hg or millibars for pressure and feet per minute meters per minute or meters per second for vertical speed VSPD To change the Units of Distance Speed Elevation Pressure or Vertical Speed 1 From the MENU Page press the UP or DOWN Button to highlight the UNITS field and then press the OK Button to display the UNITS Page 2 Press the UP or DOWN Button to highlight the field...

Page 51: ...M TEXT allows DGPS input using a standard RTCM SC 104 format and simple ASCII text output of location and velocity information NONE provides no interfacing capabilities If GARMIN DGPS or RTCM In NMEA Out format is selected additional fields are provided to control a Garmin differential beacon receiver e g GBR 21 GBR 23 directly from your unit Tuning is automatic with Scan or you can enter the beaco...

Page 52: ...nd press the OK Button 4 Press the PAGE Button to return to the SETUP Page To change the Speed used for GPS Heading 1 From the SETUP Page press the UP or DOWN Button to highlight the HEADING field and then press the OK Button to display the HEADING Page 2 Press the UP or DOWN Button to highlight the SPEED field and press the OK Button 3 From the EDIT NUMBER page use the UP DOWN and OK Buttons to sel...

Page 53: ...h can be considered the same as True North for traveling on land If necessary manually correct for the difference between Grid North and True North If you select User for North Reference the VARIATION field is highlighted for you to edit the declination The declination of the Geko 301 s compass is shown to the right of North Reference To change the North Reference 1 From the MENU Page press the UP ...

Page 54: ...n receives data for correcting differentials in the GPS satellite signals The WAAS Satellite is number 33 or higher on the Advanced Skyview Satellite Page To learn more about WAAS System access the Federal Aviation Administration s web site http gps faa gov The DEMO mode is designed for dealers to show the features and functions of the Geko 301 to potential customers inside a closed building where...

Page 55: ... on screen Altimeter Setting Turns the Automatic Calibration for the Altimeter on or off Selecting Auto Cal On for the Altimeter allows the unit to provide a fairly accurate reading within minutes of obtaining a 3D fix without requiring you to remain stationary The accuracy improves over time as the barometric pressure is compared to GPS information Battery Setting The battery type choice can affec...

Page 56: ...e page automatically changes Follow the steps listed to edit the information To change the owner information 1 From the MENU Page press the UP or DOWN Button to highlight the SYSTEM field Press the OK Button to display the SYSTEM Page 2 Press the UP or DOWN Button to highlight OWNER INFO field and press the OK Button 3 Press the UP or DOWN Button to move from one character to the next To change that...

Page 57: ... AAA batteries3 Battery Life 9 hours typical use with alkaline batteries4 Specifications subject to change without notice 1 Subject to accuracy degradation to 100m 2DRMS under the U S DoD imposed Selective Availability program 2 With optional Garmin Differential Beacon Receiver Input such as Garmin GBR 21 or 23 3 The temperature rating for the Geko 301 may exceed the usable range of some batteries ...

Page 58: ...g Marine Mounting Kit Allows the Geko 301 to be mounted on any flat surface Power Data Cable Provides power from an automobile cigarette lighter and allows for serial data transfer from a PC Suction Cup Mounting Kit Allows the Geko 301 to be mounted on a windshield Training Video NTSC Vehicle Mounting Kit Allows the Geko 301 to be mounted on the dashboard Accessories Back attachment screws into the...

Page 59: ... Sentences PGRME estimated error PGRMM map datum PGRMZ altitude PSLIB beacon receiver control DGPS Differential GPS corrections are accepted in RTCM SC 104 version 2 0 format through the Data In line Other beacon receivers with the correct RTCM format may be used but may not correctly display status or allow tuning control from the GPS unit The Geko 301 may be hard wired to a serial connector usin...

Page 60: ...essure 17 Battery 42 43 45 ix Battery Save Mode 42 Battery Usage Icon ix Beacon Receiver Setup 39 Bearing 8 12 Buttons DOWN x Buttons cont OK x PAGE x POWER x UP x C Calibrate Altimeter 17 Compass 13 Change Daylight Savings 35 Time Format 34 Time Zone 34 Clear Track Log 8 9 Compass Ring 10 Setting 43 Contrast Setup 36 Course 8 20 D Data Fields 12 14 18 20 Ambient Pressure 18 190 00297 02_0A indd 4...

Page 61: ...scent 18 Total Descent 18 Trip Odometer 12 Trip Time 20 Vertical Speed 18 Date Time 12 Daylight Savings Time 35 Delete all Waypoints 23 Delete a Waypoint 24 Demo 42 Destination Final 20 Next 20 Distance Final 20 Next 20 DOWN Button x E Edit Location 22 Electronic Compass 11 Elevation Page 14 18 ETA Final 20 Next 20 ETE Final 20 Next 20 F FCC Compliance iii Fields Data 14 15 18 Final ETA 20 190 002...

Page 62: ... 42 43 H Heading 12 20 Setup Page 10 Heading Page 40 How To adjust zoom ranges 16 calibrate the altimeter 17 calibrate the compass 13 reset the elevation data 17 reset the max elevation fields 17 use the View Points option 16 I Interface Settings 39 L Language 44 LAT LON 20 Light Timeout 4 36 Location 12 20 M Magnetic North 41 Maintenance viii Map Datums 37 38 Map Page 7 Map Setup 8 Mark Waypoint 2...

Page 63: ...3 NMEA 45 NMEA OUT 39 NONE 39 Normal Skyview 3 Normal Skyview Options 4 North Reference 38 40 O Odometer Trip 12 20 Off Course 20 OK Button x On screen Button 17 Option Menus 14 Orient Map 8 Orient Sky Ahead 5 Orient Sky Northward 5 Overall Speed 20 Owner Information 44 P PAGE Button x PanTrack 9 Pan Track Log 8 Plot Over Distance 15 Plot Over Time 15 Position Format 37 POWER Button x Product Regi...

Page 64: ...14 Sight N Go 11 Skyview Advanced 3 Software License Agreement vii Specifications 45 Speed 12 20 Maximum 20 Speed cont Overall 20 Vertical 20 Stopped Time 20 Stop Navigation 8 Storage viii Sunrise 20 Sunset 20 System Page GPS Mode 42 43 Owner Info 44 T TEXT OUT 39 Time Moving 20 Of Day 20 Stopped 20 Total 20 Time Date 12 Time Page 34 35 Time To Go 12 20 Time Zone 34 Total Time 20 190 00297 02_0A in...

Page 65: ...ip Time 20 Turn 20 U Units of Measure 38 UP Button x UTC offset field 34 V Velocity Made Good 20 Vertical Speed 20 Vertical Speed Destination 20 View Nearest Waypoints 23 View the Selected Waypoint 24 Virtua Maze 33 W WAAS 3 42 Warnings and Cautions iv Warranty vi Water Immersion viii Waypoints Show Hide 8 Wiring Diagram 47 Z Zoom Ranges 15 190 00297 02_0A indd 53 5 19 2003 4 20 40 PM ...

Page 66: ...Notes 190 00297 02_0A indd 54 5 19 2003 4 20 40 PM ...

Page 67: ...Geko 301 Cover indd 3 5 19 2003 4 22 20 PM ...

Page 68: ...angle Abbey Park Industrial Estate Romsey SO51 9DL U K Garmin Corporation No 68 Jangshu 2nd Road Shijr Taipei County Taiwan www garmin com Part Number 190 00297 02 Rev A For the latest free software updates excluding map data throughout the life of your Garmin products visit the Garmin web site at www garmin com Geko 301 Cover indd 4 5 19 2003 4 22 20 PM ...

Reviews: