background image

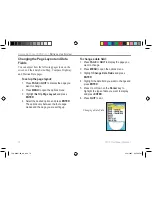
Changing the Display

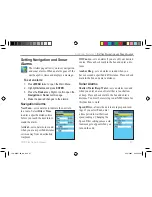
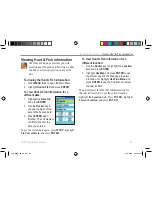
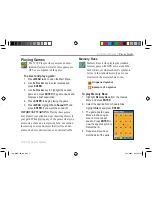
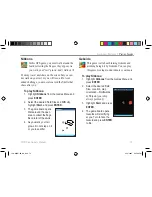
  The Display Setup page allows you to set sev-

eral features of the display, such as the color 

scheme. 

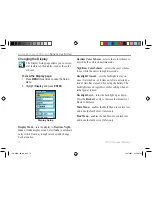
To view the Display page:

1.  Press 

MENU

 three times to open the Setup 

Menu. 

2.  Highlight 

Display

 and press 

ENTER

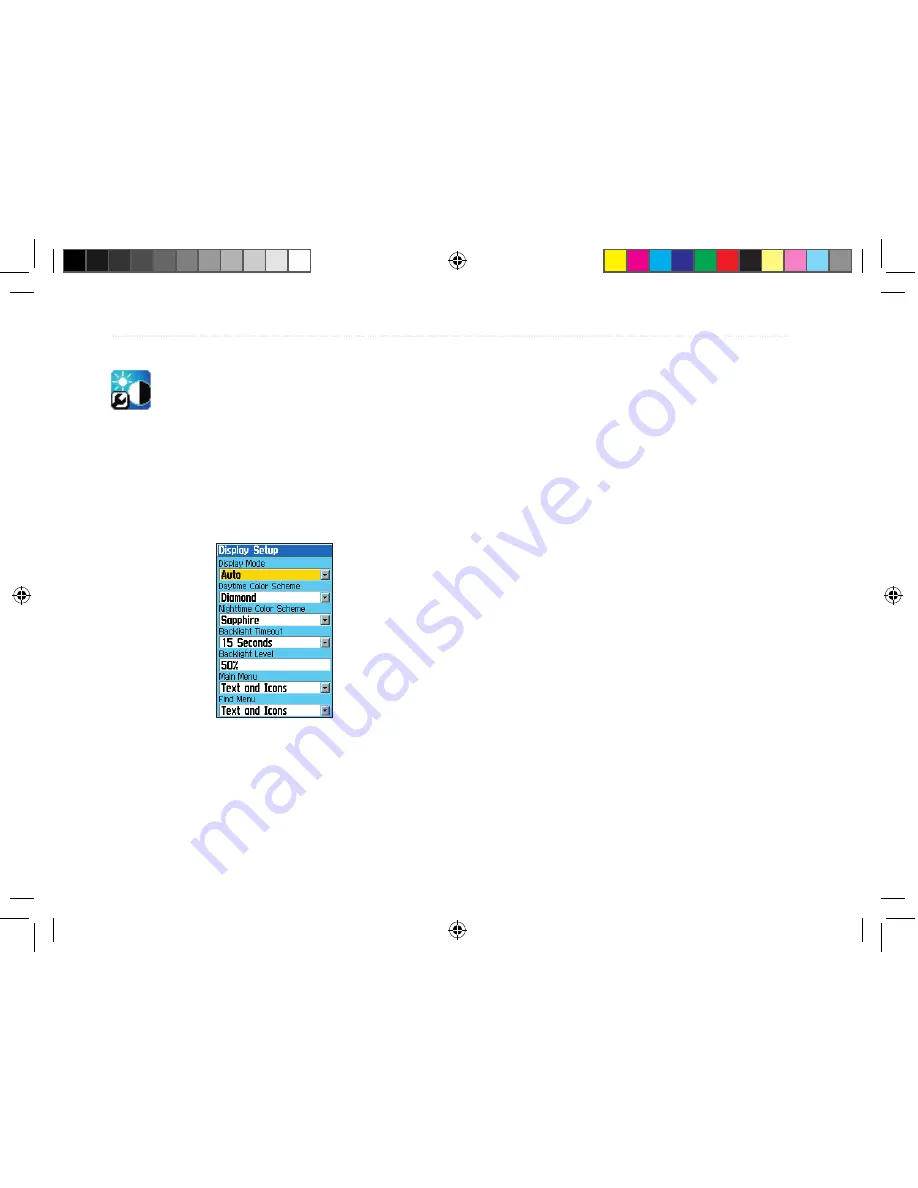
Display Setup

Display Mode

—sets the display to 

Daytime

Night-

time

, or 

Auto 

display mode. Select 

Auto

 to automati-

cally switch from day to night at sunset and change 

back at sunrise. 

Daytime Color Scheme

—selects the color scheme to 

use while the unit is in daytime mode. 

Nighttime Color Scheme

—selects the color scheme 

to use while the unit is in nighttime mode. 

Backlight Timeout

—sets the backlight to stay on 

once it is turned on, or to time out after a selected pe-

riod of time has elapsed when using the battery. The 

backlight stays on regardless of this setting when ex-

ternal power is used. 

Backlight Level

—turns the backlight up or down. 

Press the 

Rocker

 key Up to increase the intensity or 

Down to decrease. 

Main Menu

—enables the Main Menu to contain text 

and icons (default) or text labels only. 

Find Menu

—enables the find Menu to contain text 

and icons (default) or text labels only. 

78 

76CS Plus Owner’s Manual

C

USTOMIZING

 Y

OUR

 76CS P

LUS

 > 

S

ETTING


UP


THE

 S

YSTEM

190-00507-00_0A.indd   78

2/14/2005   3:33:50 PM

Summary of Contents for 76CS Plus

Page 1: ...76CS Plus chartplotting receiver owner s manual Owner s Manual 190 00507 00_0A indd 1 2 14 2005 3 33 06 PM...

Page 2: ...rint one copy of this manual or of any revision hereto provided that such electronic or printed copy of this manual must contain the complete text of this copyright notice and provided further that an...

Page 3: ...ation The Basic Operation section provides information about using your 76CS Plus such as nding locations and making routes For information about initiating navigation and fol lowing a route refer to...

Page 4: ...earning about the Keys and Icons 8 Learning about the Keys 8 Viewing the Status Bar Icons 9 Understanding On Screen Messages 9 What is the Difference Between the Modes 10 Powerboat Mode 10 Sailboat Mo...

Page 5: ...a Route 31 Viewing Your Saved Routes 33 Editing a Route 34 Editing the Route Points 35 Managing Your Tracks 37 Setting up Your Track Log 37 Editing Your Saved Track Details 39 Calculating the Area 39...

Page 6: ...3 Viewing Points 64 Resetting the Data 64 Setting Up the Altimeter 64 Setting the Timers 65 Setting Your Alarm Clock 65 Using the Calendar 66 Week View 66 Day View 66 Month View 66 Setting Navigation...

Page 7: ...nnecting the Power Data Cable 91 Connecting Your Unit to a Computer 92 Information about USB Drivers 92 Using xImage for Waypoint Icons 93 Interfacing 93 Learning about GPS 94 Common GPS Terms 94 What...

Page 8: ...ce Immersing the Unit in Water The 76CS Plus is waterproof to IEC Standard 60529 IPX7 It can withstand immersion in 1 meter of water for 30 minutes Prolonged submersion can cause dam age to the unit A...

Page 9: ...ct the USB Cable to the unit install the included MapSource Trip and Waypoint Manager software provided with this unit USB Drivers will be installed with the MapSource software Antenna Serial number u...

Page 10: ...cover by reinserting the locking pin in the back of the unit Turn the D Ring 1 4 turn clockwise to lock in place For more information about using and disposing of batteries refer to page 89 Battery Co...

Page 11: ...s ENTER to continue 4 Press PAGE to scroll through the pages 5 To turn off the 76CS Plus press and hold the Power key again After you turn on your 76CS Plus a window appears that lists any user settin...

Page 12: ...features eight main pages the Map Compass Highway Tide Prediction Station Sun Moon Marine Log Satellite and Position Data pages You can change the order of the sequence and add more pages to the sequ...

Page 13: ...ess the PAGE key to view the Satellite page While the receiver is gathering satellite signals and establishing your position x Locating Satellites is displayed on the Satellite page As the receiver lo...

Page 14: ...the options menu Start Stop Simulator activates and deactivates simulator mode which is particularly helpful when learning how to use your unit WAAS On enables WAAS Refer to page 95 for more informati...

Page 15: ...the process When using the compass hold the unit level and away from objects that generate magnetic elds Calibrating the Altimeter You can calibrate the altimeter to increase its accu racy You must kn...

Page 16: ...rrent page Press twice to open the Main Menu Press ENTER MARK to select an option enter data and to accept the selected value Press and hold to mark your current location as a waypoint Press QUIT to c...

Page 17: ...ites have been received and a three dimensional x has been attained The unit is in Powerboat mode The unit is in Sailboat mode The unit is in Automotive mode The unit is in Off Road mode USB cable is...

Page 18: ...ode Use Off Road mode when you are using an off road vehicle such as an ATV or snowmobile In this mode the 76CS Plus automatically generates a route to your selected destination but the route will not...

Page 19: ...the Rocker key to select individ ual elds Moving the highlight to a given location allows you to make a selection begin data entry or scroll through a list Field the place where data is entered or an...

Page 20: ...then appear with more options If so select the desired option and press ENTER again To exit a menu or cancel an action Press QUIT The QUIT key moves backwards through your steps Press QUIT repeatedly...

Page 21: ...Using the Databases Optional Garmin MapSource CD ROMs enhance the versatility of your 76CS Plus With optional MapSource City Select data you can view listings of nearby restaurants lodging shopping ce...

Page 22: ...hen Simulator mode is activated the GPS receiver is turned off All indicators of satellite signals are only simulations and do not represent the strength of actual satellite signals Simulating Navigat...

Page 23: ...and hold the PAGE MODE key Use the Rocker key to select Automotive and press ENTER To nd and go to a land destination 1 Activate Simulator mode 2 Press the NAV key 3 Highlight Go To Point and press EN...

Page 24: ...owing methods Press the NAV key highlight Go To Point and press ENTER Press MENU twice to open the Main Menu Highlight Find and press ENTER Tips about Finding Items By default the search results list...

Page 25: ...ltiple examples of a navigation aid Select any instance of the navigation aid and the GPS will use the most accurately located navigation aid Searching for a Location by Name If you know the name of t...

Page 26: ...R to select a new reference point on the map Search for an item using the Find Menu or the Map page With the item s information page open press MENU highlight Find Near Here and press ENTER To change...

Page 27: ...nu For more information about the options refer page 27 Searching for a Recently Found Item Recent Finds is a list all of the items you have recently found The most recent loca tion found is at the to...

Page 28: ...Press the MENU key to display a list of search options Find By Name allows you to enter the name of the waypoint in a search eld Find Nearest allows you to search for points cities near your current l...

Page 29: ...as Tide Station then press ENTER 4 Press the MENU key and then ENTER to search from a different location On the map select the location you want to search from and press ENTER 5 To enter letters cont...

Page 30: ...he Rocker key to highlight a selection from the Services list 3 Press ENTER to display the information page for the selected service Searching for an Address or Intersection If you have loaded MapSour...

Page 31: ...rest 1 Open the Find Menu 2 Highlight a desired Points of Interest category such as Food Drink and press ENTER 3 To narrow your search press the MENU key highlight Select Category and press ENTER High...

Page 32: ...waypoint s position coordinates manually Save save a Find Menu item as a waypoint Marking Your Present Position The ENTER MARK key lets you quickly capture your present position to create a new waypoi...

Page 33: ...position not the arrow s location 4 If the location you selected has more than one point at it a Select Point window appears listing different points and charts Select the desired point from the list...

Page 34: ...On the Mark Waypoint page use the Rocker key to highlight the Location eld and press ENTER Use the Rocker key to enter the desired position coordinates and press ENTER when nished 3 To change any of...

Page 35: ...U to open the options menu Some of the fea tures in the menu are listed below Find Near Here opens the Find Menu so you can search for map items near the item Change Reference opens the map so you can...

Page 36: ...oint You can create a new waypoint by projecting the distance and bearing from a speci c location To project a new waypoint s location 1 Open the item s information page by marking a waypoint opening...

Page 37: ...point is deleted it cannot be recovered from the unit Back up important waypoints to a computer using the optional PC cable and interface software such as MapSource or write them down by hand To delet...

Page 38: ...d is now highlighted Press ENTER to begin entering the proximity radius 6 Use the Rocker key to enter a distance value up to 99 99 units and press ENTER To turn proximity alarms on or off 1 Press MENU...

Page 39: ...age displays all of the saved routes in the 76CS Plus memory If a small automobile icon appears in front of a saved route it is a turn by turn route created in Au tomotive mode For more information ab...

Page 40: ...using the map 1 Press MENU twice to display the Main Menu Highlight Routes and press ENTER 2 Highlight New and press ENTER 3 Highlight the rst blank slot in the Route page and press MENU Highlight Edi...

Page 41: ...Routes page lists all the routes currently stored in memory Saved Routes To view a speci c route highlight the desired route on the Saved Routes list and press ENTER This opens the Route Review page R...

Page 42: ...Route Review options menu and the route point menu To change the name of the route 1 Press MENU twice to open the Main Menu Highlight Routes and press ENTER 2 Use the Rocker key to highlight the name...

Page 43: ...Up or Down to move the point You can also edit a route on the Map page To edit the route on the map 1 Press MENU twice to open the Main Menu Use the Rocker key to select the Routes and press ENTER 2 S...

Page 44: ...vessel such as the operator s manual or performance speci cations and make note of the desired units of measure gallons or liters To set up route leg transition 1 Press MENU twice to open the Main Men...

Page 45: ...ate Track and TracBack features You can store up to 15 track logs Setting up Your Track Log Before you begin traveling you might want to change the way the 76CS Plus records your breadcrumb trail To s...

Page 46: ...nd press ENTER 3 Highlight the Save button and press ENTER 4 A window pops up asking if you want to save the entire track log To save the entire track highlight Yes and press ENTER To save only a port...

Page 47: ...ss QUIT to exit Press MENU on the Saved Track page to view the elevation pro le of the track Calculating the Area From the Saved Track page you can calculate the area of a space as you travel around i...

Page 48: ...to segments called legs Up to 300 tem porary turns are created to mark the most signi cant features of the track in order to duplicate your exact path as closely as possible To get the most out of the...

Page 49: ...e Find Menu to navigate to Navigate Route allows you to select a route to navi gate You can also activate a saved route through the Routes page of the Main Menu For information about routes refer to t...

Page 50: ...vigate Menu with Map Feature highlighted To go to a point using the Find Menu 1 Press NAV to open the Navigate Menu 2 Highlight Go To Point and press ENTER The Find Menu opens Find Menu 3 Use the Rock...

Page 51: ...s actively navigating to that point The MOB waypoint is stored in the waypoint list and may be deleted like any other waypoint Editing Your Route You can edit your Powerboat Sailboat or Off Road route...

Page 52: ...ight the Current Vessel eld and press ENTER 2 Use the Rocker key to select the desired vessel and press ENTER To edit or delete a saved vessel 1 From the Vessel page use the Rocker key to highlight th...

Page 53: ...or more information 6 Highlight your Home Port in the search result list and press ENTER 7 From the information page highlight Use and press ENTER Your Home Port is now set Navigating to Your Home Por...

Page 54: ...Automotive mode for the turn by turn route to be saved Saved routes with more than 50 waypoints cannot be navigated in Automotive mode Track Your Progress with the Map page You can track the progress...

Page 55: ...ecalculate the route and show arrival times using the options menu Press MENU to open the options menu Following an Off Road Route Following a route in Off Road mode is very similar to following a rou...

Page 56: ...page The 76CS Plus always powers up in position mode with the last known location centered on the map When you press the Rocker key the 76CS Plus enters pan mode which moves the map to keep the white...

Page 57: ...us displays cartography as long as chart information is available for the zoom scale you have selected Map coverage conforms to the following conditions Cartography is displayed when the selected zoom...

Page 58: ...ith the arrow s position coordinates When you zoom in pan mode the arrow stays cen tered on the screen The arrow s coordinates appear in the position eld and the distance and bearing from your present...

Page 59: ...is selected Declutter appears below the map scale Measuring Distance You can measure the distance and bearing between two map items To measure bearing distance 1 From the Map page press MENU to open...

Page 60: ...ng If the arrow points up you are going directly to the waypoint If the arrow points any direction other than up turn toward the arrow until it points up then con tinue in that direction Setting up th...

Page 61: ...1 With the Compass page displaying the Course Pointer press MENU 2 Highlight Set CDI Scale and press ENTER 3 Highlight the desired scale and press ENTER Using the Electronic Compass Your 76CS Plus us...

Page 62: ...orrectly or if it is not calibrated Using the Marine Timer The Marine Timer speci cally designed for sailboat racing allows you to easily count up or down by speci ed time increments As is common in s...

Page 63: ...ve minutes If you want to change the length of time and the behavior of the timer open the Timers page in the Main Menu To set the marine timer 1 Press MENU twice to open the Main Menu 2 Highlight Tim...

Page 64: ...points that are visible As you head toward your destination the highway perspective moves to indicate your progress to the waypoint and which direction you should steer to stay on course Use the IN an...

Page 65: ...The bottom of the page indicates the station s head ing and distance from your current location The top of the page displays the tide station and date being referenced You can search for Tide Predict...

Page 66: ...ired chart displayed press the Rocker key Down to select the chart 2 Press the Rocker key Right or Left to scroll the chart The time and height of the tide at the crosshairs is displayed in boxes as s...

Page 67: ...he date or time you selected To use the current date again highlight the Date eld Press MENU highlight Use Current Date and press ENTER Sun Moon Page Moon Phase Animation controls for the sky view Sel...

Page 68: ...ENTER to close the details page TIP When the log details page is open press the Rocker key Down to view the details for the next entry in the log While in a sea mode you can change the record inter v...

Page 69: ...ta elds For an explanation of the data elds refer to page 100 To reset the trip information 1 Open the Position Data page Press MENU highlight Reset and press ENTER 2 The Reset page opens Highlight th...

Page 70: ...bient air pressure or the pressure around you Once a pressure reading has been obtained you need to calibrate the barometric altimeter Refer to page 7 to learn how to calibrate your altim eter For mor...

Page 71: ...changes in barometric pressure over time press MENU highlight View Pressure Plot and press ENTER After you have displayed the pressure plot you can then view the ambient pressure or the barometer You...

Page 72: ...on the Elevation Plot press ENTER to view the location of the crosshairs on the map Press PAGE or QUIT to close the map Resetting the Data You can reset the elevation data and the maximum el evation d...

Page 73: ...you restore all of the unit s settings to the defaults See page 81 Setting Your Alarm Clock Another feature of your 76CS Plus is that you can set it as a alarm clock When the alarm goes off a tone sou...

Page 74: ...a route to the calendar 1 Open the Calendar and highlight the day to which you want to add the route 2 Press MENU highlight Add Route and press ENTER 3 From the Saved Routes List highlight the route y...

Page 75: ...tination waypoint Off Course sets an alarm if you are off your desired course Place a check mark in the box and enter a dis tance Anchor Drag sets an alarm to sound when you have exceeded a speci ed d...

Page 76: ...he unit cre ate a lap automatically based on distance To use the stopwatch 1 Press MENU twice to open the Main Menu 2 Highlight Stopwatch and press ENTER 3 To start the stopwatch highlight Start Press...

Page 77: ...date you entered To use the current date again press MENU highlight Use Current Date and press ENTER To view Hunt Fish information for a different location 1 Use the Rocker key to highlight the Locati...

Page 78: ...sage Press ENTER to view detailed information about that message To show hide messages using the Log Filter 1 Press MENU twice to open the Main Menu 2 Highlight Messages and press ENTER 3 Use the Rock...

Page 79: ...moving about on a real playing eld use caution in selecting an area and ensure that it is free of haz ards such a holes obstructions and vehicular traf c Memory Race Memory Race is like playing the s...

Page 80: ...be penalized ve minutes and the timer will count seconds by 10 instead of 2 Press ENTER again to turn off the cheat mode GekoSmak GekoSmak is a GPS based game that features you as the player piece Yo...

Page 81: ...und the open area to collect the ags Be careful of the skulls 4 As you walk your tail grows Do not step on it or you lose a life Gekoids This game is all about blasting Gekoids and avoiding being hit...

Page 82: ...or press the QUIT key Pit and Dragon Near Pit Near Dragon Near Safe Platform Slide You Dragon Arrow Pit To play Beast Hunt 1 Highlight Beast Hunt from the Games Menu and press ENTER 2 Read the direct...

Page 83: ...e shows the Map Families stored on the unit and if they are enabled shown 3 To enable a Map Family highlight the check box and press ENTER to place a check mark in the box 4 Press QUIT to exit To enab...

Page 84: ...ER The options vary between the four usage modes and the page you are setting up To change a data eld 1 Press PAGE or QUIT to display the page you want to change 2 Press MENU to open the options menu...

Page 85: ...you have entered press MENU and then press ENTER Changing the System Settings To open System Setup press MENU three times highlight System and press ENTER Usage Mode sets the unit to the desired mode...

Page 86: ...heme selects the color scheme to use while the unit is in nighttime mode Backlight Timeout sets the backlight to stay on once it is turned on or to time out after a selected pe riod of time has elapse...

Page 87: ...Setup page allows you to adjust the way items are displayed on the Map page To change a map setup option 1 From the Map page press MENU to open the options menu highlight Set Up Map and press ENTER O...

Page 88: ...r Down until the desired position is displayed and press ENTER 4 To insert a new page in the order highlight Add Page and press ENTER Select the page you want to add and press ENTER Page Sequence Setu...

Page 89: ...mizing the Units The Units Setup page allows you to customize measurement units for the entire system To open the Units Setup page press MENU three times to open the Setup Menu Select Units and press...

Page 90: ...p up turns on or off the Next Turn pop up window Follow Road Options Off Route Recalculation determines whether the unit prompts you when it is recalculating Prompted announces the automatic recalcula...

Page 91: ...if you are using a map or chart that speci es a dif ferent position format Selecting a Different Map Datum Datums are used to describe geographic positions for surveying mapping and navigation and are...

Page 92: ...iation at your current position and provides mag netic north heading references based upon the varia tion you enter Enter the magnetic variation of your current position in the Magnetic Variation eld...

Page 93: ...GPS beacon receiver NMEA In NMEA Out supports the input output of standard NMEA 0183 version 3 01 data and sonar NMEA input support for the DPT MTW and VHW sentences Text Out allows the unit to output...

Page 94: ...t 6 second intervals The Status eld displays one of the following Tuning the unit is attempting to tune to the speci ed frequency and bit rate Scanning the unit is automatically scanning through the f...

Page 95: ...local USCG or visit their Web site at http www navcen uscg gov NMEA Output Setup If you are going to interface the 76CS Plus with an other piece of equipment such as a radar or autopi lot the unit nee...

Page 96: ...ng Temperature Range 5 to 158 F 15 to 70 C 2 Performance Speci cations Receiver WAAS Enabled 12 parallel channel Acquisition Time Warm Approx 15 seconds Cold Approx 45 seconds AutoLocate Approx 5 minu...

Page 97: ...g conditions Extensive use of screen backlighting electronic compass and audible tones signi cantly reduces battery life Important Battery Information When replacing batteries use only new or fully ch...

Page 98: ...ector for data transfer Auto Navigation Kit provides the parts and map data to use the 76CS Plus in an automobile GA 29 GA 29F and GA 27C Antennas Garmin remote antennas Battery Pack rechargeable NiMH...

Page 99: ...Plus to an 10 32 VDC system and provides interface capabilities for connecting external devices The color code in the diagram to the right indicates the appropriate harness connections Replacement fus...

Page 100: ...to an available USB data port see below USB Data Port When using a PC Interface Cable connect the larger end of the cable to a serial communications port on your computer see below Serial Communicatio...

Page 101: ...ut lines on your 76CS Plus are RS 232 compatible allowing easy interface to a wide range of external devices including PC s differential beacon receivers marine autopilots or a second GPS receiver The...

Page 102: ...acquires a position more quickly Position an exact unique location based on geo graphic coordinates Latitude and Longitude Route A group of waypoints entered into the GPS receiver in the sequence you...

Page 103: ...ormance Standard for global Satellite Based Augmentation Systems SBAS Eventually there will be several services of worldwide geostationary communication satellites and ground reference stations All SB...

Page 104: ...ition Format and which should I use Your current location can be viewed on the GPS in the form of coordinates Since different maps and charts use different position formats Garmin GPS units al low you...

Page 105: ...placed in the LORAN TD format mode it simulates the operation of a LORAN receiv er You can display position coordinates as TDs and use all navigation functions as if the unit was actually receiving LO...

Page 106: ...GRI Chain secondary stations or offsets have been changed since the waypoint was created the waypoint will now reference the active GRI chain and secondary stations and adjust the TD coordinates acco...

Page 107: ...o additional proximity waypoints can be saved Proximity Radius Overlaps Two proximity points overlap Route Already Exists A route already has this same name Route Memory Full No additional routes can...

Page 108: ...point on a route ETA at Destination Estimated Time of Arrival The estimated time you will reach your destination ETA at Next Estimated Time of Arrival The estimated time you will reach the next point...

Page 109: ...ped The length of time your vehicle has been stopped since the Trip Computer was reset Displayed as Stopped Trip Time Total The total time the unit has been tracking since the Trip Computer was reset...

Page 110: ...verse engineer or reduce to human readable form the Software or any part thereof or create any derivative works based on the Software You agree not to export or re export the Software to any country i...

Page 111: ...e above limitations may not apply to you Garmin retains the exclusive right to repair or replace the unit or software or offer a full refund of the purchase price at its sole discretion SUCH REMEDY SH...

Page 112: ...ion This equipment generates uses and can radiate radio frequen cy energy and may cause harmful interference to radio com munications if not installed and used in accordance with the instructions Howe...

Page 113: ...NAVIGATION CAUTION The electronic chart is an aid to navigation and is designed to facilitate the use of authorized government charts not replace them Only of cial government charts and notices to mar...

Page 114: ...ikely to impact it in a collision The mounting hard ware provided by Garmin is not warranted against collision damage or the consequences thereof Do not mount where driver s eld of vision is blocked D...

Page 115: ...Chain Number 97 Change Reference 18 Change the Name of the Route 34 Cigarette Lighter Adapter 2 City nd 20 Cleaning vi Clear Track Log 38 61 Compass Electronic 53 calibrate 7 icon 9 turn on and off 5...

Page 116: ...8 Fishing Information 69 Following an Automotive Route 46 47 Fuel Flow 36 Fuse 91 G Getting Started 1 Going to a Destination 41 42 43 45 46 47 home port 45 point 41 GPS learning about 94 status 5 GRI...

Page 117: ...NMEA 85 86 87 93 North Up 6 48 O Off Route Recalculating An nouncement 82 Odometer reset 61 Off Course Alarm 67 Off Road Mode 10 43 47 icon 9 On Screen Button 11 Open the Find Menu 16 Original Settin...

Page 118: ...i Sun Moon Page 59 Switch Modes 41 System Settings 75 81 T Text Language 77 Tide chart 57 information 57 page 61 Time 81 Timer Marine 54 55 User 65 Time Zone 81 Toll Roads 82 Tones 79 alarm clock 65 T...

Page 119: ...190 00507 00_0A indd 3 2 14 2005 3 34 03 PM...

Page 120: ...05 Garmin Ltd or its subsidiaries Garmin International Inc 1200 East 151st Street Olathe Kansas 66062 U S A Garmin Europe Ltd Unit 5 The Quadrangle Abbey Park Industrial Estate Romsey SO51 9DL U K Gar...

Reviews: