background image

12. 

The overall maintenance of this chainsaw, apart from the points specified in this 

manual and these maintenance instructions, must be carried out by an  
authorised customer service.

13. 

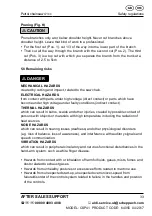
For transport and storage of the chainsaw, fit the blade cover to the chain bar.

14. 

Do not work with the chainsaw next to or in the presence of flammable liquids or 
gases, neither indoors nor outdoors. There is a risk of explosion and/or fire.

15. 

Do not fill with fuel, oil or lubricant when the chainsaw is running.

16. Only cut suitable material: 

Only cut timber. Do not use the chainsaw for work for which it is not suitable. Do 
not use the chainsaw for cutting plastic, masonry or building materials which are 
not made of wood, for example.

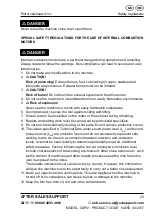
17. The power tool produces poisonous exhaust fumes as soon as the motor starts. 

Never work in closed or badly-ventilated rooms.

18. 

In order to locate significant damage or faults, it is necessary to inspect the 


machine before use and in case you drop it.

19. 

If liquid is spilled when filling the oil or fuel tank, the machine must be cleaned 

before use.

As a chainsaw user, you must follow several points in order to carry out your 

sawing work without accidents and injuries.

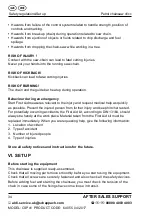
1.  A basic understanding of kickback can reduce or exclude the element of  

surprise. Sudden rash reactions can lead to accidents.

2.  When the motor is running, hold on to the saw tightly with both hands, with the 

right hand on the handle at the back and the left hand on the handle at the front. 

Thumbs and fingers must firmly clasp the chainsaw‘s handles. A secure hold 

helps you to absorb kickback and keep the saw under control. Do not let go.

3.  Ensure that the area where you are cutting is free from obstacles. The tip of the 

chain bar must not come in contact with tree trunks, branches and similar when 
cutting with the saw.

4.  Use a fast motor speed.
5.  Do not lean too far forwards and do not cut above your shoulder height.
6. 

Sharpen and maintain the chainsaw in accordance with the manufacturer‘s 


instructions.

7.  If the tool becomes jammed during cutting, it has to be turned off immediately 

and freed carefully. Afterwards, the machine has to be checked for damage  
(e.g. bent chain bar) and a test run has to be carried out.

20

AFTER SALES SUPPORT


[email protected]


00800 4003 4003

MODEL: CSP41  PRODUCT CODE:  64055  04/2017

 Safety regulations

Petrol chainsaw 41cc

Summary of Contents for CSP41

Page 1: ...are has gone into the manufacture of this product and it should therefore provide you with years of good service when used properly In the event of product failure within it s intended use over the co...

Page 2: ...Screwdriver 1 x Fuel mixing bottle 2 3 4 5 6 7 41cc 6 AFTER SALES SUPPORT aldi service uk scheppach com 00800 4003 4003 MODEL CSP41 PRODUCT CODE 64055 04 2017 4 1 UserManual 41cc Petrol Chainsaw Orig...

Page 3: ...Petrol chainsaw 41cc Utilisation AFTER SALES SUPPORT 7 00800 4003 4003 aldi service uk scheppach com MODEL CSP41 PRODUCT CODE 64055 04 2017 10 12 14 16 11 13 17 2 1 5 5 6 9 9 9 6 9 9 J H D E F G MIN M...

Page 4: ...SALES SUPPORT aldi service uk scheppach com 00800 4003 4003 MODEL CSP41 PRODUCT CODE 64055 04 2017 18 20 22 24 19 25 21 23 1 2 I 0 17 17 17 10 10 19 6 Z1 M K L 6 7 11 10 Z2 Utilisation Petrol chainsa...

Page 5: ...AFTER SALES SUPPORT 9 00800 4003 4003 aldi service uk scheppach com MODEL CSP41 PRODUCT CODE 64055 04 2017 27 28 29 26 30 5 Petrol chainsaw 41cc Utilisation...
Page 6: ...weiter Schnitt Erster Schnitt auf belasteter Stammseite Erster Schnitt auf der belasteten Stammseite Zweiter Schnitt Pos 2 Pos 1 Pos 2 F 10 AFTER SALES SUPPORT aldi service uk scheppach com 00800 4003...

Page 7: ...os 2 Pos 3 Pos 1 Pos 3 Pos 2 K 1 Schnitt 2 Schnitt Mit St tzbock 1 Schnitt 2 Schnitt Pos 1 Pos 1 Pos 2 Pos 2 Pos 1 Pos 1 Pos 2 Pos 2 H AFTER SALES SUPPORT 11 00800 4003 4003 aldi service uk scheppach...

Page 8: ...on skid safety shoes with cut protection when using this product It is important you wear the protection clothing for feet legs hands and forearms Explanation of symbols The use of symbols in this man...

Page 9: ...Installation direction of chain Guaranteed sound power level of the device Declaration of conformity see chapter Declaration of conformity Products marked with this symbol meet all applicable Communi...

Page 10: ...y only be operated by persons with appropriate training and risk education participation certificate of chainsaw training course with country typical training standard Preserve this manual carefully 1...

Page 11: ...perating instructions contain important notes on how to work safely properly and economically with your machine and how to avoid dangers save repair costs reduce downtime and increase the reliability...

Page 12: ...ard 17 Choke carburettor setting 18 Bar fastening knob lever 19 Throttle lever 20 Chain catch 21 Fuel mixing bottle 22 Spark plug spanner 23 Fuel pump primer bubble 24 Original operating safety instru...

Page 13: ...ng The manufacturer cannot be held liable for damage caused by improper or incorrect usage DO NOT operate a chainsaw whilst working in a tree The machine is to be used only for its prescribed purpose...

Page 14: ...this sign m The user manual also contains other important text marked with the word CAUTION m CAUTION When using machines safety measures must be complied with in order to prevent injury and damage Th...

Page 15: ...ling tree 4 Before starting the chainsaw make sure it is not in contact with any objects 5 Carry the chainsaw only when the motor has stopped running the blade cover is on the chain bar and the exhaus...

Page 16: ...insaw user you must follow several points in order to carry out your sawing work without accidents and injuries 1 A basic understanding of kickback can reduce or exclude the element of surprise Sudden...

Page 17: ...ned for occasional use by home owners garden owners and campers for general work such as clearing cutting firewood etc It is not intended for longer work During longer work because of vibrations there...

Page 18: ...the fuel tank filler cap or refill with petrol while the motor is running or when it is still hot 5 When fuel has been spilled do not start the motor but remove the machine from the area of the spille...

Page 19: ...o not touch mechanically moving or hot parts Do not remove protective covers 10 The values specified in Technical Data under sound power level LwA and sound pressure level LpA are emission levels and...

Page 20: ...due to kickback by stopping a moving saw chain in milliseconds It is activated by the CHAIN BRAKE LEVER 11 SAFETY LOCK prevents accidental acceleration of the engine Throttle lever 19 cannot be squeez...

Page 21: ...likelihood of accidentally touching the running saw chain Follow the instructions for lubrication chain tension and replacement of accessories An improperly tensioned or lubricated chain can either br...

Page 22: ...ction of depth limiters increases kickback tendency m WARNING Beware of the following Rotary recoil Fig 28 A Recoil distance B Recoil reaction zone Impact Jamming recoil and pulling reactions Fig 29 A...

Page 23: ...ce outdoors m WARNING Improper maintenance or non compliance or not resolving a problem can become a hazard during operation Only ever work with machines that have been serviced regularly and properly...

Page 24: ...t downwards pressure 8 Release the throttle as soon as you have finished your work so the motor runs idle If you let the machine run at full throttle without load there will be unnecessary wear and te...

Page 25: ...Remove dirt stones loose bark nails brackets and wire from the sawing area m Ensure you have a free escape route Fig A Position 1 Escape route Position 2 Falling direction of the tree Felling of large...

Page 26: ...our saw Beware especially of partly felled trees which are not supported If a tree does not fall down completely remove the saw and help the process along with a cable winch a pulley or a towing vehic...

Page 27: ...ely to control the device The saw will push backwards in your direction m CAUTION Never hold the saw the wrong way round for an undercut You do not have control of the device in this position Always m...

Page 28: ...cularly applies to bent or loaded branches Avoid coming in contact with the branch or the saw when the tension on the wood is released Keep your working area clear Clear the path of branches so you do...

Page 29: ...ible contact of persons with objects or materials with high temperature including the radiation of heat sources NOISE HAZARDS which can result in hearing losses deafness and other physiological disord...

Page 30: ...keep him her rested For potentially occurring accidents the First Aid kit according to DIN 13164 should always be handy at the work place Material taken from the First Aid kit must be replaced immedi...

Page 31: ...the bar still upwards tighten the bar fastening wheel Fig 9 pos 18 The chain is correctly tensioned when it is closely seated and can be pulled right around by hand when the chain brake 5 is released...

Page 32: ...provide the intended measure of protection if the saw is operated carelessly Always test the chain brake before using your saw and periodically while on the job See below for details of how to perform...

Page 33: ...luding oxygenated petrols It is recommended to use unleaded petrol as fuel Lubrication of chain and chain bar Whenever you refill the fuel tank with petrol you must also top up the level of chain oil...

Page 34: ...th the relevant mixture of petrol and oil Fig 21 and also top up the chain oil Fig 21 See the section Fuel and oil Disengage the chain brake 1 Switch the stop switch to 0 OFF Fig 19 2 Pull the choke 1...

Page 35: ...will wear away faster Always hold the starter cable when the starter line retracts Starting the engine when warm The equipment has been idle for less than 15 20min Fill up the fuel tank with the relev...

Page 36: ...into the DISENGAGED position Fig 11 2 Extend the lever on the Bar fastening knob Fig 9 pos 18 completely un screw COUNTERCLOCKWISE Fig 9 Then remove the complete side cover Complete any necessary rep...

Page 37: ...n is closely seated Make sure that all the drive links are in the groove of the bar Align the chain bar such that the TANG fits into the hole in the chain bar shown in figure 7 Align the Chain brake l...

Page 38: ...cribed in this manual may only be carried out by authorised after sales service personnel Chain brake operational test Test the chain brake periodically to ensure proper function Perform a chain brake...

Page 39: ...the Stop switch is set to Stop 0 2 Remove the top cover Fig 12 pos 9 by removing the clips on the cover as shown in figure 12 You can then remove the cover Fig 13 pos 9 3 Disconnect the spark plug bo...

Page 40: ...ean it If the filter is damaged dispose of it and replace it with a new filter 8 Insert the end of the cleaned new filter onto the fuel pipe Place one end of the filter into the tank opening Make sure...

Page 41: ...f performance m NOTICE The sprocket tip on your new saw has been pre lubricated at the factory Failure to lubricate the guide bar sprocket tip as explained below will result in poor performance and se...

Page 42: ...quare up the rails using a flat file Not supplied m CAUTION Never fit a new chain to a worn chain bar Oil passages Oil passages on the bar should be cleaned to ensure proper lubrication of the bar and...

Page 43: ...hat cutters are sharpened at the correct angle and depth For the inexperienced chainsaw user we recommend that the saw chain be professionally sharpened by the nearest professional Service Centre If y...

Page 44: ...91P ca 4 0 mm 30 0 80 0 64 mm depth stop file CHAIN MAINTENANCE CONTINUED Chain tension Check the chain tension frequently and adjust as often as necessary to keep the chain snug on the bar but loose...

Page 45: ...ing the saw dry or with too little oil will decrease cutting efficiency shorten saw chain life cause rapid dulling of chain and lead to excessive wear of bar from overheating Too little oil is evidenc...

Page 46: ...Service and clean the appliance regularly Adapt your working style to suit the appliance Do not overload the appliance Have the appliance serviced whenever necessary Switch the appliance off when it...

Page 47: ...ied combined spark plug wrench screwdriver 5 Add one teaspoon of 2 stroke engine oil into the combustion chamber 6 Slowly pull the starter cord several times to apply a layer of oil to all internal pa...

Page 48: ...lection point you should ask in your local council offices XIV TROUBLESHOOTING The table below contains a list of fault symptoms and explains what you can do to remedy the problem if your equipment fa...

Page 49: ...gapped spark plug Clean gap or replace plug Runs erratically Incorrect carburettor mixture adjustment setting Have carburettor adjusted by an Authorized Service Center Smokes excessively Incorrect fue...

Page 50: ...hain bar Saw chain oil Motor oil Spiked bumper Chain catcher Spark plug Air filter Fuel filter Saw chain oil filter Not necessarily included in the scope of delivery Admitted saw chain and chain bar c...

Page 51: ...liecina du saska ar ES direkt vu atbilst bas un standarti du rakstu NL verklaart hierbij dat het volgende artikel voldoet aan de daarop betrekking hebbende EG richtlijnen en normen RUS PT declara o se...

Page 52: ...facturer you are requested to return the faulty product please return the completed warranty card together with it GreatStar Europe Unit 55 Romsey Industrial Estate Romsey Hampshire SO51 0HR United Ki...

Page 53: ...he product with all components included in the packaging The warranty does not cover damage caused by Accident or unanticipated events e g lightning water fire Improper use or transport Disregard of t...

Reviews: