Galvanic Applied Sciences 962-AGX Operation Manual Download Page 61


Revision 1 

61 

9/10/2019 

5.5  Help Section  


5.5.1  Drawings 


A number of assembly drawings are included in the application program. These are 

reproduced as Chapter 9 of this manual.  


5.5.2  User Manual 


This manual can be accessed via the 

User Manual

 page 


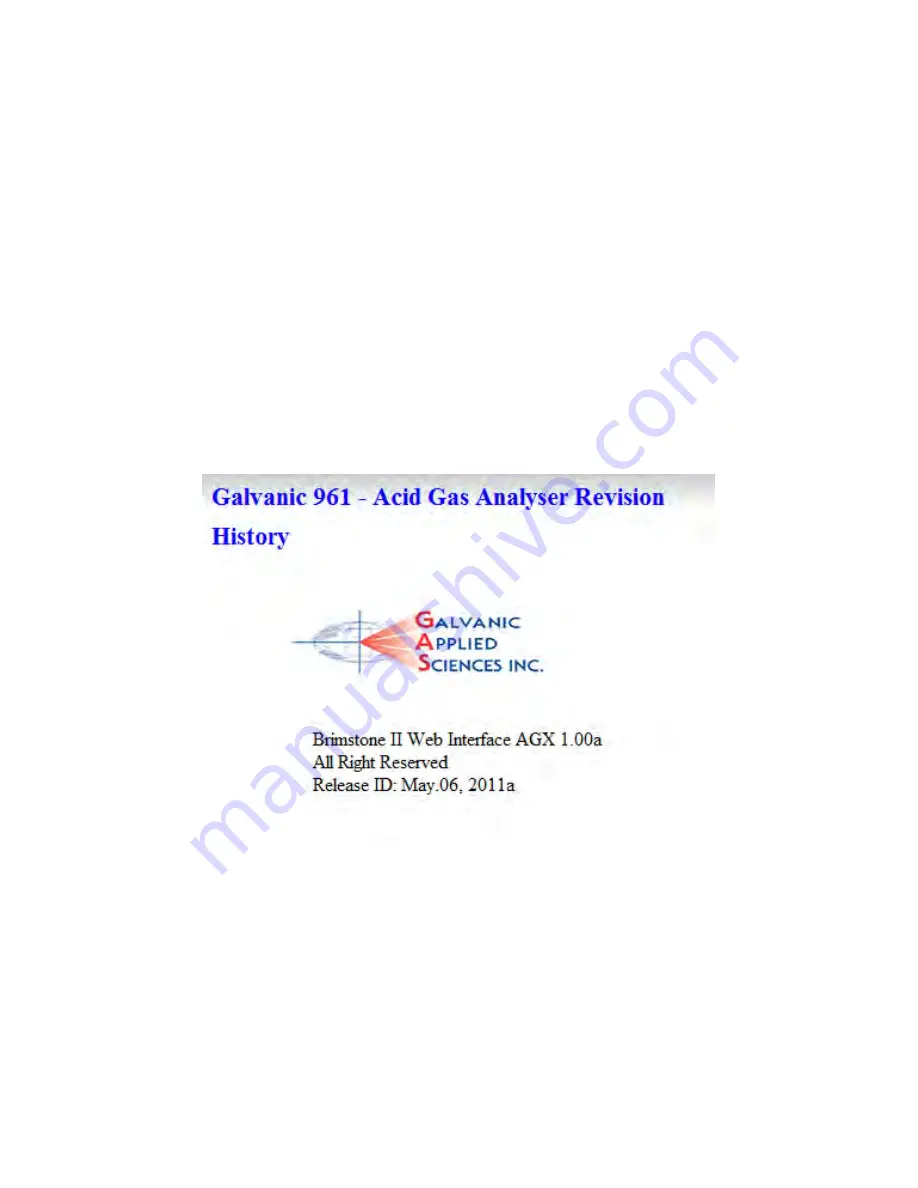
5.5.3  Revision History  


The 

Revision History

 page (Figure 5-15) presents the release ID number of the software. 

Please refer to it when making inquiries about the system.  


Figure 5-15: Revision History 


Summary of Contents for 962-AGX

Page 1: ...Acid Gas Analysis OPERATION MANUAL P N MA7429 Revision 2 April 30 2012 Galvanic Applied Sciences Inc 7000 Fisher Road S E Calgary Alberta T2H 0W3 Canada Phone 403 252 8470 Fax 403 255 6287 E mail info...

Page 2: ...his manual is subject to change without notice and does not represent a commitment on the part of Galvanic Applied Sciences Inc No part of this manual may be reproduced or transmitted in any form or b...

Page 3: ...f the AC Power Service 18 2 4 4 Connection of the Analog Signal Cables 19 2 4 5 Connection of the Digital Signal Cables 19 2 4 6 Connection of Instrument Air Services 19 2 4 7 Connection of the Zero G...

Page 4: ...age 49 5 2 3 Indicators Page 50 5 2 4 Spectrum Curve Page 51 5 2 5 Absorbance 52 5 3 PARAMETERS SECTION 54 5 3 1 Parameters 54 5 3 2 Modbus 55 5 3 2 1 Overview 55 5 3 2 2 The Enron Modbus Protocol 58...

Page 5: ...NCE PROGRAM 83 8 1 OVERVIEW 83 8 2 OVERALL SYSTEM IDENTIFICATION 83 8 3 QA DOCUMENT PACKAGE CHECK LIST AND REQUIREMENTS 84 SECTION 9 DRAWINGS 85 SECTION 10 SPECIFICATIONS 91 SECTION 11 RECOMMENDED SPA...

Page 6: ...ING PARAMETERS 63 TABLE 6 2 MAINTENANCE RECORD SHEET 65 TABLE 7 1 ANALYZER FAULT TABLE 72 TABLE 7 2 ADDITIONAL SERVICE RELATED OBSERVATIONS 73 TABLE 8 1 DOCUMENT PACKAGE CHECK LIST 84 TABLE 11 1 ONE Y...

Page 7: ...The Warning symbol indicates a hazardous situation that if not avoided could result in death or serious injury The Caution symbol with the safety alert symbol indicates a hazardous situation that if...

Page 8: ...ggested procedures This system when operating in its normal mode and or when it is being serviced maintained installed and commissioned contains items which may be hazardous to humans if handled or op...

Page 9: ...that generates intense UV radiation that is transmitted to the measurement cell and spectrometer through fibre optic cables This radiation is extremely harmful to the naked eye and skin even in short...

Page 10: ...ity transportation charges prepaid or accept the return of the defective Product and refund the purchase price paid by Buyer for that Product If requested by Buyer Seller will use its best efforts to...

Page 11: ...e processor or software or firmware will be uninterrupted or error free The warranty herein applies only to Products within the agreed country of original end destination Products transferred outside...

Page 12: ...o the spectrometer by a second fibre optic cable The CCD array converts the light into electrical signals which represent the intensity of the spectral distribution within the band of interest The spe...

Page 13: ...when no absorbing species are present To the sample system zeroing and back purging are identical A temperature controlled oven maintains all components exposed to the gas sample at higher than dew po...

Page 14: ...ection 5 System Control Web Based Operation describes how the user controls the system and views system parameters using a remote computer via the Internet Section 6 Maintenance describes a series of...

Page 15: ...is 110 220 V 1 phase 50 60 Hz 15 A The operating voltage is specified on the serial number name plate 2 2 2 Temperature The system is designed to be operated at ambient temperatures 10 50oC Galvanic...

Page 16: ...crate f Lay the analyzer system frame onto a structurally strong and level surface and inspect for any visual damage g Remove the plastic wrap from the analyzer system to gain access to the doors of t...

Page 17: ...of the Loss of Purge Signal Section 2 4 8 The user should read each step and make certain that it is fully understood before proceeding to installing the analyzer 2 4 1 Mounting of the Analyzer System...

Page 18: ...s Outlet Ensure that the analyzer vent system block valve is in the Off position before connecting the vent line The block valve is labeled Sample Outlet Shut Off Valve Refer to the Customer Connectio...

Page 19: ...ect to any or all of the available signals The signal cable pair shields should be connected to the ground terminals provided Installation of the conduit wiring and disconnect devices must comply with...

Page 20: ...nt control cabinet protective purge air flow as shown in the Figure 2 1 The user must connect the Loss of Purge Signal to a plant alarm system in a constantly attended area in order to maintain a Clas...

Page 21: ...flow initiation analysis on line calibration range sensitivity selection fault detection and oven temperature control Operators are alerted to an abnormal state or fault occurrence through indicators...

Page 22: ...orrosive element exposure on the system electrical equipment This adjustment must be performed with the Cabinet Cooler Air Valve closed Seventeen 17 minutes of normal purge air flow is required before...

Page 23: ...on is given the analyzer temperature zones and the spectrometer signal must be within the specific set point ranges This indicator will be in the Normal state only when ALL of the following are true T...

Page 24: ...signals When this indication is in the Auto state the analyzer believes that output data are real and current measurements of the tail gas process stream Under conditions where the validity of the ou...

Page 25: ...nel benefit from the knowledge of when a change in status occurs f The Control Cabinet Safe Purge Indication employs a contact switch indicating the status of the control cabinet purge This connection...

Page 26: ...ing the Onboard Display and Hand Held Keypad 4 2 1 The Onboard Display The main screen of the onboard display is presented in Figure 4 1 There are six panels which are accessed via pressing the Panel...

Page 27: ...2 is used to navigate between the various panels and enter information Figure 4 2 Hand Held Keypad The buttons on the keypad provide the following Panel Prev Changes the active panel to the previous p...

Page 28: ...in conjunction with the On Line Off Line button has been incorporated as a convenience to the user The On Line Off Line function essentially provides a method of signaling that the analyzer data is i...

Page 29: ...unction normally producing usable outputs c Mode Run Green status indicates that the system is in Run mode Calibrate Amber indicates that a zero calibrate sequence is in progress At the end of the cal...

Page 30: ...o value At this time the zero gas solenoid is de energized to allow sample gas to flood the cell d The analyzer waits for the number of seconds specified by the Zero Hold Interval parameter of the con...

Page 31: ...stantaneous readings for these parameters updated every second Figure 4 3 Analysis 2 Panel The default full scale values and the time scale can be set on the Config panel Section 4 8 using a range bet...

Page 32: ...the last 25 events are indicated on the grid A discussion of the causes and remedies for the faults is presented in Section 8 Green System is functioning within the accepted range Yellow System requir...

Page 33: ...ation time will optimize the resolution however the noise may be relatively high If a long integration period is employed the resolution may be compromised and small features in the spectrum may be lo...

Page 34: ...s to a spectrum of zero gas this was saved at the time of analyzer calibration at the factory If the Show Factory Reference check box is selected the spectrum will be superimposed on the same set of a...

Page 35: ...shooting purposes Peak Height Height of the highest point in the spectrum First Vector Pixel The instantaneous reading at the pixel corresponding to the starting wavelength Dark Level the signal from...

Page 36: ...ed only by qualified personnel 4 8 1 Config Outputs Sub Panel The Outputs sub panel Figure 4 9 is used to define the H2S analog output The Analog Output Full Scale field can be used to set the full sc...

Page 37: ...s used to set several calibration parameters Figure 4 10 Calculation Sub Panel To edit a parameter use the Field Prev or Field Next button to access the field and press Enter A dialog box similar to F...

Page 38: ...the x on and off in this field If the x is present the analyzer will use the temperature indicated here when calculating the concentration of the H2S If the x is not present the analyzer will use the...

Page 39: ...to access the field enter the desired value for the parameter via the keypad and press Enter The X range is from 1 15 min and the Y range is from 0 1 to 1000 When all desired changes have been made s...

Page 40: ...eter use the Field Prev or Field Next button to access the field A dialog box similar to Figure 4 6 will be presented Enter the desired value for the parameter via the keypad and press Enter When all...

Page 41: ...ation state after a new zero has been established During this time interval process sample gas flows into the measurement cell and the concentration outputs climb to actual readings At the expiration...

Page 42: ...lay outputs and Status indicator will return to Normal and the Control indicator will return to Auto This value is typically 40oC Low Aux This parameter specifies the set point temperature in degrees...

Page 43: ...Revision 1 43 9 10 2019 Figure 4 13 Network Sub Panel...

Page 44: ...the analyzer into the address line of any web browser Changes that are made via the Web GUI and saved to the analyzer will be shown on the local display When communication between the remote computer...

Page 45: ...ation an indication of the present system status the Sample Back Purge status the manual Zero controls and the status of various relays Figure 5 2 Analysis Page Information Display 5 2 1 1 Value Displ...

Page 46: ...rrection is required under normal circumstances on an installed analyzer The calibration sequence is identical whether trigger manually or automatically When triggered the calibration sequence proceed...

Page 47: ...en status indicates that service is not required Warning Red indicates that the computer has detected that one of the parameters for a warning condition is out of range This indicates that service is...

Page 48: ...ng can be changed Right click on the plot to present a dialog box Figure 5 4 in which the desired Ymin and Ymax can be entered The graphic display of the H2S concentration is updated once per second T...

Page 49: ...is replaced a new calibration matrix must be loaded onto the system computer Consult Galvanic Applied Sciences for the procedure The calibration matrix is a 9 x 530 element array used in conjunction w...

Page 50: ...ts The last 25 events are indicated on the grid and the most recent report is on the right side A discussion of the causes and remedies for the faults is presented in Section 7 2 Figure 5 6 Indicators...

Page 51: ...10 2019 5 2 4 Spectrum Curve Page The Spectrum Curve page Figure 5 7 displays the present spectrum and lets the operator change the integration time The spectrum data is updated every second Figure 5...

Page 52: ...solution may be compromised and small features in the spectrum may be lost however the noise in the spectrum is reduced The optimum integration time for the present set of conditions can be obtained b...

Page 53: ...n of the spectrum for viewing Use the mouse to define the region of the spectrum that is to be viewed If desired the operator can edit the Y by selecting the Change Absorbance Curve Display Y Axis but...

Page 54: ...dited Figure 5 9 Parameters Page When the page is opened the Read Only mode is active The pink background color groups all temperature related parameters The blue background color groups all concentra...

Page 55: ...eters to be implemented in the analyzer Pressing the Revert button before pressing the Save to Unit button will undo the edit 5 3 2 Modbus 5 3 2 1 Overview The Modbus page Figure 5 10 allows the user...

Page 56: ...list press Change to Update Mode to present a dialog box for the password After the password is entered the New Load and Save buttons will be activated To select a different Modbus type press New to...

Page 57: ...d they only apply to Modicon Modbus data In Modicon Modbus floating point numbers are transmitted in 2 16 bit words Endian Swap determines if the most significant bit is transmitted first or if the le...

Page 58: ...nodes on the Modbus tree They are Output Status Input Status Input Register and Output Register The Input and Output Status nodes contain Boolean data points Data points in the Input Status node are...

Page 59: ...ew value Some parameters such as Fixed Temperature Enable can be edited by using the pull down selection menu d Press Enter on the keyboard e Press the Save to Unit button This will cause the changed...

Page 60: ...Password dialog box will be presented as shown in Figure 5 12 Leave the Factory Password box unchecked c Enter the current operator password in the Enter Old Password field Enter the desired new pass...

Page 61: ...ogram These are reproduced as Chapter 9 of this manual 5 5 2 User Manual This manual can be accessed via the User Manual page 5 5 3 Revision History The Revision History page Figure 5 15 presents the...

Page 62: ...ers displayed on the front panel of the analyzer and verification of certain flow change of various gases and response changes on the analyzer Section 6 2 1 Weekly performance of the Maintenance Check...

Page 63: ...3 Fault Indicators Indicators Panel Low Cell Temperature Green Low Auxiliary Temperature Green High Oven Temperature Green Measure Range Green Reference Range Green Dark Range Green 4 Cell Temperature...

Page 64: ...This offset from zero will vary based on length of time since the last calibration cycle whether manual or automatic d Access the Spectrum panel Observe the raw scan signal and compare the shape of th...

Page 65: ...e 1 Initial Status Fault Condition Cell Temp Cabinet Temp Integration Period 2 Forced Zero Time to stabilize H 2 S Reading 3 Initial Raw Signal Peak Height Standard Shape Yes No 4 Spectrometer Signal...

Page 66: ...ach 32 000 counts the most probable cause is degraded Anti Solarant Solution Wear protective UV eye glasses at all times if the optical fibres are removed while the UV Source is powered up The control...

Page 67: ...lder to remove any air bubbles that may form Take care not to touch the Anti Solarant Solution directly as the oils from your hands will contaminate the solution i Replace the fluid holder filler plug...

Page 68: ...er signal the normal target value for the peak value is 32 000 counts 1 000 The spectrometer energy level can be optimized manually for special cases or automatically as a function of the analyzer The...

Page 69: ...Integration Period dialog box Type the new integration period in the New Value field and press Enter After several seconds the new raw signal will be displayed New values for the Integration Period c...

Page 70: ...zer For Service and or Assistance Contact Galvanic Applied Sciences Inc 7000 Fisher Road SE Calgary Alberta T2H 0W3 Canada Tel 403 252 8470 TOLL FREE CANADA US 1 866 252 8470 Fax 403 255 6287 Email in...

Page 71: ...Revision 1 71 9 10 2019 Figure 7 1 Indicators Panel The Analyzer Fault table is presented in Table 7 1 and a listing of some other issues that may be observed is presented in Table 7 2...

Page 72: ...Check ArcNet wiring Cabinet Temperature RTD problem Computer temperature control is malfunctioning Air supply to vortec cooler is turned off High Absorbance The H2S concentration is out of range The a...

Page 73: ...hwhile to wait for 15 20 minutes before restarting it If the lamp does not start after the cool down period it should be replaced as described below The normal lifespan of a UV Source Lamp is about si...

Page 74: ...e ACTS 28 or place the UV Lamp power switch to the Off position see Figure 7 2 for the location of the switch e Remove the UV Lamp Power Supply cabinet lid by removing the four 4 socket head cap screw...

Page 75: ...ic plugs m Reconnect the three 3 wires from the lamp to the terminal strip Connect Red to Red Blue to Blue and Black to Black If the lamp has two 2 black wires connect one of the Black wires to the Bl...

Page 76: ...rge field on the Analysis 1 page and pressing Enter to place an x in the box c Access the purged control cabinet following proper user company and or regulatory agency procedure The control cabinet do...

Page 77: ...ly pushing the fibre end into the SMA connector Hand tighten the nut l Route the fibre out of the oven making sure that the fibre is routed in the indents to avoid damage when the oven compartment cov...

Page 78: ...tenance tasks Procedure a Click the On Line Off Line switch to indicate that the system is Off Line b Place the analyzer in back purge mode This can be done by navigating to the Back Purge field on th...

Page 79: ...fibres have cooled k Loosen one of the cell tubing fittings to vent positive pressure zero gas that may be trapped in the sample system l To remove the measurement cell assembly disconnect the three...

Page 80: ...r 4 sided nut Leave the SMA fibre connector in place in the cell end cap body c Remove the top O ring If it is not on the cell window then it will be in the end cap O ring groove Discard if there is a...

Page 81: ...ection 7 8 7 8 Measurement Cell Installation Refer to the Flow Diagram the Sample System Components and the Measurement Cell Assembly drawings while performing these steps The measurement cell is to b...

Page 82: ...ontrol cabinet door o Access the Spectrum panel and optimize the spectrometer energy level by clicking on the Optimize Integ Time button p Return to the Analysis 1 panel and perform a Manual Zero by c...

Page 83: ...nufacturing specifications and is built to meet the customer s specific requirements This chapter consists of a number of forms which provide the overall QA procedure and should be retained 8 2 Overal...

Page 84: ...ecked Control Cabinet Type Z Purge System Checked Gas Runs Complete Calibration Data Sheet Temperature Sensor Inputs Checked and Calibrated Analog Output Calibration Checked Digital Output Checked Sys...

Page 85: ...ovided in this section These drawings can also be viewed on the Drawing page of the Help section of the remote software Figure 9 1 Customer Connections Figure 9 2 Analyzer Components Figure 9 3 Inputs...

Page 86: ...Revision 1 86 9 10 2019 Figure 9 1 Customer Connections...

Page 87: ...Revision 1 87 9 10 2019 Figure 9 2 Analyzer Components...

Page 88: ...Revision 1 88 9 10 2019 Figure 9 3 Inputs and Outputs...

Page 89: ...Revision 1 89 9 10 2019 Figure 9 4 AC Wiring Overview...

Page 90: ...Revision 1 90 9 10 2019 Figure 9 5 DC Wiring Overview...

Page 91: ...Sample Line Dependent Physical Specifications Size Mounted on Frame Outside Dimensions 57 L x 42 H x16 D 145 cm x 107 cm x 41 cm Weight 250 lbs 114 kg depending on options Control Cabinet 30 H x 24 W...

Page 92: ...xpedite maintenance and service procedures Spare Parts can be obtained from Galvanic Applied Sciences 7000 Fisher Road S E Calgary AB Canada T2H 0W3 Main 1 403 252 8470 TOLL FREE CANADA US 1 866 252 8...

Page 93: ...089 1 Pkg of 5 Fuse 1 5 Amp PC7090 1 Pkg of 5 Fuse 3 Amp PC7083 1 Pkg of 5 Fuse 5 Amp Slo Blo PC7087 1 Pkg of 5 Table 11 2 Two Year Kit 120 V Analyzer Item Description Part Number Quantity Unit of Mea...

Page 94: ...enter http 123 456 789 123 12345 userio htm The Peripheral Board menu includes the following two tabs The Status tab Section 1 2 presents the status of the analog and digital inputs and outputs The M...

Page 95: ...nd red if the system is off line The Relays Solenoids and Digital Inputs LEDs are red if the function is active and gray if the function is not active The On Board Temperature field provides the tempe...

Page 96: ...l control of the outputs place a checkmark in the Direct Peripheral Board Control check box This tab allows the operator to make changes to the peripheral board of the instrument Any change will perma...

Page 97: ...may not read exactly 4 e Enter the reading from the meter in the Meter Reading field and press the Auto Cal button This will adjust the Zero output to exactly 4 mA The raw value can be entered manuall...

Page 98: ...l input d When the discrete input is open the Digital Input indicator on the Status page will be grey not active e When the discrete input is closed the Digital Input indicator on the Status page will...

Page 99: ...Prop Band 44 Cell Setpoint 44 Cell Windows Replacement 83 Check Out Procedure 67 Config Outputs 39 Config Panel 39 Connection of AC Power 20 Control 49 Control Cabinet Safe Purge Indication 27 Control...

Page 100: ...ap 60 Relay Indicator Fields 32 50 Revision History 64 Routine Maintenance 65 S Safety Guidelines 8 Safety Symbols 7 Sample 49 Sample Line Connections 20 Sample Return Line Connections 20 Sample Syste...

Reviews: