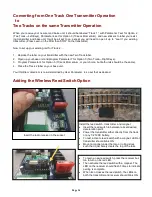
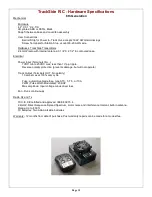
background image


Page 12 

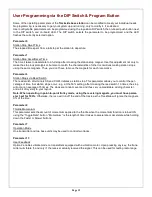
User Programming via the DIP Switch & Program Button 

 
Some of the operating parameters of the 

Trackside base station

 can be modified to meet your individual needs. 

No programming is necessary to get your system up and running, only to modify it, if so desired.  
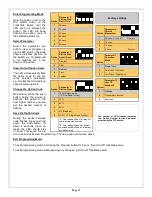
User configurable parameters can be programmed using the 4-position DIP switch, the on-board push-button next 
to  the  DIP  switch,  and  on-board  LED.  The  DIP  switch  selects  the  parameter  to  be  programmed,  and  the  LED 
flashes the currently selected option. 

 
Parameter 0  

Station Stop Dwell Time 
The elapsed time spent from a full stop at the station to departure. 
 

Parameter 1 

Station Stop Accel/Decel Time 
The time it takes to decelerate to a full stop after crossing the station stop magnet. Use this adjustment not only to 
make the stop look prototypical, but also to match the characteristics of other locomotives making station stops 
using the same magnets. Thus, you don’t have to move the magnets for each locomotive. 
 

Parameter 3 

Station Stops via Reed Switch 
The reed switch at terminals SS and COM, initiates a station stop. This parameter allows you to control the per-
centage of time, that station stops occur;. e.g. at the 50% setting, after crossing the reed switch 10 times, the stop 
will occur an average of 5 times. The stops are random events, and thus very unpredictable, adding character, 
and a bit of mystery to your layout. 

Note: When operating in point-to-point trolley mode, using the reversing magnets, you must have param-
eter 3 set for 100%. 

Otherwise, the loco will run off the end of the track, as the TrackSide will ignore the magnets 

X% of the time.  
 

Parameter 4 

Throttle Momentum 
This parameter sets the amount of momentum applied to the throttle when the momentum function is turned ON 
using the “Toggle Rate” button. “Momentum” is the length of time it takes to accelerate or decelerate while holding 
down the Faster or Slower buttons. 
 

Parameter 7 

Operation Mode 
One transmitter and two base units may be used to control two tracks. 
 

Parameter 13 

User Feedback 
Option 2 enables vibrate mode on transmitters equipped with a vibration motor. Upon pressing any key, the trans-
mitter will vibrate if, and only if, the receiver actually received the signal. This can be used for testing radio range. 


Summary of Contents for TrackSide

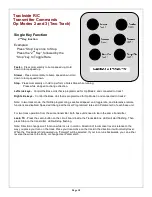
Page 1: ...vision C Updated 6 1 2021 Operation and Installation Manual G Scale Graphics 5860 Crooked Stick Dr Windsor CO 80550 970 581 3567 GScaleGraphics comcast net www GScaleGraphics net Revision K Updated 6...

Page 2: ...e TrackSide R C Control Board 4 Installation 5 Automated Station Stops 6 Operation 7 Transmitter Command Summary 9 Trouble Shooting 11 User Programming 12 Two Track Operation 14 Adding Wireless Reed S...

Page 3: ...can pass up to 10 amps of current from the power supply to your track That is more than enough to handle one or more locomotives pulling a full train Typical current draw for one locomotive motor is a...

Page 4: ...of track The TrackSide R C Control Board The TrackSide base station houses a circuit board which is a combination control board and radio transceiver Transmitter commands control a powerful and silen...

Page 5: ...assumed that power to the system will be switched on off at the power supply Any DC power supply with a regulated output between 7 and 25 VDC will work Bridgewerks and Crest Switching power supplies a...

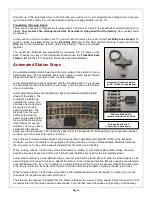
Page 6: ...tion The distance from the reed switch to the stop de pends on the speed of the loco and the station stop decel rate set in user pa rameter 1 Once you have established the desired setup save the loco...

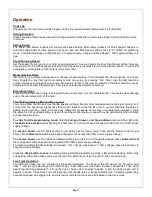
Page 7: ...less than what it takes to make the loco move you will eliminate the delay in getting the loco moving Note All locos have different min speeds so this may only useful when always running the same loco...

Page 8: ...ck radio range You will likely not want to use this all the time to save TX batteries This func tion can be activated using User programming parameter 13 Fuses If you are blowing fuses due to derailme...

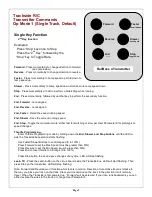
Page 9: ...ming Enter Throttle Programming mode by holding down the 2nd Slower and Stop buttons until the LED in side the Trackside base station starts flashing Use Faster Slower Buttons to control speed 0 to 10...

Page 10: ...two track mode the throttle programming save recall speed and toggle rate and interactive remote functions are disabled Speed will change at the User Programmed rate set in Parameter 0 of each base un...

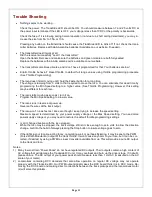
Page 11: ...peed setting to a lower value The locos runs in reverse at power up Reverse the wires at the track output The loco won t run as fast as I like even though I keep trying to increase the speed setting M...

Page 12: ...ed switch at terminals SS and COM initiates a station stop This parameter allows you to control the per centage of time that station stops occur e g at the 50 setting after crossing the reed switch 10...

Page 13: ...gramming The new option will now be active Exit Programming Mode To exit programming mode hold down the Program button for 5 secs then turn off TrackSide power To exit programming mode without saving...

Page 14: ...s Momentum or your choice but both units should be the same 4 Place the Track 2 label on your base unit Your throttle momentum is now determined by User Parameter 4 so set that as desired Adding the W...

Page 15: ...als IN 7VDC min to 25VDC max less than 1V p p ripple Reverse polarity protection prevents damage but will not operate Track Output Terminals OUT No polarity 10 amps max at 100 duty cycle Fuse automoti...

Page 16: ...side of the power supply for 115 VAC U S Output voltage should be 24 VDC maximum for use with the G Scale Graphics Trackside R C or Track Throttle But no adjustment should be necessary as received Cr...

Reviews: