Brocade Gen5 6545 16-Gbps FC Switch Module Hardware Reference Manual
25
53-1003184-01
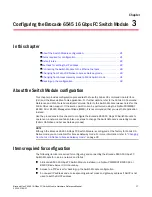
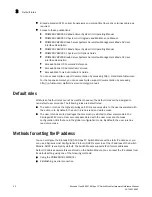
Methods for setting the IP address
3
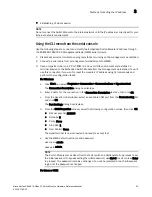
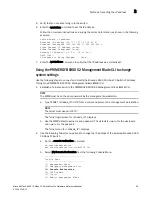
5. Verify that you are able to log in to the switch.
6. Enter the ipAddrSet command to set the IP address.
Follow the on-screen instructions and supply the correct information, as shown in the following
example:
switch:admin > ipaddrset
Ethernet IP address [10.77.77.77]:10.32.53.47
Ethernet Subnetmask [255.255.255.0]:255.255.240.0
Fibre Channel IP Address [none]:
Fibre Channel Subnetmask [none]:
Gateway IP Address [0.0.0.0]: 10.32.48.1
DHCP [Off]:
IP address is being changed ... Done.
7. Enter the ipAddrShow command to verify that the IP address was correctly set.
Using the PRIMERGY BX900 S2 Management Blade CLI to change
system settings
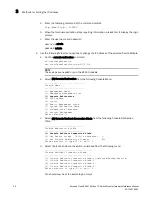
Use the following steps to connect and modify the Brocade 6545 16 Gbps FC Switch IP address
through the PRIMERGY BX900 S2 Management Blade (MMB) CLI.
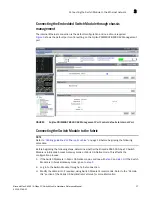
1. Establish a Telnet session to the PRIMERGY BX900 S2 Management Blade (MMB) CLI.
NOTE
The MMB must be on the same network as the management workstation.
a. Type TELNET <
chassis_IP
> 3172 from a command prompt on a management workstation.
NOTE
The telnet must use port 3172.
The Telnet login screen for <
chassis_IP
> displays.
b. Use the MMB default username and password. The default is
admin
for the username
and
admin
for the password.
The Telnet menu for <
chassis_IP
> displays.
2. Use the following Telnet menu options to change the IP address of the selected Brocade 6545
16 Gbps FC Switch.
a. Run the console redirection command.
cd consoleredirection
set consoleredirectionto=cb<SLOT ID>
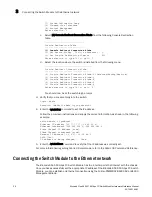
b. Select (3) Console Redirection from the following Console Menu.
--------------------------------
Console Menu
--------------------------------
(1) Management Agent
(2) Emergency Management Port
(3) Console Redirection
(4) TFTP update
(5) Logout
(6) Reboot Management Blade

