14
1
Bef
o
re
Y
ou
Beg
in
Using the Menus
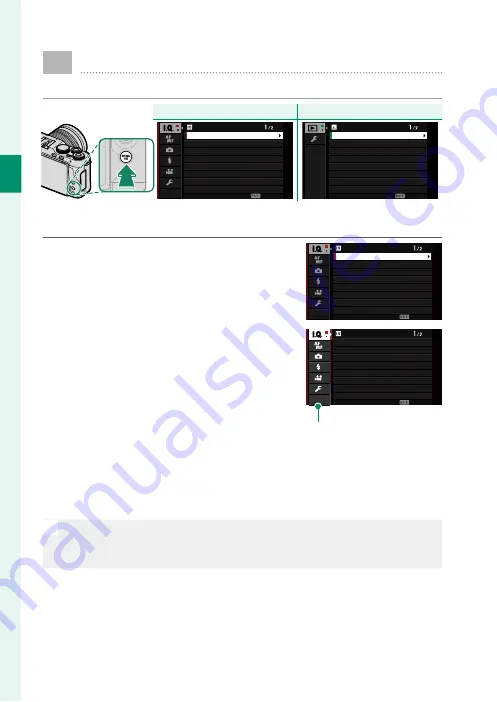
To display the menus, press
MENU/OK
.
Shooting
Shooting
Playback
Playback
IMAGE QUALITY SETTING
EXIT
IMAGE QUALITY
FILM SIMULATION
PORTRAIT ENHANCER LV
BRIGHT MODE
DYNAMIC RANGE
WHITE BALANCE
HIGHLIGHT TONE
IMAGE SIZE
PLAY BACK MENU
EXIT
ERASE
CROP
RESIZE
PROTECT
IMAGE ROTATE
RED EYE REMOVAL
IMAGE TRANSFER ORDER
RAW CONVERSION
To navigate the menus:
1
Press
MENU/OK
to display the menus.
IMAGE QUALITY SETTING
EXIT
IMAGE QUALITY
FILM SIMULATION
PORTRAIT ENHANCER LV
BRIGHT MODE
DYNAMIC RANGE
WHITE BALANCE
HIGHLIGHT TONE
IMAGE SIZE
2
Press the focus stick (focus lever) left
to highlight the tab for the current
menu.
IMAGE QUALITY SETTING
EXIT
IMAGE QUALITY
FILM SIMULATION
PORTRAIT ENHANCER LV
BRIGHT MODE
DYNAMIC RANGE
WHITE BALANCE
HIGHLIGHT TONE
IMAGE SIZE
Tab
3
Press the focus stick up or down to highlight the tab (
H
,
G
,
A
,
F
,
B
,
C
or
D
) containing the desired item.
4
Press the focus stick right to place the cursor in the menu.
N
•
You can also navigate the menus using touch controls.
•
Use the front command dial to select menu tabs or page through
menus and the rear command dial to highlight menu items.
Summary of Contents for X-A7
Page 1: ...Owner s Manual BL00005018 201 EN ...
Page 18: ...xviii MEMO ...
Page 19: ...1 Before You Begin ...
Page 37: ...19 First Steps ...
Page 51: ...33 Basic Photography and Playback ...
Page 56: ...38 MEMO ...
Page 57: ...39 Movie Recording and Playback ...
Page 63: ...45 Taking Photographs ...
Page 109: ...91 The Shooting Menus ...
Page 147: ...129 Playback and the Playback Menu ...
Page 169: ...151 The Setup Menus ...
Page 191: ...173 Shortcuts ...
Page 198: ...180 MEMO ...
Page 199: ...181 Peripherals and Optional Accessories ...
Page 205: ...187 Connections ...
Page 217: ...199 Technical Notes ...


