background image

8

1. General

FinePix S5200/S5600 Service Manual

System

White balance

Automatic scene recognition/Preset (Fine, Shade, Fluorescent (Daylight), Fluorescent
(Warm White), Fluorescent (Cool White), Incandescent)/Custom

Self-timer

Approx. 10 sec./2 sec.

Flash type

Popping the flash up automatically
Effective range (AUTO): Wide-angle: approx. 30 cm-4 m (1.0 ft.-13.1 ft.)

        Telephoto: approx. 80 cm-4 m (2.6 ft.-13.1 ft.)

Flash mode

Auto, Red-Eye Reduction, Forced Flash, Suppressed Flash,
Slow Synchro, Red-Eye Red Slow Synchro

Viewfinder

0.33 inches, 115,000 pixels electronic viewfinder, Approx. 100 % coverage

LCD monitor

1.8 inches, Aspect ratio: 4:3; approx. 115,000 pixels TFT color LCD monitor,
Approx. 100% coverage

Movie

640 

×

 480 pixels/320 

×

 240 pixels (

/

)

(30 frames per second with monaural sound)
A series of continuous image can be recorded up to available recording time per xD-
Picture Card. Zoom cannot be used during movie recording.

Photography functions

Post shot assist window, High-speed shooting, Best framing,
Frame No. memory

Playback functions

Trimming, Image rotate, Automatic playback, Multi-frame playback,
Sorting by date, Histograms (Highlight warning), Voice memo

Other functions

PictBridge, Exif print, PRINT Image Matching II, Language (English, Francais, Deutsch,

, Italiano, 

), Time difference, FinePix photo mode ( -mode)

Input/Output Terminals

A/V OUT

NTSC/PAL-type (with monaural sound)

 (Audio/Visual output)

Digital input/output

USB2.0 High-Speed

DC input socket

AC-5VX/AC-5VH/AC-5VHS (sold separately)

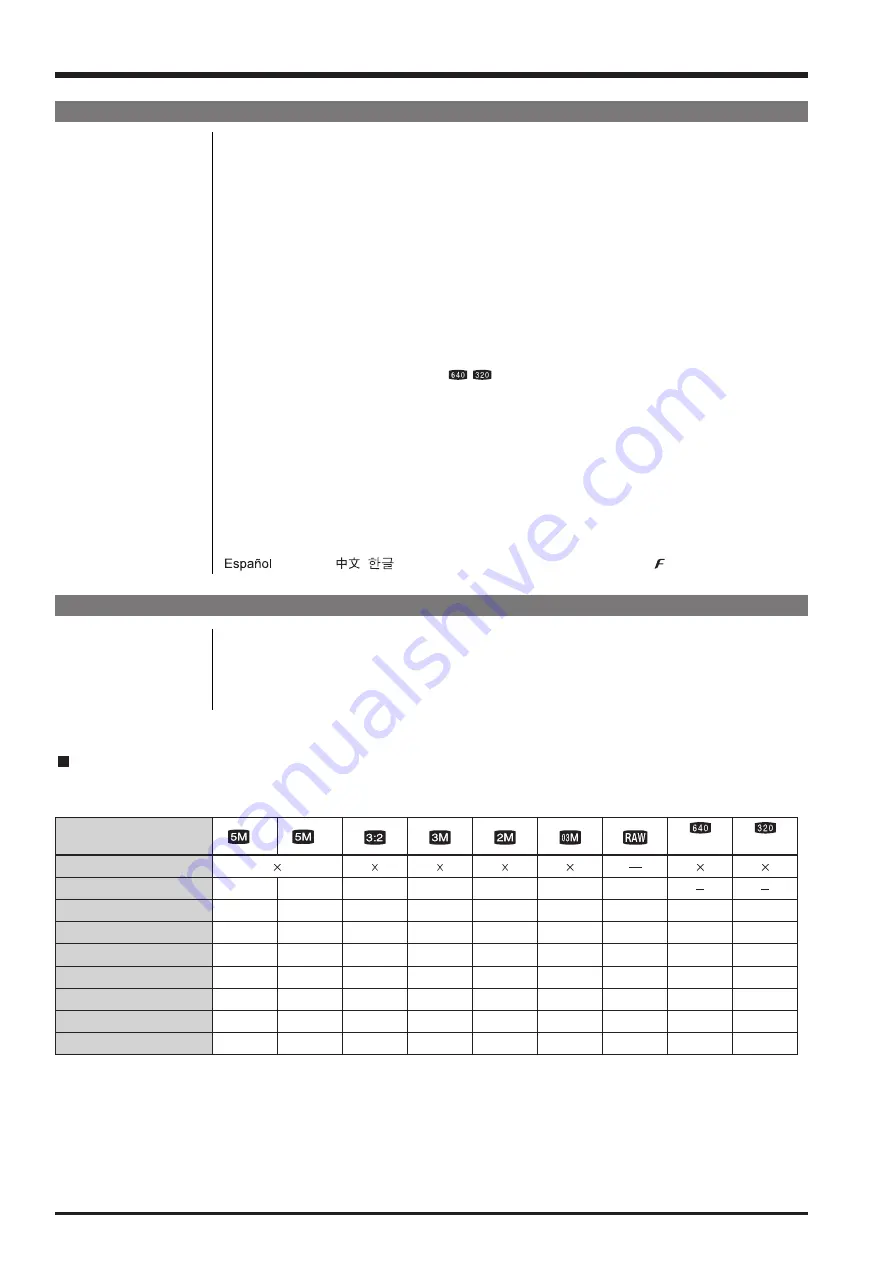
Quality setting

DPC-16 (16 MB)

DPC-32 (32 MB)

DPC-64 (64 MB)

DPC-128 (128 MB)

DPC-256 (256 MB)

Image data size

Number of recorded pixels

F

2592

1944

2736 1824 2048 1536 1600 1200 640

480

640

480 320

240

N

(30 fps)

(30 fps)

6

12

25

51

102

2.5 MB

DPC-512/M512 (512 MB)

DPC-M1GB (1 GB)

205

412

12

25

50

102

204

1.3 MB

409

819

12

25

51

103

207

1.3 MB

414

830

19

40

81

162

325

780 KB

651

1305

25

50

101

204

409

630 KB

818

1639

122

247

497

997

1997

130 KB

3993

7995

1

2

5

11

23

11 MB

46

92

13 sec.

27 sec.

55 sec.

111 sec.

223 sec.

7.4 min.

14.9 min.

26 sec.

54 sec.

109 sec.

219 sec.

7.3 min.

14.6 min.

29.3 min.

Standard number of available frames/recording time per xD-Picture Card

The number of available frames, recording time or file size varies slightly depending on the subjects photographed. Note also
that the divergence between standard number of frames and the actual number of frames is greater for 
xD-Picture Card s with higher capacities.

Summary of Contents for FinePix S5200

Page 1: ... YOU USE PARTS NOT SPECIFIED IT MAY RESULT IN A FIRE AND AN ELECTRICAL SHOCK FUJI PHOTO FILM CO LTD Ref No ZM00608 100 Printed in Japan 2005 09 DIGITAL CAMERA FinePix S5200 S5600 US CA EU EG EE AS CH JP Model SERVICE MANUAL WARNING BECAUSE THIS PRODUCTIS RoHS LEAD FREE COMPLIANT USE THE DESIG NATED AFTER SELES PARTS AND THE DESIGNATED LEAD FREE SOLDER WHEN PERFORMING REPAIRS Refer to page 3 to pag...

Page 2: ...oldered connections Check the entire board surface for solder splasher and bridges 2 Check the interboard wiring to ensure that no wires are pinched or contact high wattage resistors 3 Look for unauthorized replacement parts particularly transistors that were installed during a previous repair Point them out to the customer and recommend their replacement 4 Look for parts which though functioning ...

Page 3: ...epairs use a designated lead free solder bearing in mind the differing work practices for conventional solder eutectic and lead free solder Differences in the soldering work for lead free and eutectic solder When the soldering work practices for eutectic solder and lead free solder are compared the main differences are as shown below In particular when lead free solder is used the solder tends to ...

Page 4: ...ure The correct bonding temperature refers not to the temperature of the heat source but to the bonding temperature that will give the best bond strength Precautions when soldering with lead free solder Soldering iron maintenance Because of the high soldering iron temperature in lead free soldering there is rapid carbonization of the flux adhering to the tip of the soldering iron 1 Always cover th...

Page 5: ... symbol SnAgCu Solder wire thread Use the lead free solders specified below Solder type Sn96 5Ag3Cu0 5 Displayed symbol SnAgCu Wire diameter 0 6 0 8 or 1 0 mm Sample Flux Conventional flux can be used Solder application wires mesh wicking wire etc Conventional application wires can be used ...

Page 6: ...B ASSY 56 3 7 9 MAIN PWB ASSY 58 3 7 10 XE PWB ASSY 60 4 Adjustments 61 4 1 Important point Adjustment when Replacing Major Parts 61 4 2 Measuring Instruments Used 61 4 3 Use Jig list 61 4 4 Calibration method of pattern box 62 4 5 Adjustment software installation 62 4 5 1 Various downloading software decompressions preservation methods and notes 62 4 5 2 Installation of DSC jig driver 63 4 5 3 Ad...

Page 7: ... approx 2 m 6 6 ft to infinity Telephoto approx 2 m 6 6 ft to infinity In High speed shooting mode approx 4 m 13 1 ft to infinity Macro Wide angle approx 10 cm 3 9 in to 2 m 6 6 ft In High speed shooting mode approx 10 cm 3 9 in to 2 m 6 6 ft Telephoto approx 90 cm 1 5 ft to 2 m 6 6 ft In High speed shooting mode approx 90 cm 1 5 ft to 2 m 6 6 ft Sensitivity AUTO Equivalent to ISO 64 100 200 400 8...

Page 8: ... date Histograms Highlight warning Voice memo Other functions PictBridge Exif print PRINT Image Matching II Language English Francais Deutsch Italiano Time difference FinePix photo mode mode Input Output Terminals A V OUT NTSC PAL type with monaural sound Audio Visual output Digital input output USB2 0 High Speed DC input socket AC 5VX AC 5VH AC 5VHS sold separately Quality setting DPC 16 16 MB DP...

Page 9: ...er of available shots varies depending on the capacity of alkaline batteries or the level of charge in Ni MH batteries the figures shown here for the number of available shots using batteries are not guaranteed The number of available shots will also decline at low temperatures Camera dimensions 113 5 mm 85 0 mm 112 0 mm 4 4 in 3 3 in 4 4 in W H D not including accessories and attachments Camera m...

Page 10: ...Reader DPC R1 Compatible with Windows 98 98 SE Windows Me Windows 2000 Professional Windows XP or iMac Mac OS 8 6 to 9 2 2 Mac OS X 10 1 2 to 10 2 2 and models that support USB as standard Compatible with xD Picture Card of 16 MB to 512 MB and SmartMedia of 3 3 V 4 MB to 128 MB z PC Card Adapter DPC AD Compatible with xD Picture Card of 16 MB to 512 MB and SmartMedia of 3 3 V 2 MB to 128 MB z Comp...

Page 11: ...s The higher the compression rate the greater the loss of quality in the decompressed restored image Memory effect If an Ni MH battery is repeatedly charged without first being fully discharged its perfor mance may drop below its original level This is referred to as the memory effect Motion JPEG A type of AVI Audio Video Interleave file format that handles images and sound as a single file Images...

Page 12: ... Mode dial Still Photography Movie recording Power switch Playback mode Power OFF Photography mode Auto Programmed Auto Manual Anti blur Aperture priority Auto Shutter priority Auto Movie Natural light Night Portrait Landscape Strap mount Slot cover USB socket DC IN 5V power input socket A V OUT Audio Visual output socket Microphone Flash AF assist illuminator Self timer lamp Speaker xD Picture Ca...

Page 13: ...ay BACK button Low light view button Battery cover MENU OK button T Tele zoom button Strap mount Viewfinder EVF Diopter adjustment dial EVF LCD monitor selector button Tripod mount LCD monitor Indicator lamp Playback mode Photography mode Erase button 4 direction button Macro button Flash button ...

Page 14: ...es of internal Components CONST FLASH EVF UNIT CONST LCD CONST MAIN PWB ASSY KSW PWB ASSY MSW PWB ASSY FRAME LCD ST PWB ASSY MIC ASSY SPEAKER ASSY FRAME MAIN COVER JACK ASSY CASE F ASSY CASE R ASSY HOLDER BATTRY LID BATTRY CONST AF LED RSW PWB ASSY ASSY CASE LENS LENS CONST ...

Page 15: ... 2 2 4 3 A A 2 2 Removing the CONST REAR 1 Remove the 2 screws M1 7 x 9 0 2 Remove the 3 screws M1 7 x 3 5 3 Apply pressure in the direction indicated by the arrow to disengage the catches at A 4 Slowly remove the CONST REAR in the direction of the arrow ...

Page 16: ... the LCD FPC 6 Unlock connector CN801 and then remove the MAIN KSW FPC Take care that the metal catch B on the FRAME LCD does not touch the MAIN PWB ASSY Assembly Re assemble by reversing the disassembly procedure Notes on assembly Fit the CONST REAR into the CASE F with the COVER CARD open to prevent damage to SW551 ...

Page 17: ...s M1 7 x 4 0 8 Remove the KSW PWB in the direction of the arrow 9 Remove the LCD CONST in the direction of the arrow 10 Remove the BUTTON REAR in the direction of the arrow 11 Remove the BUTTON ZOOM in the direction of the arrow 12 Remove the screw M1 7 x 4 0 13 Remove the STRAP RIGHT in the direction of the arrow 14 Remove the ASSY CURSOL in the direction of the arrow Assembly Re assemble by reve...

Page 18: ...rness couplings in the direction of the arrows 2 Remove the 3 FPCs in the direction of the arrows 3 Remove the FPC in the direction of the arrow 4 Remove the EVF UNIT in the direction of the arrow 5 Remove the 3 screws M1 7 x 2 5 6 Unlock connector CN151 and remove the FPC 7 Remove the B to B CONNECTOR and remove the MAIN PWB ASSY in the direction of the arrow ...

Page 19: ... the direction of the arrow 14 Remove the 3 screws M1 7 x 2 5 15 Push the ST PWB ASSY to the right to disengage it from J702 and then pull it outwards to remove it Assembly Re assemble by reversing the disassembly procedure Notes on assembly 1 ST PWB ASSY Engage the ST PWB ASSY and the CASE F bosses in the correct positions 2 MAIN PWB ASSY A Ensure that the wire harnesses for the SPEAKER ASSY and ...

Page 20: ...ERY 1 Remove the screw M1 7 x 9 0 2 Remove the HOLDER BATTERY in the direction of the arrow Assembly Re assemble by reversing the disassembly procedure Notes on assembly When assembling the HOLDER BATTERY ensure that the LEVER RELEASE is set to OFF to prevent damage to SW902 and SW903 ...

Page 21: ...ENS CONST 1 Remove the 3 screws M2 0 x 9 0 2 Remove the FRAME MAIN in the direction of the arrow 3 Remove the LENS CONST in the direction of the arrow Assembly Re assemble by reversing the disassembly procedure Notes on assembly Take care not to press on the CCD pressure plate ...

Page 22: ...SH in the direction of the arrow Assembly Re assemble by reversing the disassembly procedure Notes on assembly 1 Push the FLASH CONST lock catch in the direction of the arrow 2 Assemble with the FLASH in the UP position 3 When fitting the FLASH CONST into the CASE F take care not to pinch the wire harnesses for the SPEAKER ASSY and MIC ASSY ...

Page 23: ...y shifting it through the notch without pulling on the wire harness 10 Remove the COVER JACK in the direction of the arrow Assembly Re assemble by reversing the disassembly procedure Notes on assembly 1 The SPEAKER ASSY wire harness should exit from the top 2 Stick the SHEET PROTECT in place aligned with the CABI F rib and run the harness between the rib and the SPEAKER ASSY 3 Run the MIC ASSY wir...

Page 24: ...24 2 Disassembly FinePix S5200 S5600 Service Manual MEMO ...

Page 25: ...MEDIA BLOCK Connection with the xD card USB BLOCK Connection with the USB ST PWB ASSY STJACK BLOCK Flash Charge FSW PWB ASSY FSW BLOCK AF Switch SW Flash pop up Detection RSW PWB ASSY RSW BLOCK Release SW Power SW KSW PWB ASSY KSW BLOCK Key Switch MSW PWB ASSY MSW BLOCK Mode Switch BL FPC ASSY BL FPC BLOCK LCD Back light CONST AF LED LED FPC BLOCK AF Assist LED 3 Schematics 3 1 Cautions Cautions w...

Page 26: ...CS IC204 image data and sent to the BCS_IC IC104 to obtain the appropriate AE AF AWB Record processing to xD Card Image data stored in SD DRAM is sent one frame at a time to the internal signal processing section in the signal processing LSI YCS IC204 In a process called unpacking 32 bit to 12 bit conversion and pre processing including digital clamp white balance and noise reduction processing li...

Page 27: ... DC IC 6ch 1 0V Detect system AUDIO IC BU7804KN L T C P M A _ C I M P M A _ P S Video Driver CCD_ON RESET 3 3V_ON STB_SY LED_R LED_G VIDEO_ON VBS_OUT O _ U A T U D x Card t o l S N I P 0 2 B BUS x64 O I S _3 SIO_2 CDS C D A t i b 4 1 G T e l b a m a r g o r P l a t i g i D n i a G y a r G e d o C i n i M B S U IPS2 AN30204 FLASH CTRL LED DRIVER x 3 RTC Power on Reset 0 9VRese CTL 32 768kHZ FUSE 3 ...

Page 28: ...ET AV_OUT IGBT_GDR GND BSTSEC GND BSTVS GND BSTGDR GND BSTVD GND GND GND M F A 0 2 9 1 8 1 7 1 6 1 5 1 4 1 3 1 1 1 2 1 0 1 9 8 7 6 5 4 3 1 2 B M F M F A B M F 2 T S 1 T S 4 T S 3 T S 2 O I 1 O I C I P Z V 3 3 E I P Z M Z A B M Z M Z A B M Z E I P F V 3 3 C I P F MOTOR FPC LENS UNIT MOTOR BLK FGB148 0201 20FKZ RSM1 1 TB FLASH BLK FLASH PWB MSW PWB 2 1 5 6 GND GND GND VBS GND GND AV_DET AV_OUT IGBT_...

Page 29: ...29 3 Schematics FinePix S5200 S5600 Service Manual 3 6 Circuit Diagrams 3 6 1 CAMERA BLOCK ...

Page 30: ...30 3 Schematics FinePix S5200 S5600 Service Manual 3 6 2 DCDC BLOCK ...

Page 31: ...31 3 Schematics FinePix S5200 S5600 Service Manual 3 6 3 KEY BLOCK ...

Page 32: ...32 3 Schematics FinePix S5200 S5600 Service Manual 3 6 4 KSW BLOCK ...

Page 33: ...33 3 Schematics FinePix S5200 S5600 Service Manual 3 6 5 LCD EVF BLOCK ...

Page 34: ...34 3 Schematics FinePix S5200 S5600 Service Manual 3 6 6 MOTOR BLOCK ...

Page 35: ...35 3 Schematics FinePix S5200 S5600 Service Manual 3 6 7 PMAN BLOCK ...

Page 36: ...36 3 Schematics FinePix S5200 S5600 Service Manual 3 6 8 PROCESS BLOCK ...

Page 37: ...37 3 Schematics FinePix S5200 S5600 Service Manual 3 6 9 STJACK BLOCK ...

Page 38: ...38 3 Schematics FinePix S5200 S5600 Service Manual MEMO ...

Page 39: ...39 3 Schematics FinePix S5200 S5600 Service Manual 3 6 10 AF LED BLOCK 3 6 11 BL FPC BLOCK ...

Page 40: ...40 3 Schematics FinePix S5200 S5600 Service Manual 3 6 12 AUDIO BLOCK ...

Page 41: ...41 3 Schematics FinePix S5200 S5600 Service Manual 3 6 14 FLASH PLUNGER BLOCK 3 6 13 CCD FPC BLOCK ...

Page 42: ...42 3 Schematics FinePix S5200 S5600 Service Manual 3 6 15 CN BLOCK 3 6 16 FSW BLOCK ...

Page 43: ...43 3 Schematics FinePix S5200 S5600 Service Manual 3 6 17 EMI BLOCK ...

Page 44: ...44 3 Schematics FinePix S5200 S5600 Service Manual 3 6 18 LED FPC BLOCK 3 6 20 MSW BLOCK 3 6 19 MEDIA BLOCK ...

Page 45: ...45 3 Schematics FinePix S5200 S5600 Service Manual 3 6 22 USB BLOCK 3 6 21 RSW BLOCK ...

Page 46: ...46 3 Schematics FinePix S5200 S5600 Service Manual 3 6 23 VIDEO BLOCK 3 6 24 XE BLOCK ...

Page 47: ...47 3 Schematics FinePix S5200 S5600 Service Manual 3 7 Mounted Parts Diagrams 3 7 1 AF FPC ASSY SIDE A SIDE B ...

Page 48: ...48 3 Schematics FinePix S5200 S5600 Service Manual 3 7 2 BL FPC ASSY SIDE A ...

Page 49: ...49 3 Schematics FinePix S5200 S5600 Service Manual SIDE B ...

Page 50: ...50 3 Schematics FinePix S5200 S5600 Service Manual 3 7 3 CCD FPC ASSY SIDE A ...

Page 51: ...51 3 Schematics FinePix S5200 S5600 Service Manual SIDE B ...

Page 52: ...52 3 Schematics FinePix S5200 S5600 Service Manual 3 7 4 ST PWB ASSY SIDE A ...

Page 53: ...53 3 Schematics FinePix S5200 S5600 Service Manual SIDE B ...

Page 54: ...54 3 Schematics FinePix S5200 S5600 Service Manual 3 7 5 FSW PWB ASSY SIDE A SIDE B ...

Page 55: ...55 3 Schematics FinePix S5200 S5600 Service Manual 3 7 6 MSW PWB ASSY SIDE A 3 7 7 RSW PWB ASSY SIDE B SIDE A SIDE B ...

Page 56: ...56 3 Schematics FinePix S5200 S5600 Service Manual 3 7 8 KSW PWB ASSY SIDE A ...

Page 57: ...57 3 Schematics FinePix S5200 S5600 Service Manual SIDE B ...

Page 58: ...58 3 Schematics FinePix S5200 S5600 Service Manual 3 7 9 MAIN PWB ASSY SIDE A ...

Page 59: ...59 3 Schematics FinePix S5200 S5600 Service Manual SIDE B ...

Page 60: ...60 3 Schematics FinePix S5200 S5600 Service Manual 3 7 10 XE PWB ASSY SIDE A SIDE B ...

Page 61: ... adjustment Common with the FinePixS2Pro ZJ00936 100 CCD data for FinePix S5200_5600 CCD defect adjustment New Jig 2 FZ06229 100 Video cable VIDEO adjustment Common with the FinePixA310 FZ03983 100 AC Cable For EG Use with VIDEO adjustment jig Common with the FinePixA310 3 FZ03982 100 AC Cable For EU Use with VIDEO adjustment jig Common with the FinePixA310 3 FZ00330 200 AC Cable For US JP Use wit...

Page 62: ...cified Web server and both of these are the compression of ZIP form files Therefore after downloading these compression files from the Web server the decompression of the file is necessary In the decompression software if the decompression of the ZIP form can be done any software is OK Please prepare each one for the decompression software The decompression and the preservation method of the PC ad...

Page 63: ...f DSC jig driver Since this camera uses the USB for communications with the personal computer in order to start the PC adjustment software the DSC jig driver needs to be installed in the personal computer beforehand The DSC jig driver is the same as that for the FinePix S7000 so if this jig driver software is already installed in the personal computer it is not necessary to install it The procedur...

Page 64: ...ewritten the adjustment software will not startup Step 1 Double click on the FFW exe execute file of the adjustment software to open the FinePix S5200_5600_W Adjustment Software Startup screen Fig 4 6 1 Step 2 Click on Settings 1 in Fig 4 6 2 in the menubar of the startup window Then select Mode setting 2 in Fig 4 6 2 from the pull down menu that appears Fig 4 6 2 1 2 FinePix S5200_5600_W Adjustme...

Page 65: ...heck Note If Disable OKNG display on the PC screen Fig 4 6 4 is set to OFF the PC screen displays OK if adjustment is OK and NG if adjustment is NG either setting is OK Step 5 Select the Hardware tab 1 in Fig 4 6 5 in the Customize dialog box that appears Input the values for PI O port 2 in Fig 4 6 5 PIO 0 10 12 14 16 PIO 1 11 13 15 17 Set the Hardware items 3 in Fig 4 6 5 as follows Item Details ...

Page 66: ... for Auto Adjust in user program Help Help Basic software help FF help User program help Focus Not used with this adjustment software Version Version information for basic software Table FFW exe Commands Cautions When Adjusting 1 FinePix S5200_5600 cannot adjust the EVR data reading and writing Details are right tables 2 End Setting returns the camera from the Jig mode to the Product Mode End Sett...

Page 67: ...ent software 4 Proceed with adjustment after reading the cautions here and the relevant cautions noted in the Service Manual Press the Enter key to proceed to the Jig Mode Setup screen Fig 4 7 2 FinePix S5200_5600_W Adjustment Software Start up Screen Select Start from Operate on the FFW Toolbar The adjustment software starts Fig 4 7 2 4 7 Starting the Adjustment Software Step 1 Double click on FF...

Page 68: ...Connect the power cable jig with the camera 3 Adjust the output current of the power supply to 3 0A or less 4 Adjust the output voltage of the power supply to 5 0 0 02V 5 Connect the USB cable with the camera and PC 6 Switch ON the camera power while pressing the shutter button 7 Check that the LED at the under the viewfinder is lights in green Press the Enter key after completing the procedure of...

Page 69: ...creen indicates the version number of the adjustment software 2 After running firmware download other adjustments may be required depending on the content of the download software In such cases the items to be adjusted and the sequence of adjustment will be indicated separately 3 After starting the adjustment software and beginning communication with the camera always run End Setting following adj...

Page 70: ...ssful completion of the adjustments In some cases the camera may be completely disabled If this occurs set the camera to jig mode again and then reset the flash memory Step 1 In the adjustment item selection screen select R Reset flash memory The flash memory reset confirmation screen appears The Reconfirm flash memory reset screen then appears Flash memory reset EVR Attention When the MAIN PWB AS...

Page 71: ... MAIN PWB ASSY has not been replaced all the adjusted data reverts to the default settings In this event adjust all the settings Excludes firmware downloading Enter RESET from the PC keyboard R E S E T Input is completed Press the Enter key to reset the flash memory Fig 4 8 2 Flash Memory Reset is completed 1 Remove the DC jack cable from the camera 2 Press the Enter key Fig 4 8 3 Step 2 Once the ...

Page 72: ...n The LENS Data Input Start screen appears Step 2 Run the adjustment in accordance with the instructions on the screen Write the adjustment data to the flash ROM when adjustment has been completed correctly The LENS Data Input Complete screen appears 4 9 L LENS Data Input If the LENS CONST or MAIN PWB ASSY was replaced enter the LENS data As LENS data simply enter the number on the lens bar code l...

Page 73: ...73 4 Adjustments FinePix S5200 S5600 Service Manual LENS Data Input is completed Press the Enter key to return to the Adjustment Item Selection Screen Fig 4 9 3 Step 3 ...

Page 74: ...tension is dat Depending upon Windows settings this extension may not be displayed In this case change the settings to ensure that it is displayed 2 In addition to numbers letters are also used in the CCD serial No The data file name is instructed in the same manner in this case 3 Ensure that the CCD serial No is read correctly If the file name is read incorrectly CCD data for another camera will ...

Page 75: ...sert the floppy disk in the A drive floppy disk drive on the PC When preparations are complete press the Enter key on the PC Or click on the OK button 501W0149 Fig 4 10 2 Adjustment Step 1 Select F4 CCD Data Input on the Adjustment Items Select screen The CCD Data Input Start screen appears Step 2 Run the adjustment in accordance with the instructions on the screen Write the adjustment data to the...

Page 76: ...e with the instructions on the screen Note An error will occur during CAMERA adjustment and adjustment cannot be completed unless the pattern box is calibrated correctly The Shutter adjustment without filter screen appears Camera Filter LB140 Pattern box Maximum 5mm Centerline Maximum 30mm Maximum 40mm CAMERA Adjustment CAMERA Adjustment Preparations 1 Prepare the LB140 filter 2 Adjust the color t...

Page 77: ...A Setup for CAMERA Adjustment Fig 4 11 2 Squeezing sensitivity decrease rate adjustment 1 Set the distance between the camera and pattern box 2 Place the LB140 filter in front of the lens When preparations are complete press the Enter key LB140 filter 5mm or 30mm or less less Center Center Pattern box PTB450 CAMERA Setup for CAMERA Adjustment Fig 4 11 3 Step 3 The Squeezing sensitivity decrease ra...

Page 78: ...nter Pattern box PTB450 CAMERA Setup for CAMERA Adjustment Fig 4 11 5 OFD sensibilty adjustment 1 Set the distance between the camera and pattern box 2 The LB140 filter is not placed in front of the lens When preparations are complete press the Enter key LB140 filter 5mm or 30mm or less less Center Center Pattern box PTB450 CAMERA Setup for CAMERA Adjustment Fig 4 11 4 Step 5 The WB adjustment wit...

Page 79: ...Center Pattern box PTB450 CAMERA Setup for CAMERA Adjustment Fig 4 11 6 Step 7 The WB adjustment Hi with filter screen appears Step 8 The WB adjustment Hi without filter screen appears WB adjustment Hi with filter 1 Set the distance between the camera and pattern box 2 Place the LB140 filter in front of the lens When preparations are complete press the Enter key LB140 filter 5mm or 30mm or less le...

Page 80: ...ttern box 2 Remove the LB140 filter from front of the lens When preparations are complete press the Enter key LB140 filter 5mm or 30mm or less less Center Center Pattern box PTB450 CAMERA Setup for CAMERA Adjustment Fig 4 11 8 Shading compensation 1 Set the distance between the camera and pattern box 2 Remove the LB140 filter from front of the lens When preparations are complete press the Enter ke...

Page 81: ...81 4 Adjustments FinePix S5200 S5600 Service Manual Camera Adjustment is completed Press the Enter key to return to the Adjustment Item Selection Screen Fig 4 11 10 Step 8 ...

Page 82: ...nsure that the brightness at the surface of the AF chart is between 9 0 and 11 5EV 3 Place the conversion lens concentric with the camera lens Step 1 Select F6 AF Adjustment on the Adjustment Items Select screen The AF Adjustment Preparation screen appears Step 2 Run the adjustment in accordance with the instructions on the screen Note Always use a 900mm conversion lens The AF Adjustment INF Start...

Page 83: ... are complete press the Enter key AF chart 924 9 1 25mm Center CAMERA Setup for AF Adjustment Fig 4 12 3 AF Adjustment 1 Place the Siemens star chart at a distance of 924 9 1 25mm from the lens face of the conversion lens 2 Place the conversion lens at a distance of 23 6 2mm from the lens face of the lens 3 Adjust the position of the camera so that the center of the AF chart is displayed in the ca...

Page 84: ...84 4 Adjustments FinePix S5200 S5600 Service Manual Fig 4 12 4 Step 5 The AF Adjustment is completed Press the Enter key to return to the Adjustment Items Select Screen ...

Page 85: ...y of the DC IN terminal 3 When reducing the voltage adjust the stabilized power supply to ensure that the voltage is not reduced excessively from the measured point The adjustment software may produce an error if communication between the adjustment software and the camera is disrupted Restart the adjustment software in this case Step 1 Select F1 Battery Voltage Adjustment on the Adjustment Items ...

Page 86: ... and the camera are connected If not return to the Jig Mode Setup screen and connect the Power Cable Jig and the camera 2 Supply power 5 0V to the camera from the Power Cable Jig When preparations are complete press the Enter key on the PC Lens is extended when the Enter key is pressed Fig 4 13 1 Step 2 Run the adjustment in accordance with the instructions on the screen The 4 40V Input screen app...

Page 87: ... preparations are complete press the Enter key Result 3 Supply 7 20V 0 02V 0 00V When preparations are complete press the Enter key Fig 4 13 3 Battery Voltage Adjustment 1 Supply 4 40V 0 02V 0 00V When preparations are complete press the Enter key Result 2 Supply 4 00V 0 02V 0 00V When preparations are complete press the Enter key Step 4 The 7 20V Input screen appears Step 5 The 5 0V Input screen ...

Page 88: ...een completed correctly The Battery Voltage Adjustment Complete screen appears Step 7 Fig 4 13 5 Battery Voltage Adjustment 1 Supply 4 40V 0 02V 0 00V When preparations are complete press the Enter key Result 2 Supply 4 00V 0 02V 0 00V When preparations are complete press the Enter key Result 3 Supply 7 20V 0 05V When preparations are complete press the Enter key Result 4 Supply 5 0V 0 1V When pre...

Page 89: ...As flash adjustment is readily affected by external light ensure that the vicinity of the gray chart is very dark 2 Ensure that distance is measured from the front of the camera during flash adjustment 3 When adjusting the flash always ensure that AF adjustment is complete before beginning flash adjustment Setup for Flash Adjustment Gray chart 1000 10mm Centerline Step 1 Select F7 Flash Adjustment...

Page 90: ... Adjust brightness so that the periphery of the gray chart is as dark as possible 2 Adjust the camera so that the entire chart is shown on the LCD monitor 3 Press the flash pop up button When preparations 1 and 2 are complete press the Enter key 1000 10mm Center CAMERA Setup for Flash Adjustment Fig 4 14 2 Flash Adjustment is completed Press the Enter key to return to the Adjustment Item Selection...

Page 91: ... waveform of the brightness signal Y or color signal C does not appear in the WAVE No 0 window during adjustments check the connections of the video adjustment jig Step 1 Select F11 Video Adjustment on the Adjustment Items Select screen The Video Adjustment Preparation screen appears PCI 2746C Board AC100 240V Video adjustments jig Video cable FinePix S5200 S5600 AC Power Adapter USB cable PC for ...

Page 92: ...ideo Adjustment Video Adjustment Preparations 1 Connect the camera and video adj jig with the video cable 2 Confirm Video jig is connected with the video cable When preparations are complete press the Enter key Fig 4 15 1 Fig 4 15 3 Step 2 Run the adjustment in accordance with the instructions on the screen Write the adjustment data to the Flash ROM when adjustment has been completed correctly The...

Page 93: ...irmware is needed FUJI SERVICE BULLETIN is contacted from FTYO QA Till then disregard this item Setup for Firmware Download Step 1 Select F8 Firmware Download on the Adjustment Items Select screen The Firmware Download Start screen appears FinePix S5200 S5600 AC Power Adapter USB cable PC for adjustment and checks ...

Page 94: ...green LED lights on The system returns to the Jig Mode Setup screen when press the Enter key Fig 4 16 2 Firmware Download LED lights to orange while downloading the firmware Do not turn off the power while downloading the firmware c FinePixS5200_5600_W Firmwear SU1760RSC bin Press the ENTER Key to start download Fig 4 16 1 Step 2 Run the adjustment in accordance with the instructions on the screen...

Page 95: ...ue throughout the world For this reason each device has a unique ID as determined by the USB standard If multiple devices with the same USB ID are connected to a single PC the PC will be unable to identify each USB device thus preventing operation Item Details Repair Date Date information is acquired from the PC and written Administrator ID 01 01 Repair Station U S A 61 a SAPPORO 30 0 CANADA 62 b ...

Page 96: ...del W to Z Fig 4 17 2 End Setting The End settings consist of the destination setting the USB_ID write and product mode settings Mass Storage recognition Press the Enter key Fig 4 17 1 Step 1 Select F12 End Setting on the Adjustment Items Select screen The End Setting Description screen appears Step 2 Run the adjustment in accordance with the instructions on the screen The Destination Setting scre...

Page 97: ... S5200 US CA model Press the Enter key Fig 4 17 3 Repair site ID input menu The repair site is selected from an undermentioned list A SAPPORO SS M BRITAIN B SENDAI SS N GERMANY C TOKYO SS O FRANCE D NAGOYA SS P SPAIN E OSAKA SS Q ITALY F HIROSHIMA SS R NETHERLANDS G FUKUOKA SS S BELGIUM H U S A T SWEDEN I CANADA U SWITZERLAND J HAWAII V NORWAY K TAIWAN W FINLAND X SINGAPORE L CHINA Z OTHERS Fig 4 ...

Page 98: ...Adjustment End screen appears Step 7 USB ID Selected U S A Press the Enter key Fig 4 17 5 Fig 4 17 6 FinePix S5200_5600 Adjustment completed 1 Remove USB cable from the camera 2 Press the Enter key The adjustment software returns to the Jig mode setup screen after press the Enter key ...

Page 99: ...l use able to measure 1mA or less Power Cable Jig Common with adjustment JIG ZJ00580 100 xD Picture card For general use Macro Chart Resolution confirmation ZJ00525 100 TV Monitor TV monitor minimum resolution 600 lines LCD INSPECTION DATA Download and use ZJ00885 100 Vectorscope For general use 5 2 Connection of Measuring Equipment Use Power Cable Jig The output current of the Regurated power sup...

Page 100: ...tric adjustment dial up and down 9 Check for blemishes in the CCD live image 1 Zoom drive noise 1 Apply a shock to the camera using the shock jig 1 Check for damage to the outer casing 2 Check for problems with the clicking or sliding movement of switches 3 Check for dust or fogging in the viewfinder and AF assist flash window 4 Check for dust or fogging in the LCD 1 Applied voltage 5 0 0 05 V 2 C...

Page 101: ...cture 1 Set the Mode dial to Movie shooting mode 2 Press S1 S2 and then release S2 S1 3 After 5 seconds press and then release S1 1 Set the camera to Playback mode 2 Press the 4 way button down to play back the movie 2 Press the 4 way button left and check that the Macro icon tulip appears on the LCD monitor Press the 4 way button right and check that the Flash OFF icon appears on the LCD monitor ...

Page 102: ...rase Erase all from the menu and then press the OK button 2 Press the OK button again 2 Check that the position of the bright spot is within a 10 circle with a center that is X 1 and Y 3 from the center of the vectorscope see figure below 3 Where the horizontal resolution is as follows 350 TV lines or better at the center and 300 TV lines or better at the periphery NTSC 300 TV lines or better at t...

Page 103: ...ply voltage 3 Set the Mode dial to AUTO and turn the camera on 4 After the LCD live image appears check the current consumption 1 Mode dial 2 SETUP frame No 3 Battery and cards not inserted 4 Battery cover 5 EVF diopter adjustment dial 6 Focus mode SW lock lever 1 Press the 4 way button right and check that AUTO appears on the LCD monitor 2 Check that there are no noticeable dust flecks or stains ...

Page 104: ... BATTERY A107 FZ06230 100 USB CABLE W A108 FZ06229 100 AV CABLE A109 BU02939 100 SHOULDER BELT ASSY A110 AZF0000 101 LDPE BAG NO 10 A111 FZ06269 300 CD ROM A112 BF04146 100 XDCARD 16MB ASSY A113 BL00209 100 CASE A114 BB18002 100 CERTIFICATION SEAL A115 BB12943 100 BAR CODE LABEL BLANK A110 A102 A104 A111 A117 A118 A119 A121 A120 A112 A113 A106 A108 A107 A105 A103 A109 A101 A115 A116 A114 A116 BB19...

Page 105: ...230 100 USB CABLE W A108 FZ06229 100 AV CABLE A109 BU02939 100 SHOULDER BELT ASSY A110 AZF0000 101 LDPE BAG NO 10 A111 FZ06269 300 CD ROM A112 BF04146 100 XDCARD 16MB ASSY A113 BL00209 100 CASE A114 BB18002 100 CERTIFICATION SEAL A115 BB12943 100 BAR CODE LABEL BLANK A116 BB19067 D00 DEST LAB 17600CA CFG A117 BL00484 200 MANUAL E A118 BL00484 300 MANUAL F A119 BL00485 200 QUICK MANUAL E A120 BL004...

Page 106: ...USB CABLE W A108 FZ06229 100 AV CABLE A109 BU02939 100 SHOULDER BELT ASSY A110 AZF0000 101 LDPE BAG NO 10 A111 FZ06269 300 CD ROM A112 BF04146 100 XDCARD 16MB ASSY A113 BL00209 100 CASE A114 BB18002 100 CERTIFICATION SEAL A115 BB12943 100 BAR CODE LABEL BLANK A110 A102 A104 A111 A117 A118 A122 A121 A120 A119 A123 A112 A113 A106 A108 A107 A105 A103 A109 A101 A115 A116 A114 A116 BB19067 B00 DEST LAB...

Page 107: ...Y A107 FZ06230 100 USB CABLE W A108 FZ06229 100 AV CABLE A109 BU02939 100 SHOULDER BELT ASSY A110 AZF0000 101 LDPE BAG NO 10 A111 FZ06269 300 CD ROM A112 BF04146 100 XDCARD 16MB ASSY A113 BL00209 100 CASE A114 BB18002 100 CERTIFICATION SEAL A115 BB12943 100 BAR CODE LABEL BLANK A116 BB19067 C00 DEST LAB 17600EG CFG A117 BL00484 200 MANUAL E A118 BL00485 200 QUICK MANUAL E A119 BL00176 102 H14 WARR...

Page 108: ...3 100 ALKALINE BATTERY A107 FZ06230 100 USB CABLE W A108 FZ06229 100 AV CABLE A109 BU02939 100 SHOULDER BELT ASSY A110 AZF0000 101 LDPE BAG NO 10 A111 FZ06269 300 CD ROM A112 BF04146 100 XDCARD 16MB ASSY A113 BL00209 100 CASE A114 BB18002 100 CERTIFICATION SEAL A115 BB12943 100 BAR CODE LABEL BLANK A116 BB19067 G00 DEST LAB 17600EE CFG A117 BL00484 200 MANUAL E A118 BL00485 200 QUICK MANUAL E A110...

Page 109: ...3 100 ALKALINE BATTERY A107 FZ06230 100 USB CABLE W A108 FZ06229 100 AV CABLE A109 BU02939 100 SHOULDER BELT ASSY A110 AZF0000 101 LDPE BAG NO 10 A111 FZ06269 300 CD ROM A112 BF04146 100 XDCARD 16MB ASSY A113 BL00209 100 CASE A114 BB18002 100 CERTIFICATION SEAL A115 BB12943 100 BAR CODE LABEL BLANK A116 BB19067 F00 DEST LAB 17600AS CFG A117 BL00484 200 MANUAL E A118 BL00485 200 QUICK MANUAL E A110...

Page 110: ...OARD S A103 FZ06289 100 SHEET MOLD FC A104 AZF0000 311 HDPE BAG NO 11 A105 BU02876 200 LENS CAP ASSY A106 FZ04793 100 ALKALINE BATTERY A107 FZ06230 100 USB CABLE W A108 FZ06229 100 AV CABLE A109 BU02939 100 SHOULDER BELT ASSY A110 AZF0000 101 LDPE BAG NO 10 A111 FZ06269 300 CD ROM A112 BF04146 100 XDCARD 16MB ASSY A113 BL00209 100 CASE A114 BB19104 100 REGULATION SEAL A115 BB12943 100 BAR CODE LAB...

Page 111: ...B13000 100 PARTITION BOARD S A103 FZ06289 100 SHEET MOLD FC A104 AZF0000 311 HDPE BAG NO 11 A105 BU02876 200 LENS CAP ASSY A106 FZ06486 100 ALKALINE BATTRY P2 A107 FZ06231 100 USB CABLE J A108 FZ06229 100 AV CABLE A109 BU02939 100 SHOULDER BELT ASSY A110 AZF0000 101 LDPE BAG NO 10 A111 FZ06269 300 CD ROM A112 BB12943 100 BAR CODE LABEL BLANK A113 BB18949 100 WARRANTY CARD A114 BL00484 100 MANUAL J...

Page 112: ...19284 100 CUSHION CONDENSER M213 BU03236 100 ASSY CASE LENS M214 BB19122 100 BT2M2 0X9 0 M215 FZ06338 100 MIC ASSY M216 FZ06339 100 SPEAKER ASSY M217 BB18979 100 SHEET SP M218 BF05759 100 CONST AFLED M219 BB19185 100 SHEET PROTECT M220 BU03218 200 ASSY FLASH M221 BB18985 100 FLASH TOP M222 BB18987 100 WINDOW FLASH PMMA M223 BB17335 300 BT2M1 7X3 5B M224 BB18128 D00 MS2M1 4X1 6BN M225 FZ06332 101 P...

Page 113: ...SHION CONDENSER M213 BU03236 100 ASSY CASE LENS M214 BB19122 100 BT2M2 0X9 0 M215 FZ06338 100 MIC ASSY M216 FZ06339 100 SPEAKER ASSY M217 BB18979 100 SHEET SP M218 BF05759 100 CONST AFLED M219 BB19185 100 SHEET PROTECT M220 BU03218 200 ASSY FLASH M221 BB18985 200 FLASH TOP M222 BB18987 100 WINDOW FLASH PMMA M223 BB17335 300 BT2M1 7X3 5B M224 BB18128 D00 MS2M1 4X1 6BN M225 FZ06332 101 PLUNGER UNIT ...

Page 114: ...ONDENSER M213 BU03236 100 ASSY CASE LENS M214 BB19122 100 BT2M2 0X9 0 M215 FZ06338 100 MIC ASSY M216 FZ06339 100 SPEAKER ASSY M217 BB18979 100 SHEET SP M218 BF05759 100 CONST AFLED M219 BB19185 100 SHEET PROTECT M220 BU03218 200 ASSY FLASH M221 BB18985 200 FLASH TOP M222 BB18987 100 WINDOW FLASH M223 BB17335 300 BT2M1 7X3 5B M224 BB18128 D00 MS2M1 4X1 6BN M225 FZ06332 101 PLUNGER UNIT M226 FZ06248...

Page 115: ...18128 D00 MS2M1 4X1 6BN M225 FZ06332 101 PLUNGER UNIT M203 M210 M211 M237 M204 M209 N S M207 K G B C A D M J I E F M212 M206 M208 M216 M219 M217 M215 M211 M202 M245 M244 M213 M205 M214 M230 M229 M214 M238 M242 M231 M214 M240 M239 M241 M218 M211 M224 M243 M220 M225 M211 M227 M228 M240 M211 M223 M226 M221 L M244 M201 M233 M236 M246 K TAPE M211 M235 M234 M232 M222 M211 E A K I C N M L F D G H J B M22...

Page 116: ...BB19022 100 STRAP RIGHT M309 BB17681 400 BT2M1 7X4 0 M310 BB17335 300 BT2M1 7X3 5B M311 BB14959 300 LABEL M312 BU03282 100 ASSY CURSOL M313 BB19014 100 BUTTON REAR ABS M314 BB19015 100 BUTTON ZOOM ABS M315 CB1689 A200 MSW PWB ASSY M304 M322 M305 M302 M310 M309 M308 M321 N S M303 M304 M311 M307 M306 M323 M318 M320 M313 M319 M309 M312 M314 M317 M309 M316 M315 M309 M301 N H M316 FZ06336 100 FFC KSW M...

Page 117: ...BS M304 BB19013 100 SHAFT COVER CARD M305 BB19016 100 EYE PIECE M306 BB19017 100 CUSHION LCD PE URETHAN M307 BB19018 100 SHEET SW M308 BB19022 100 STRAP RIGHT M309 BB17681 400 BT2M1 7X4 0 M310 BB17335 300 BT2M1 7X3 5B M311 BB14959 300 LABEL M312 BU03282 100 ASSY CURSOL M313 BB19014 100 BUTTON REAR ABS M314 BB19015 100 BUTTON ZOOM ABS M315 CB1689 A200 MSW PWB ASSY M316 FZ06336 100 FFC KSW MSW 6 M31...

Page 118: ...GHT M309 BB17681 400 BT2M1 7X4 0 M310 BB17335 300 BT2M1 7X3 5B M311 BB14959 300 LABEL M312 BU03282 100 ASSY CURSOL M313 BB19014 100 BUTTON REAR ABS M314 BB19015 100 BUTTON ZOOM ABS M315 CB1689 A200 MSW PWB ASSY M304 M322 M305 M302 M310 M309 M308 M321 N S M303 M304 M311 M307 M306 M323 M318 M320 M313 M319 M309 M312 M314 M317 M309 M316 M315 M309 M301 N H M316 FZ06336 100 FFC KSW MSW 6 M317 CB1689 A30...

Page 119: ...UL F591 FP00039 253 FUSE 2 5A 32V UL CONNECTOR CN101 FGB170 0351 CONNECTOR CJ 35P FN 0 3MM NH CN151 FGB173 0201 CONNECTOR CJ 20P FN 0 5MM NH CN251 FZ05744 100 JACK USB MINI B CN261 FGY097 0201 CONNECTOR CJ 20P B 1MM NN CN281 FGY093 0021 CONNECTOR CJ 2P N 0 8MM NV CN282 FGY093 0022 CONNECTOR CJ 2P N 0 8MM NV CN451 FGB163 0241 CONNECTOR CJ 24P FN 0 5MM NH CN452 FGB162 0181 CONNECTOR CJ 18P FN 0 5MM ...

Page 120: ...e Manual 7 Appendix 7 1 List of Related Technical Updates Issued To ensure that after sales srevice is performed accuratety keep a record here of the technical updates issued that cover this device Technical Update No Date Title Details Other ...

Page 121: ...26 30 Nishiazabu 2 chome Minato ku Tokyo 106 8620 Japan FUJI PHOTO FILM CO LTD ...

Reviews: