background image

18

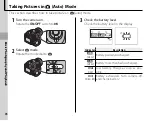
Taking Pictures in 

B

 (Auto) Mode

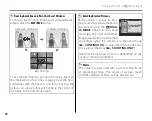
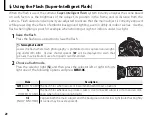
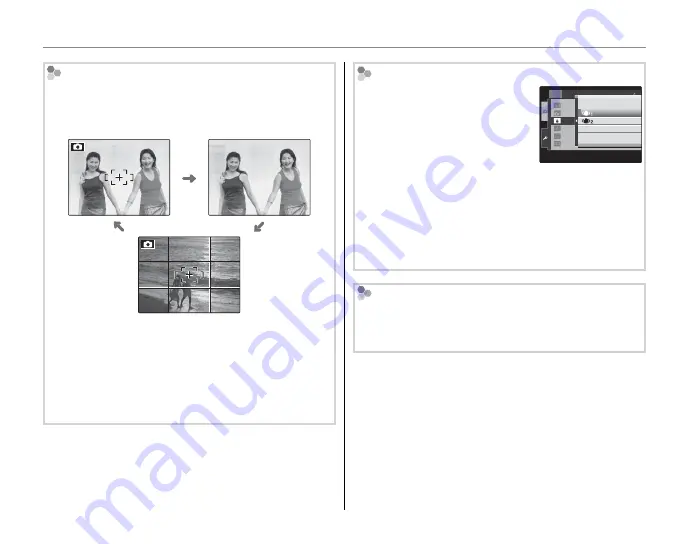
 Framing Guideline and Post-Shot Assist Window

To choose the shooting information and guides dis-
played, press the 

DISP/BACK

 button.

Indicators displayed

Indicators hidden

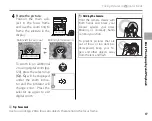
Best framing

To use the best framing, position the main subject at 
the intersection of two lines or align one of the hori-
zontal lines with the horizon.  Use focus lock (pg. 24) 
to focus on subjects that will not be in the center of 
the frame in the fi nal photograph.

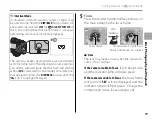
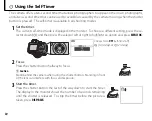
 Avoiding Blurred Pictures

If the subject is poorly lit, blur-
ring caused by camera shake can 
be reduced using the 

L


DUAL 

IS MODE

 option in the setup 

menu (pg. 95).  Choose whether 
image stabilization is performed 
at all times when the camera is in shooting mode 
(

l


CONTINUOUS

), or only when the shutter but-

ton is pressed halfway (

m


SHOOTING ONLY

).

Note that blurring may still occur depending on the 
scene or shooting conditions.

ON

AE-L 1

3

5

OFF

SET-UP

EVF/LCD MODE
AUTO POWER OFF

RED EYE REMOVAL

AE-LOCK MODE

DUAL IS MODE

2 MIN

ON

AF ILLUMINATOR

SHOOTING ONLY

OFF

CONTINUOUS

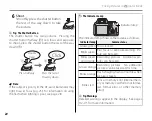
 Filters

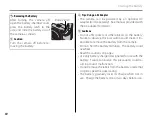
The camera can be used with a φ 67 mm thin-frame 
PL (polarizing) fi lters. The edges of pictures taken 
with the standard PL fi lters will be blacked out.

Summary of Contents for FinePix S200EXR

Page 1: ...dix For information on related products visit our website at http www fujifilm com products index html Owner s Manual Thank you for your purchase of this prod uct This manual describes how to use your FUJIFILM FinePix S200EXR digital camera and the supplied software Be sure that you have read and understood its contents before using the camera BL00886 200 EN ...

Page 2: ...roper ventilation is provided or the manu facturer s instructions have been ad hered to This video product should never be placed near or over a radia tor or heat register Attachments Do not use attachments not recommended by the video product manufacturer as they may cause hazards Water and Moisture Do not use this video product near water for ex ample near a bath tub wash bowl kitchen sink or la...

Page 3: ...nct change in performance this indicates a need for service ReplacementParts Whenreplacement parts are required be sure the service technician has used replacement parts specified by the manufacturer or have the same characteristics as the original part Unauthorized sub stitutions may result in fire electric shock or other hazards SafetyCheck Upon completion of any service or repairs to this video...

Page 4: ...a digital camera or keep it in the hard case When storing the battery keep it in the hard case When discarding cover the battery terminals with insulation tape Contact with other metallic objects or batteries could cause the battery to ignite or burst Keep memory cards out of the reach of small children Because memory cards are small they can be swallowed by children Be sure to store memory cards ...

Page 5: ... or hairpins Do not expose to flame or heat Do not disassemble or modify Use with designated chargers only Dispose of used batteries promptly Do not drop or subject to strong physical shocks Do not expose to water Keep the terminals clean The battery and camera body may become warm to the touch after extended use This is normal ACpoweradapters AvailableSeparately Use only FUJIFILM AC power adapt e...

Page 6: ...ermined by turning the equipment off and on the user is encouraged to try to correct the interference by one or more of the following measures Reorient or relocate the receiving antenna Increase the separation between the equipment and receiver Connect the equipment into an outlet on a circuit different from that to which the receiver is connected Consult the dealer or an experienced radio TV tech...

Page 7: ...Norway Iceland and Liechtenstein If you wish to discard this product including the batteries or accumula tors please contact your local authorities and ask for the correct way of disposal NotesonCopyright NotesonCopyright Unless intended solely for personal use images recorded using your digital camera system cannot be used in ways that infringe copyright laws with out the consent of the owner Not...

Page 8: ... know the name for it Find the answer in Camera Q A The Table of Contents gives an overview of the entire manual The principal camera operations are listed here Glossary Glossary pg 116 pg 116 RestrictionsonCameraSettings RestrictionsonCameraSettings BM BM See the Basic Manual for restrictions on the op tions available in each shooting mode The meanings of some technical terms may be found here Tr...

Page 9: ...top the camera beeping and clicking Operation and shutter volume 95 Silent mode 19 What are the parts of the camera called Parts of the camera 2 What do the icons in the display mean Displays 5 How do I use the menus Menus 74 What s behind that flashing icon or error message Messages and displays 112 How much charge is left in the battery Battery level 16 Sharing Pictures Sharing Pictures Question...

Page 10: ...p my subjects eyes glowing red when I use the flash How do I fill in shadows on back lit subjects How do I take a series of pictures in a single burst Continuous shooting mode 32 How do I turn off the lamp on the front of the camera AF assist illuminator 25 How do I take a group portrait that includes the photographer Self timer mode 30 Is there a remote shutter release for this camera Remote shut...

Page 11: ... frame playback 54 How do I view all pictures taken on the same day Sort by date 55 Can I protect my pictures from accidental deletion Protect 88 Can I hide the icons in the display when viewing my pictures The DISP BACK button 54 Can I view my pictures in a slide show Slide show 86 Can I add a short voice memo to my pictures Voice memo 92 Can I crop unwanted elements out of my pictures Crop trimm...

Page 12: ... Photography and Playbac Basic Photography and Playback k Taking Pictures in B Auto Mode 16 Viewing Pictures 21 More on Photograph More on Photography y g Intelligent Face Detection and Red Eye Removal 22 Focus Lock 24 AE Lock 26 F Macro Mode Close ups 27 N Using the Flash Super Intelligent Flash 28 h Using the Self Timer 30 I Continuous Shooting Burst Mode 32 d Exposure Compensation 34 Metering 3...

Page 13: ...der 65 Creating a DPOF Print Order 66 Viewing Pictures on a Computer 68 Installing FinePixViewer 68 Connecting the Camera 72 Menu Menus s Using the Menus Shooting Mode 74 Using the Shooting Menu 74 Shooting Menu Options 75 O IMAGE SIZE 77 T IMAGE QUALITY 78 U DYNAMIC RANGE 78 P FILM SIMULATION 79 d WB FINE TUNE 79 F AF MODE 80 J AE BKT EV STEPS 81 I FLASH 81 g EXTERNAL FLASH 82 E HIGH SPEED SHOOTI...

Page 14: ... M AUTO POWER OFF 100 j CCD RAW 101 l FOCUS CHECK 101 Technical Note Technical Notes s Optional Accessories 102 Accessories from FUJIFILM 103 Caring for the Camera 104 Troubleshootin Troubleshooting g Troubleshooting 105 Warning Messages and Displays 112 Appendi Appendix x Glossary 116 Internal Memory Memory Card Capacity 118 Specifications 120 FUJIFILM Digital Camera Worldwide Network 126 ...

Page 15: ...itional information that may be helpful when using the camera Menus and other text in the camera monitor are shown in bold In the illustrations in this manual the monitor display may be simplified for explanatory purposes Supplied Accessories Supplied Accessories The following items are included with the camera NP 140 rechargeable battery BC 140 battery charger USB cable A V cable Strap Owner s Ma...

Page 16: ... dial 6 18 Strap eyelet 7 19 G switch 14 20 Shutter button 20 21 ISO sensitivity button 38 22 d exposure compensation button 34 23 Command dial 32 34 38 39 24 Microphone 92 1 Focus ring 36 2 Hot shoe 82 3 Zoom ring 17 4 Lens 5 Flash 28 6 AF assist illuminator 25 Self timer lamp 31 7 r one touch AF button 37 8 N flash pop up button 28 9 I Continuous shooting button 32 10 D white balance button 39 1...

Page 17: ...iewfinder 4 26 EVF LCD display selection button 4 27 g Intelligent Face Detection red eye removal button 22 28 Monitor 5 29 DISP display BACK button 18 54 30 Metering selector 35 31 AE L autoexposure lock button 26 The Selector Button MENU OK button pg 15 Move cursor left F macro button pg 27 Move cursor right N flash button pg 28 Move cursor up e digital zoom button pg 17 Move cursor down h self ...

Page 18: ...icult to see To switch between the monitor and electronic viewfinder press the EVF LCD button your selection remains in effect when the camera is turned off or the mode dial is rotated to another setting LCD EVF The camera is equipped with diopter adjustment to accommodate individual differences in vision Slide the diopter adjustment control up and down until the viewfinder dispay is in sharp focu...

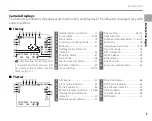
Page 19: ...9 White balance 39 20 Battery level 16 21 Dual IS mode 18 22 Exposure compensation 34 1 Internal memory indicator 11 2 Focus frame 19 24 3 Silent mode 19 4 Continuous shooting mode 32 5 Metering 35 6 Intelligent Face Detection indicator 22 7 Shooting mode 41 8 Flash mode 28 9 Macro close up mode 27 10 Self timer indicator 30 11 Focus warning 19 112 Playback Playback 100 0001 100 0001 400 400 12 31...

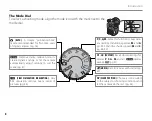
Page 20: ...s including aperture M and A pg 49 50 and or shutter speed M and S pg 48 50 SP SCENE POSITION Choose a scene suited to the subject or shooting conditions and let the camera do the rest pg 44 P FILM SIMULATION BRACKETING Vary film simulation settings over a series of pictures pg 43 O Improve clarity reduce noise in crease dynamic range or let the camera automatically adjust settings to suit the sce...

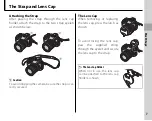
Page 21: ...below c Caution To avoid dropping the camera be sure the strap is cor rectly secured The Lens Cap The Lens Cap When removing or replacing the lens cap press the latch as shown To avoid losing the lens cap pass the supplied string through the eyelet and secure the lens cap to the strap The Lens Cap Holder When not in use the lens cap can be attached to the lens cap holder as shown ...

Page 22: ...hen it is not in use Remove dirt from the battery terminals with a clean dry cloth Failure to observe this precau tion could prevent the battery from charging Charging times increase at low temperatures The Charging Indicator The charging indicator shows battery charge status as follows Chargingindicator Chargingindicator Battery status Battery status Action Action Off Battery not inserted Insert ...

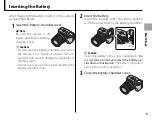
Page 23: ... caution could result in damage to image files or memory cards Do not use excessive force when handling the battery chamber cover 2 Insert the battery Insert the battery with the arrow aligned with the arrow next to the battery chamber Arrow c Caution Insert the battery in the correct orientation Do NOT use force or attempt to insert the battery up side down or backwards The battery will slide in ...

Page 24: ...dapter for details c Cautions Do not affix stickers or other objects to the battery Failure to observe this precaution could make it im possible to remove the battery from the camera Do not short the battery terminals The battery could overheat Read the cautions on page v Use only battery chargers designated for use with the battery Failure to observe this precaution could re sult in product malfu...

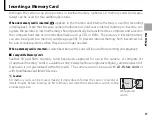
Page 25: ...ge 90 To prevent internal memory from becoming full be sure to delete pictures when they are no longer needed When a memory card is inserted as described below the card will be used for recording and playback CompatibleMemoryCards CompatibleMemoryCards SanDisk SD and SDHC memory cards have been approved for use in the camera A complete list of approved memory cards is available at http www fujifil...

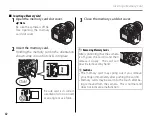
Page 26: ...Click Be sure card is in correct orientation do not insert at an angle or use force 3 Close the memory card slot cover Removing Memory Cards After confirming that the camera is off press the card in and then release it slowly The card can now be removed by hand c Cautions The memory card may spring out if you remove your finger immediately after pushing the card in Memory cards may be warm to the ...

Page 27: ...arger or smaller than the standard dimensions of an SD card may not eject normally if the card does not eject take the camera to an authorized service representative Do not forcibly remove the card Do not affix labels to memory cards Peeling labels can cause camera malfunction Movie recording may be interrupted with some types of SD memory card The data in internal memory may be erased or corrupte...

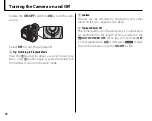
Page 28: ...ain or press the shutter but ton halfway to return to shooting mode c Caution Pictures can be affected by fingerprints and other marks on the lens Keep the lens clean b Tip Auto Power Off The camera will turn off automatically if no operations are performed for the length of time selected in the M AUTO POWER OFF menu pg 100 note that OFF is not available when R is selected in O mode To turn the ca...

Page 29: ... YY MM DD 2 1 Press the selector left or right to highlight the year month day hour or minute and press up or down to change To change the order in which the year month and day are displayed highlight the date for mat and press the selector up or down 2 2Press MENU OK b Tip The Camera Clock If the battery is removed for an extended period the camera clock will be reset and the language selection d...

Page 30: ...witch to ON 2 Select B mode Rotate the mode dial to B 3 Check the battery level Check the battery level in the display q w e r Indicator Indicator Description Description D white Battery partially discharged C white Battery more than half discharged B red Low battery Charge as soon as pos sible A blinks red Battery exhausted Turn camera off and charge battery ...

Page 31: ... the selector up e e will be displayed under the zoom indica tor and the indicator will change color Press the selector up again to exit digital zoom Holding the Camera Hold the camera steady with both hands and brace your elbows against your sides Shaking or unsteady hands can blur your shots To prevent pictures that are out of focus or too dark un derexposed keep your fin gers and other objects ...

Page 32: ...f the subject is poorly lit blur ring caused by camera shake can be reduced using the L DUAL IS MODE option in the setup menu pg 95 Choose whether image stabilization is performed at all times when the camera is in shooting mode l CONTINUOUS or only when the shutter but ton is pressed halfway m SHOOTING ONLY Note that blurring may still occur depending on the scene or shooting conditions ON AE L 1...

Page 33: ...he flash will still fire when C is selected in scene mode To restore nor mal operation press the DISP BACK button until the h icon is no longer displayed 5 Focus Press the shutter button halfway to focus on the main subject in the focus frame Press halfway Focus frame Camera selects small focus frame and focuses on subject aNote The lens may make a noise when the camera fo cuses This is normal If ...

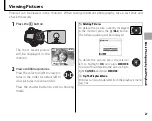
Page 34: ... lighting is poor see page 28 The Indicator Lamp Indicator lamp The indicator lamp shows camera status as follows Indicator lamp Indicator lamp Camera status Camera status Glows green Focus locked Blinks green Blur focus or exposure warning Pic ture can be taken Blinks green and orange Recording pictures Additional pic tures can be taken Glows orange Recording pictures No additional pictures can b...

Page 35: ...Press the selector right to view pic tures in the order recorded left to view pictures in reverse order Press the shutter button to exit to shooting mode Deleting Pictures To delete the picture currently displayed in the monitor press the b AE L button The following dialog will be displayed ERASE OK OK CANCEL SET To delete the picture press the selector left to highlight OK and press MENU OK To ex...

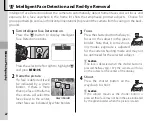
Page 36: ...tected it will be indicated by a green border If there is more thanonefaceintheframe the camera will select the face closest to the center other faces are indicated by white borders 3 Focus Press the shutter button halfway to focus on the subject in the green border Note that in some shoot ing modes exposure is adjusted for the current shooting mode and may not be optimized for the selected subjec...

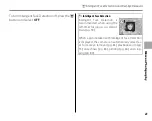
Page 37: ...ction Intelligent Face Detection is recommended when using the self timer for group or self por traits pg 30 77 When a picture taken with Intelligent Face Detection is displayed the camera can automatically select fac es for red eye removal pg 86 playback zoom pg 53 slide shows pg 86 printing pg 66 and crop ping pg 89 g Intelligent Face Detection and Red Eye Removal ...

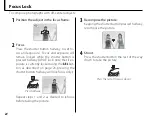
Page 38: ... halfway AF AE lock note that if ex posure is currently locked using the AE L but ton as described on page 26 pressing the shutter button halfway will lock focus only Press halfway Repeat steps 1 and 2 as desired to refocus before taking the picture 3 Recompose the picture Keeping the shutter button pressed halfway recompose the picture 4 Shoot Press the shutter button the rest of the way down to ...

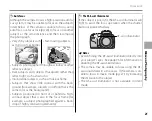
Page 39: ...ground for example subjects in clothing that is the same color as the background Subjects positioned in front of or behind a high contrast object that is also in the focus frame for example a subject photographed against a back drop of highly contrasting elements The AF Assist Illuminator If the subject is poorly lit the AF assist illuminator will light to assist the focus operation when the shutt...

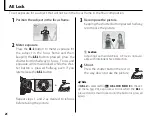
Page 40: ...t ter button is pressed halfway even if you later release the AE L button Repeat steps 1 and 2 as desired to refocus before taking the picture 3 Recompose the picture Keeping the shutter button pressed halfway recompose the picture c Caution Adjusting zoom ends AE lock AE lock is not avail able with Intelligent Face Detection 4 Shoot Press the shutter button the rest of the way down to take the pi...

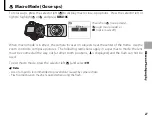
Page 41: ...o mode is in effect the camera focuses on subjects near the center of the frame Use the zoom control to compose pictures The following restrictions apply in super macro mode the lens must be zoomed all the way out at other zoom positions o is displayed and the flash can not be used To exit macro mode press the selector left F and select OFF aNotes Use of a tripod is recommended to prevent blur cau...

Page 42: ...on to raise the flash Turning the Flash Off Lower the flash where flash photography is prohibited or to capture natural light ing under dim light At slow shutter speeds k will be displayed to warn that pictures may be blurred use of a tripod is recommended 2 Choose a flash mode Press the selector right N and then press the selector left or right to high light one of the following options and press...

Page 43: ... the shutter button the rest of the way down to shoot c Caution The flash may fire several times with each shot Do not move the camera until shooting is com plete Red Eye Removal When ON is selected for J RED EYE REMOVAL in the setup menu pg 96 red eye removal J is available in AUTO FLASH K FORCED FLASH L and SLOW SYNCHRO M modes Red eye removal minimizes red eye caused when light from the flash i...

Page 44: ...s the se lector down h and then press the selector left or right to highlight an option and press MENU OK OFF OFF Choose from OFF self timer off S 10s delay or R 2s delay 2 Focus Press the shutter button halfway to focus c Caution Stand behind the camera when using the shutter button Standing in front of the lens can interfere with focus and exposure 3 Start the timer Press the shutter button the ...

Page 45: ...for group portraits or self portraits To use the self timer with Intelligent Face Detection turn Intelligent Face Detection on set the timer as described in Step 1 and then press the shutter button all the way down to start the timer The camera will detect faces while the timer is counting down and adjust focus and exposure immediately before the shutter is released Be careful not to move until th...

Page 46: ...g menu pg 81 and the third underexposed by the same amount the camera may not be able to use the selected bracketing increment if the amount of over or under exposure exceeds the limits of the exposure metering system X film simulation bracketing Each time the shutter button is pressed the camera takes three shots each with a different option selected for P FILM SIMULATION c PROVIA for the first s...

Page 47: ...been taken aNotes Focus and exposure are determined by the first frame in each series The flash turns off automatically pg 28 the previously selected flash mode is restored when burst shooting is turned off Frame rate varies with shutter speed The number of pictures that can be recorded depends on the memory available Bracketing options are only available if there is sufficient memory for three pi...

Page 48: ...e term EV see the Glossary on page 116 Highly reflective subjects or very bright scenes e g snowfields 1EV Scenes that are mostly sky 1EV Spotlit subjects particularly if photographed against dark backgrounds 2 3 EV Subjects with low reflectivity pine trees or dark col ored foliage 2 3 EV aNote A d icon and exposure indicator are displayed at set tings other than 0 Exposure compensation is not res...

Page 49: ...e range of shooting conditions p spot The camera meters lighting conditions at the center of the frame Recommended when the background is much brighter or darker than the main subject Can be used with exposure lock pg 26 to meter off center subjects q average Exposure is set to the average for the entire frame Provides consistent exposure across multiple shots with the same lighting and is particu...

Page 50: ... MODE pg 80 is fixed at r CENTER if Intelligent Face Detection is on the camera will continually adjust focus for the selected face Choose for moving subjects MF manual Focus manually using the focus ring Rotate the ring left to reduce the focus distance right to increase The manual focus indicator indicates how closely the focus distance matches the distance to the subject in the focus brackets C...

Page 51: ...s may be affected if the camera moves The camera will not focus when the focus ring is rotated all the way to the right To focus at infinity focus on a distant object To focus using autofocus pg 25 press the r button This can be used to quickly focus on a chosen subject in manual focus mode ...

Page 52: ...ensitivities particularly at settings above 1600 If AUTO or an option such as AUTO 3200 is selected the camera will adjust sensitivity automatically in response to shoot ing conditions In the case of AUTO 3200 AUTO 1600 AUTO 800 and AUTO 400 the value in parentheses is the maximum sensitivity that will be selected when the subject is poorly lit Settings other than AUTO are shown by an icon in the ...

Page 53: ...or subjects in the shade k Use under daylight fluorescent lights l Use under warm white fluorescent lights m Use under cool white fluorescent lights n Use under incandescent lighting If AUTO does not produce the desired results for example when taking close ups select y or z and measure a value for white balance or choose the option that matches the light source aNotes At settings other than y and...

Page 54: ...alance to the measured value This value is stored even when the battery is removed and can be reselected by pressing MENU OK when cus tom white balance options are displayed If UNDER is displayed raise exposure compensa tion pg 34 and try again If OVER is displayed lower exposure compensa tion and try again b Tip To give a deliberate color cast to your photographs measure a value for custom white ...

Page 55: ...MENU OK to display the shoot ing menu EXIT AUTO N 4 3 MODE SHOOTING MENU 1 ISO IMAGE SIZE FILM SIMULATION DYNAMIC RANGE IMAGE QUALITY 1 AUTO 2 Highlight A E MODE 3 Press the selector right to display the following menu CANCEL SET Selects EXR mode and camera settings for each scene AUTO D RANGE PRIORITY RESOLUTION PRIORITY HIGH ISO LOW NOISE Shooting Mode Choose a shooting mode according to the sce...

Page 56: ...R EXR AUTO EXR AUTO In this mode the camera auto matically analyzes the compo sition and selects the appropri ate scene mode according to the subject and shooting con ditions The selected mode is displayed as shown at right When the shutter button is pressed halfway the camera selects the optimal EXR mode which is displayed next to the scene mode icon Mode Mode Type of subject or scene detected Ty...

Page 57: ...may be audible In R mode the camera continuously focuses on the selected face and o is displayed in the monitor P P FILM SIMULATION BRACKETING FILM SIMULATION BRACKETING Each time the shutter button is pressed the camera records three images the first with standard color reproduction suited to a wide range of subjects from portraits to landscapes c PROVIA the second with a high contrast palette of...

Page 58: ...SITION ISO IMAGE SIZE FILM SIMULATION DYNAMIC RANGE IMAGE QUALITY AUTO 3 Highlight A SCENE POSITION 4 Press the selector right to display the following menu CANCEL SET NATURAL LIGHT Portrait with soft overall tone and beautiful skin tones NATURAL PORTRAIT PRO LOW LIGHT 5 Press the selector up or down to highlight a scene pg 46 6 Press MENU OK to select the high lighted option 7 Press DISP BACK to ...

Page 59: ...backing away from your sub ject and increasing zoom The camera may also be un able to soften the background if the subject is moving if prompted check the results and try again c Cautions Hold the camera steady during shooting Frame coverage is reduced in this mode j j PRO LOW LIGHT MODE PRO LOW LIGHT MODE Each time the shutter button is pressed the cam era takes four shots and combines them to fo...

Page 60: ... N SPORT Choose when photographing moving subjects p HIGH SPEED SHOOTING turns on automatically and priority is given to faster shutter speeds O NIGHT Choose this mode for poorly lit twilight or night scenes Sensitivity is automatically raised to reduce blur caused by camera shake H NIGHT TRIPOD Choose this mode for slow shutter speeds when shooting at night Use a tripod to prevent blur P FIREWORK...

Page 61: ...displays will show Press the shutter button halfway to measure exposure again Program Shift Rotate the command dial to choose the desired combination of shutter speed and aper ture The default values can be restored by raising the flash rotating the mode dial to an other setting turning the camera off or selecting playback mode Program shift is available when the flash is off or an option other th...

Page 62: ...tate the command dial to choose the shutter speed 3 Take pictures If the correct exposure can not be achieved at the selected shutter speed ap erture will be displayed in red when the shut ter button is pressed halfway Adjust shutter speed until the correct exposure is achieved c Caution If the subject is outside the metering range of the cam era the aperture display will show F Press the shut ter...

Page 63: ...rture 2 Rotate the command dial to choose the aperture 3 Take pictures If the correct exposure can not be achieved at the selected aperture shutter speed will be displayed in red when the shut ter button is pressed halfway Adjust aperture until the correct exposure is achieved c Caution If the subject is outside the metering range of the cam era the shutter speed display will show Press the shutte...

Page 64: ...ll be dis played 250 F4 5 M Shutter speed Aperture 2 Rotate the command dial to choose the shutter speed c Caution Noise in the form of randomly spaced bright pixels may occur in long exposures 3 Press the d button and rotate the command dial to choose the aperture 4 Take pictures The Exposure Indicator The amount the picture will be under or over exposed at cur rent settings is shown by the ex po...

Page 65: ...ting menu stores the following settings Shooting menu A E MODE O IMAGE SIZE T IMAGE QUALITY U DYNAMIC RANGE P FILM SIMULATION d WB FINE TUNE f COLOR e TONE H SHARPNESS h NOISE REDUCTION G AF MODE J AE BKT EV STEPS I FLASH g EXTERNAL FLASH E HIGH SPEED SHOOTING Setup menu C AF ILLUMINATOR j CCD RAW Camera controls ISO white balance burst mode macro mode digital zoom flash mode exposure compensation...

Page 66: ...4 5 12 31 2050 12 31 2050 10 00 AM 10 00 AM Press the selector right to view pictures in the order recorded left to view pic tures in reverse order Keep the selector pressed to scroll rapidly to the desired frame aNote Pictures taken using other cameras are indicated by a m gift image icon during playback More on Playback ...

Page 67: ...left or right and then use the selector to scroll to the desired location CANCEL Navigation window shows portion of image currently displayed in monitor Press DISP BACK to exit zoom aNote Playback zoom is not available with cropped copies saved at a size of a or copies created with O RE SIZE pg 90 Intelligent Face Detection Pictures taken with Intelligent Face Detection pg 22 are indi cated by a g...

Page 68: ...yed Indicators hidden 2050 2 13 2 13 12 31 Sort by date 1 frame w prev next Microthumbnail 9 frames 2 frames Use the selector to highlight images and press MENU OK to view the highlighted image full frame In the nine and hundred frame displays press the selector up or down to view more pictures b Tip Two Frame Display Two frame display can be used to compare pictures taken in C mode Multi Frame Pl...

Page 69: ...highlight a date Keep the selector pressed to scroll rapidly to the de sired date 2050 1 4 1 4 12 30 3 Press the selector left or right to scroll through the pictures taken on the highlighted date Keep the selector pressed to scroll rapidly to the desired frame Sort by Date Sort by Date Choose sort by date mode to view pictures taken on a selected date ...

Page 70: ...XIT 2 Press the selector up or down to highlight A ERASE 3 Press the selector right to display de lete options PLAYBACK MENU ERASE RED EYE REMOVAL SLIDE SHOW CROP IMAGE ROTATE PROTECT 1 2 FRAME ALL FRAMES BACK 4 Press the selector up or down to highlight FRAME or ALL FRAMES 5 Press MENU OK to display options for the selected item pg 57 b Tips Deleting Pictures When a memory card is inserted pictur...

Page 71: ...e Press DISP BACK to exit when all the desired pic tures have been deleted ALL FRAMES ALL FRAMES DeletingAllImages DeletingAllImages Selecting ALL FRAMES dis plays the confirmation shown at right SET ERASE ALL OK IT MAY TAKE A WHILE OK CANCEL Highlight OK and press MENU OK to delete all unprotected pictures The dialog shown at right is dis played during deletion Press DISP BACK to cancel before al...

Page 72: ...e number 0 Picture overexposed areas blink on and off 1 Histogram Histograms Histograms show the distribution of tones in the im age Brightness is shown by the horizontal axis the number of pixels by the vertical axis Pixel brightness No of pixels Shadows Highlights Optimal exposure Pixels are distributed in an even curve throughout the tone range Overexposed Pixels are clustered at the right side...

Page 73: ... for longer movies Press MENU OK to return to movie re cording mode SHOOTING MENU QUALITY 1 1 43s 1m25s 2 Press the shutter button all the way down to start recording REC 12s 12s zREC and time remaining are displayed b Tip There is no need to keep the shutter button pressed during recording F Recording Movies Shoot short movies at 30 frames per second Sound is recorded via the built in microphone ...

Page 74: ...efore recording begins Movies are recorded as monaural motion JPEG files If the subject is poorly lit the AF assist lamp may light to assist the focus operation To turn the AF assist lamp off select OFF for the C AF ILLUMINATOR option in the setup menu pg 96 c Caution The indicator lamp lights while movies are being re corded Do not open the battery chamber cover dur ing shooting or while the indi...

Page 75: ... Advance rewind Press the selector right to advance left to rewind If playback is paused the movie will advance or rewind one frame each time the selector is pressed Adjust volume Press MENU OK to pause playback and dis play volume controls Press the selector up or down to adjust the volume press MENU OK again to resume playback Progress is shown in the monitor during play back STOP PAUSE 15s 15s ...

Page 76: ...eo in jack Connect white plug to audio in jack Insert into A V cable connector Turn the camera on and press a button The camera monitor turns off and pictures and voice memos are played back on the TV Note that the camera volume controls have no effect on sounds played on the TV use the television volume controls to adjust the volume aNote Image quality drops during movie playback c Caution When c...

Page 77: ...n and press a button t USB will be displayed in the monitor fol lowed by the PictBridge display shown below at right USB 00 OK SET FRAME SHEETS PICTBRIDGE TOTAL 00000 Printing Selected Pictures Printing Selected Pictures 1 Press the selector left or right to dis play a picture you wish to print aNote To print one copy of the current picture proceed directly to Step 3 2 Press the selector up or dow...

Page 78: ...with printers that support date printing aNotes Use an optional AC adapter and DC coupler to power the camera for extended periods Print pictures from internal memory or a memory card that has been formatted in the camera Default printer page size and print quality settings are used when printing via direct USB connection During Printing The message shown at right is displayed during printing Pres...

Page 79: ...ORDER DPOF in the playback menu pg 85 1 In the PictBridge display press DISP BACK to open the PictBridge menu 2 Press the selector up or down to highlight u PRINT DPOF PICTBRIDGE PRINT WITH DATE PRINT DPOF PRINT WITHOUT DATE 3 Press MENU OK to display a confirma tion dialog TOTAL 9 SHEETS CANCEL YES PRINT DPOF OK 4 Press MENU OK to start printing ...

Page 80: ...ATE s or WITHOUT DATE PLAYBACK MENU 2 2 RESIZE VOICE MEMO COPY PRINT ORDER DPOF WITHOUT DATE RESET ALL WITH DATE WITH DATE s Print date of record ing on pictures WITHOUT DATE Print pictures with out date Press MENU OK and follow the steps below 1 Press the selector left or right to dis play a picture you wish to include in or remove from the print order 2 Press the selector up or down to choose th...

Page 81: ... or der select RESET ALL in the K PRINT ORDER DPOF menu Theconfirmationshown at right will be displayed press MENU OK to remove all pictures from the order aNotes Remove the memory card to create or modify a print order for the pictures in internal memory Print orders can contain a maximum of 999 pictures If a memory card is inserted con taining a print order created by another camera the message ...

Page 82: ...ecommended Windows XP 800MHz Pentium 4 or better 2GHz Pentium 4 or better recommended Windows 2000 200MHz Pentium or better RAM RAM Windows Vista 512MB or more 1GB or more recommended Windows XP 512MB or more Windows 2000 128MB or more Free disk Free disk space space A minimum of 450MB required for installation with 600MB available when FinePixViewer is running 15GB or more recommended under Windo...

Page 83: ...nstaller does not start automatically select Computer or My Computer from the Start menu Win dows Vista XP or double click the My Computer icon on the desktop Windows 2000 then double click the FINEPIX CD icon to open the FINEPIX CD window and double click SETUP or SETUP exe 4 If prompted to install Windows Media Player or DirectX follow the on screen instructions to com plete installation 5 When ...

Page 84: ... Other Built in USB port recommended Operation is not guaranteed other USB ports Internet connection 56kbps or faster recommended required to use FinePix Internet Service Internet connection and e mail software required to use e mail option 2 After starting the computer and quitting any applications that may be running insert the installer CD in a CD ROM drive Double click the FinePix CD icon on t...

Page 85: ...or reference when updating the software or contacting customer support 5 Select Applications in the Finder Go menu to open the applications folder Double click the Image Capture icon and select Preferences from the Im age Capture application menu The Image Capture preferences dialog will be displayed Choose Other in the When a camera is connected open menu then select FPVBridge in the Applications...

Page 86: ...t the camera di rectly to the computer do not use a USB hub or keyboard 3 Turn the camera on and press a button FinePixViewer will start automatically and the Save Image Wizard will be displayed Follow the on screen instructions to copy pictures to the computer To exit without copying pic tures click Cancel c Caution If FinePixViewer does not start automatically the software may not be correctly i...

Page 87: ...alone computer The user bears all applicable fees charged by the phone company or Internet service provider when using services that require an Internet connection Disconnecting the Camera After confirming that the indicator lamp is out follow the on screen instructions to turn the camera off and disconnect the USB cable Updating FinePixViewer The latest version of FinePixViewer can be download ed...

Page 88: ... N 4 3 AUTO 1 2 1600 ISO IMAGE SIZE FILM SIMULATION DYNAMIC RANGE IMAGE QUALITY AUTO 2 Press the selector up or down to highlight the desired menu item 3 Press the selector right to display op tions for the highlighted item SHOOTING MENU IMAGE QUALITY N 4 3 AUTO 1 2 1600 4 3 1600 AUTO FINE NORMAL 4 Press the selector up or down to highlight the desired option 5 Press MENU OK to select the high lig...

Page 89: ...e image size and aspect ratio pg 77 O 4 3 O 3 2 O 16 9 P 4 3 P 3 2 P 16 9 Q 4 3 Q 3 2 Q 16 9 O 4 3 TIMAGE QUALITY Choose image quality pg 78 F N N UDYNAMIC RANGE Enhance details in highlights for natural contrast pg 78 AUTO A B C D AUTO PFILM SIMULATION Simulate the effects of different types of film pg 79 c d e b f c dWB FINE TUNE White balance can be fine tuned using this option Adjustments can ...

Page 90: ...s selected in continuous shooting mode pg 81 1 3 EV 2 3 EV 1EV 1 3 EV IFLASH FLASH Adjust flash brightness pg 81 2 3 EV 2 3 EV in steps of 1 3 EV 0 gEXTERNAL FLASH Choose when using a optional flash pg 82 ON OFF OFF EHIGH SPEED SHOOTING HIGH SPEED SHOOTING Choose for quick shutter response pg 83 ON OFF OFF KCUSTOM SET CUSTOM SET Save settings for P S A M and all O except R modes pg 51 aNote Some o...

Page 91: ...at can be taken at cur rent settings pg 118 119 is shown to the right of the image quality icon in the display Aspect Ratio Pictures with an aspect ratio of 4 3 have the same proportions as the camera display Pictures with an aspect ratio of 3 2 have the same proportions as a frame of 35 mm film while an aspect ratio of 16 9 is suited to display on High Definition HD devices N N 4 3 N N N N 3 2 16...

Page 92: ... as sunlight on water brightly lit autumn leaves and portraits taken against a blue sky note however that mottling may appear in pictures taken at higher values If AUTO is se lected the camera will automatically select values between 100 and 400 in response to shooting conditions aNote D 800 is available only when U DYNAMIC RANGE is selected in A E MODE SHOOTING MENU IMAGE QUALITY N 4 3 AUTO 1 2 1...

Page 93: ...wide range of subjects from por traits to landscapes dVelvia VIVID A high contrast palette of saturated colors suited to nature photographs eASTIA SOFT A soft toned palette of less saturated colors bB W Take pictures in black and white fSEPIA Take pictures in sepia d d WB FINE TUNE WB FINE TUNE Press the selector up or down to fine tune white balance on the selected color axis Red Cyan or Blue Yel...

Page 94: ...TI When the shutter button is pressed halfway the camera detects high contrast subjects near the center of the frame and selects the focus area automati cally if the focus frame is not displayed select r CENTER and use focus lock pg 24 M Press halfway Focus frame t AREA The focus posi tion can be chosen manu ally by pressing the selector up down left or right while pressing the r button Press the ...

Page 95: ... Adjustflashbrightness Choose from values between 2 3 EV and 2 3 EV the default setting is 0 Note that the desired re sults may not be achieved de pending on shooting conditions and the distance to the subject SHOOTING MENU M 3 3 AE BKT EV STEPS OFF OFF C1 0 0 C1 OFF OFF 3 2 1 EV EV 3 1 EV SHOOTING MENU M 3 3 AE BKT EV STEPS OFF OFF C1 0 0 C1 OFF OFF 3 2 1 EV EV 3 1 EV SHOOTING MENU M 3 3 OFF OFF ...

Page 96: ...NAL FLASH the built in flash will fire once to provide a signal for the optional flash unit to fire aNote The camera can be used with flash units that provide aperture adjustment external metering and sensitivity control Some flash units that are designed specifically for other cameras can not be used UsinganOptionalFlashUnit UsinganOptionalFlashUnit 1 Select ON for g EXTERNAL FLASH SHOOTING MENU ...

Page 97: ... in the man ual provided with the optional flash unit TTL mode is not supported choose external flash sync mode and set sensitivity pg 38 and ap erture to the values selected with the camera E E HIGH SPEED SHOOTING HIGH SPEED SHOOTING Selecting ON reduces focusing time ensuring a quick shutter response SHOOTING MENU M 3 3 OFF OFF C1 0 C1 3 1 0 OFF HIGH SPEED SHOOTING ON OFF ...

Page 98: ...SHOW CROP IMAGE ROTATE PROTECT EXIT 3 Press the selector up or down to highlight the desired menu item 4 Press the selector right to display op tions for the highlighted item PLAYBACK MENU ERASE RED EYE REMOVAL SLIDE SHOW CROP IMAGE ROTATE PROTECT 1 2 FRAME ALL FRAMES BACK 5 Press the selector up or down to highlight the desired option 6 Press MENU OK to select the high lighted option 7 Press DISP...

Page 99: ...BRED EYE REMOVAL Create copies with reduced red eye pg 86 CIMAGE ROTATE Rotate pictures pg 87 DPROTECT Protect pictures from accidental deletion pg 88 GCROP Create cropped copies of pictures pg 89 ORESIZE Create small copies of pictures pg 90 ECOPY Copy pictures between internal memory and a memory card pg 90 FVOICE MEMO Add voice memos to pictures pg 92 KPRINT ORDER DPOF Select pictures for print...

Page 100: ...utomatically while a slide show is in progress B B RED EYE REMOVAL RED EYE REMOVAL If the current picture is marked with a g icon to indicate that it was taken with Intelligent Face De tection this option can be used to remove red eye The camera will analyze the image if red eye is detected the image will be processed to create a copy with reduced red eye EXIT PLAYBACK MENU 1 2 ERASE RED EYE REMOV...

Page 101: ...otating pictures pg 88 The camera may not be able to rotate pictures cre ated with other devices To rotate a picture play the picture back and se lect C IMAGE ROTATE in the playback menu 1 Press the selector down to rotate the picture 90 clockwise up to rotate the picture 90 counterclockwise 2 Press MENU OK to confirm the opera tion to exit without rotating the pic ture press DISP BACK The next ti...

Page 102: ...ages Press DISP BACK to exit when the operation is complete SET ALL SET ALL Press MENU OK to protect all pictures or press DISP BACK to exit without changing picture status CANCEL YES SET ALL OK IT MAY TAKE A WHILE RESET ALL RESET ALL Press MENU OK to remove pro tection from all pictures or press DISP BACK to exit without changing picture status CANCEL YES IT MAY TAKE A WHILE RESET ALL OK If the n...

Page 103: ...NCEL YES CROP PANNING Navigation window shows portion of image currently dis played in monitor If the size of the final copy will be a OK will be displayed in yellow b Tip Intelligent Face Detection If the picture was shot with Intelligent Face Detection pg 20 g will be displayed in the monitor Press the g button to zoom in on the selected face 2 Press MENU OK A confirmation dia log will be displa...

Page 104: ...ion 3 Press MENU OK to copy the picture at the selected size E COPY COPY Copy pictures between internal memory and a memory card 1 Presstheselectorupordowntohigh light a INTERNAL MEMORY y b CARD copy pictures from internal memory to the memory card or b CARD y a INTERNAL MEMORY copy pictures from a memory card to internal memory 2 Press the selector right to display op tions for the highlighted it...

Page 105: ...d frames 100 0001 100 0001 YES CANCEL COPY OK 1 Press the selector left or right to dis play the desired picture 2 Press MENU OK to copy the picture 3 Repeat steps 1 2 to copy additional images Press DISP BACK to exit when the operation is complete ALL FRAMES ALL FRAMES Press MENU OK to copy all pic tures or press DISP BACK to exit without copying pictures YES CANCEL 100 0001 100 0001 IT MAY TAKE ...

Page 106: ...protect ed pictures Remove protection from pictures before recording voice memos pg 88 1 Hold the camera at a distance of about 20cm 8in and face the microphone Microphone 2 Press MENU OK to start recording 28s RECORDING REC RE REC Time remaining Blinks red 3 Press MENU OK again to end record ing Recording ends automatically after 30 seconds REC RE REC FINISH F F VOICE MEMO VOICE MEMO ...

Page 107: ...tor down again to end playback press the selector up Press the selector left to rewind right to fast forward Volume controls can be displayed by pressing the MENU OK button press the selector up or down to adjust the volume and press MENU OK again to resume playback STOP PAUSE 15s 15s Progress is shown in the monitor Progress bar aNote The camera may not play voice memos recorded with other device...

Page 108: ...the selector right to place the cursor in the setup menu EXIT SET UP 1 5 OFF ENGLISH DATE TIME TIME DIFFERENCE SILENT MODE RESET FORMAT 2 Adjust settings 2 1 Press the selector up or down to highlight a menu item 2 2Press the selector right to dis play options for the highlighted item ON AE L 1 3 5 OFF SET UP EVF LCD MODE AUTO POWER OFF RED EYE REMOVAL AE LOCK MODE DUAL IS MODE 2 MIN ON AF ILLUMIN...

Page 109: ...MENU OK KFORMAT Format internal memory or memory cards pg 98 AIMAGE DISP Choose how long pictures are displayed after shooting pg 98 CONT 3 SEC 1 5 SEC ZOOM OFF 1 5 SEC BFRAME NO Choose how files are named pg 99 CONT RENEW CONT GOPERATION VOL Adjust the volume of camera controls b high c mid d low eOFF mute c HSHUTTER VOLUME Adjust the volume of the shutter sound IPLAYBACK VOLUME Adjust the volume...

Page 110: ...uter pg 101 If RAW JPG is selected JPEG copies will also be recorded Choose OFF to record pictures in JPEG format only RAW JPG RAW OFF OFF lFOCUS CHECK If ON is selected the center of frame will be magnified in the display to assist focus when the focus ring is rotated in manual focus mode pg 101 This option only takes effect when 30 fps is selected for E EVF LCD MODE ON OFF ON nSAVE ORG IMAGE Cho...

Page 111: ...00 00 1 3Press the selector left or right to highlight hours or min utes press up or down to edit The minimum increment is 15 minutes 1 4Press MENU OK when settings are complete 2 Switch between local time and your home time zone To set the camera clock to local time high light g LOCAL and press DISP BACK button To set the clock to the time in your home time zone select h HOME If g LOCAL is select...

Page 112: ...t open the battery cover during formatting A A IMAGE DISP IMAGE DISP Choose an option other than OFF to display pic tures in the monitor after shooting Pictures can be displayed for 1 5s 1 5 SEC 3s 3 SEC or un til the MENU OK button is pressed CONTINUOUS and ZOOM CONTINUOUS If ZOOM CON TINUOUS is selected photos can be zoomed in to check focus and other fine details see page 53 Note that ZOOM CONT...

Page 113: ...nues from the last file number used or the first available file number whichever is higher Choose this option to reduce the number of pictures with duplicate file names RENEW Numbering is reset to 0001 after formatting or when a new memory card is inserted aNotes If the frame number reaches 999 9999 the shutter release will be disabled pg 114 Selecting RRESET pg 95 resets B FRAME NO to CONTINUOUS ...

Page 114: ...crease battery life if OFF is selected the camera must be turned off manu ally Note that regardless of the option selected the camera will not turn off automatically when connected to a printer pg 63 or computer pg 68 or when a slide show is in progress pg 86 b Tip Reactivating the Camera To reactivate the camera after it has turned off auto matically use the G button or press the a but ton for ab...

Page 115: ...M website http www fujifilm com support download camera software from November 2009 l l FOCUS CHECK FOCUS CHECK If ON is selected the center of frame will be magnified in the display to assist focus when the focus ring is rotated in manual focus mode pg 36 The view through the lens is restored when the shutter button is pressed or if no operations are performed for a set period c Caution Focus che...

Page 116: ...isual Printing Printing TV available from third party suppliers PictBridge compatible printer available from third party suppliers USB USB Audio visual output SD card slot or card reader Computer available from third party suppliers SD SDHC memory card Printer available from third party suppliers Remoteshutterrelease Remoteshutterrelease RR 80 remote release sold separately USB ...

Page 117: ...fujifilm com products digital_cameras index html AC power adapter AC power adapter AC 84V Use for extended playback or when copying pictures to a computer shape of adapter and plug vary with region of sale Rechargeable Rechargeable Li ion battery Li ion battery NP 140 supplied Additional NP 140 large capacity batteries can be pur chased as required Remote release Remote release RR 80 Remote shutte...

Page 118: ...e camera at the beach or seaside avoid exposing the camera to water or sand Do not place the camera on a wet surface Condensation Condensation Sudden increases in temperature such as occur when entering a heated building on a cold day can cause condensation inside the camera If this occurs turn the camera off and wait an hour be fore turning it on again If condensation forms on the memory card rem...

Page 119: ...y times The battery has reached the end of its charging life Purchase a new battery AF C is selected for focus mode Select a different focus mode 36 The camera turns off suddenly The battery is exhausted Insert a fresh or fully charged spare battery 9 The AC adapter or DC coupler has been dis connected Make sure that the AC adapter and DC coupler are properly connected Battery charger Charging doe...

Page 120: ... dirt on the memory card contacts Clean the contacts with a soft dry cloth The memory card is damaged Insert a new memory card 11 The battery is exhausted Insert a fresh or fully charged spare battery 9 The camera has turned off automatically Turn the camera on 14 The monitor goes dark after shooting The flash has fired The monitor may darken while the flash charges Wait for the flash to charge 28...

Page 121: ... center of the frame than the main subject Recompose the picture or turn face detection off and frame the picture using focus lock 22 24 Close ups Macro mode is not available Macro mode is not available in the current shooting mode Choose a different shooting mode 41 Flash The flash does not fire The flash is charging Wait for the flash to charge 28 The flash is not available in the current shoot ...

Page 122: ... Slow shutter speed selected and the subject is poorly lit Choose a faster shutter speed 48 50 Vertical lines appear in pictures The camera has been used continuously at high temperatures Turn the camera off and wait for it to cool down Recording Pictures are not recorded Power was interrupted during shooting Turn the camera off before connecting the AC adapter DC coupler Leaving the camera on can...

Page 123: ... in silent mode Turn silent mode off 19 Playback volume is too low Adjust playback volume 100 The microphone was obstructed Hold the camera correctly during recording 92 The speaker is obstructed Hold the camera correctly during playback 93 Deletion Selected pictures are not deleted Some of the pictures selected for deletion are protected Remove protection using the device with which it was origin...

Page 124: ...video standard Match the camera Q VIDEO SYSTEM setting to the TV 96 The volume on the television is too low Adjust the volume No color The camera is not set to the correct video standard Match the camera Q VIDEO SYSTEM setting to the TV 96 Computer The computer does not recognize the camera The camera is not properly connected Connect the camera correctly 72 PictBridge Pictures can not be printed ...

Page 125: ...ra malfunction Remove and reinsert the battery or disconnect and reconnect the AC adapter DC coupler 9 The battery is exhausted Insert a fresh or fully charged spare battery 9 The camera does not function as expected Temporary camera malfunction Remove and reinsert the battery or disconnect and reconnect the AC adapter DC coupler If the problem persists contact your FUJIFILM dealer 9 126 ...

Page 126: ...ject is too bright or too dark The picture will be over or under exposed If the subject is dark use the flash FOCUS ERROR Camera malfunction Turn the camera off and then on again taking care not to touch the lens If the message persists contact a FUJIFILM dealer pg 126 ZOOM ERROR LENS CONTROL ERROR NO CARD No memory card inserted when E COPY is se lected in the playback menu Insert a memory card C...

Page 127: ...rd Camera malfunction Contact a FUJIFILM dealer pg 126 b MEMORY FULL The memory card or internal memory is full pic tures can not be recorded or copied Delete pictures or insert a memory card with more free space a MEMORY FULL INTERNAL MEMORY IS FULL INSERT A NEW CARD WRITE ERROR Memory card error or connection error Re insert the memory card or turn the camera off and then on again If the message...

Page 128: ...4 999 pictures exist se lected in sort by date view Choose a different date PROTECTED FRAME An attempt was made to delete rotate or add a voice memo to a protected picture Remove protection before deleting rotating or adding voice memos to pictures u ERROR Voice memo file is corrupt The voice memo can not be played back Camera malfunction Contact a FUJIFILM dealer pg 126 b NO IMAGE The source devi...

Page 129: ...to a computer or other device Confirm that the device is turned on and that the USB cable is connected PRINTER ERROR Printer out of paper or ink or other printer error Check printer see printer manual for details To resume printing turn the printer off and then turn it back on PRINTER ERROR RESUME Check printer see printer manual for details If printing does not resume automatically press MENU OK ...

Page 130: ...e each time the amount of light is halved EV decreases by one The amount of light entering the camera can be controlled by adjusting aperture and shutter speed Exif Print A standard that allows information stored with pictures to be used for optimal color reproduction dur ing printing JPEG Joint Photographic Experts Group A compressed file format for color images The higher the compression rate th...

Page 131: ... using Windows Media Player or QuickTime 3 0 or later White balance The human brain automatically adapts to changes in the color of light with the result that objects that appear white under one light source still appear white when the color of the light source changes Digital cameras can mimic this adjustment by processing images according to the color of the light source This process is known as...

Page 132: ...NE FINE NORMAL NORMAL FINE FINE NORMAL NORMAL Size Size pixels pixels 4000 3000 4000 2664 4000 2248 2816 2112 2816 1864 2816 1584 File size File size 4 7MB 3 0MB 4 2MB 2 6MB 3 5MB 2 2MB 2 9MB 1 5MB 2 6MB 1 3MB 2 2MB 1 1MB Internal memory Internal memory approx 47MB approx 47MB 9 15 11 17 13 21 16 31 18 36 21 42 SD card SD card 512MB 512MB 100 160 110 180 130 220 160 330 180 370 220 430 1GB 1GB 200...

Page 133: ...sec SD card SD card 512MB 512MB 310 600 350 680 460 700 19 35 7min 14min 1GB 1GB 620 1210 700 1370 930 1400 40 75 14min 28min 2GB 2GB 1230 2380 1400 2690 1870 2810 80 150 29min 57min SDHC card SDHC card 4GB 4GB 2480 4770 2820 5390 3760 5640 160 310 58min 2 114min 2 8GB 8GB 4980 9570 5650 10820 7540 11310 320 620 116min 2 230min 2 16GB 16GB 9880 19000 11230 21480 14970 22460 630 1230 231min 2 457mi...

Page 134: ... 080 File size See pages 118 119 Lens Fujinon 14 3 optical zoom lens F 2 8 wide angle 5 3 telephoto Focal length f 7 1mm 101 5mm 35 mm format equivalent 30 5mm 436mm Digital zoom Approx 2 up to 28 6 when combined with optical zoom Aperture F2 8 F1 1 wide angle F5 3 F11 telephoto 1 3 EV increments Manual Auto selectable Focus range distance from front of lens Approx 50cm 1 6ft infinity wide angle 2...

Page 135: ...0 s H 4s 1 1 000 s P 4s 1 2 s P P S A modes 4s 1 4 000 s M mode 30s 1 4 000 s Other modes 1 4 s 1 4 000 s Continuous I up to 1 6fps max 6 frames max 3 frames when RAW or RAW JPG is selected for j CCD RAW J up to 5fps max 24 frames L up to 1 6fps last 6 frames recorded last 3 frames when RAW or RAW JPG is selected for j CCD RAW M up to 5fps last 24 frames recorded O 3 frames selected exposure overe...

Page 136: ...ISE D RANGE PRIORITY Dynamic range Intelligent Face Detection with red eye removal framing guideline frame number memory film simulation high speed shooting and histogram display Playback options Intelligent Face Detection red eye removal micro thumbnail multi frame playback sort by date trimming resize slide show image rotation voice memo histogram display and exposure warning Other options PictB...

Page 137: ...pplied with camera and SD memory card Note Number of shots that can be taken with battery varies with battery charge level and will de cline at low temperatures Camera dimensions W H D 134 4mm 93 6mm 145 0mm 5 3in 3 7in 5 7in excluding batteries and accessories Camera weight Approx 820g 28 9oz excluding batteries accessories and memory cards Shooting weight Approx 870g 30 7oz including batteries a...

Page 138: ...1 5oz BC 140 battery charger Rated input 100V 240V AC 50 60Hz Input capacity 14 0VA 100V 20VA 240V Rated output 8 4V DC 720mA Supported batteries NP 140 rechargeable batteries Charging time Approx 110 minutes Dimensions W H D 68 0mm 84 0mm 28 0mm 2 7in 3 3in 1 1in Weight Approx 83g 2 9oz excluding battery Operating temperature 0 C 40 C 32 F 104 F The weight and dimensions vary with the country or ...

Page 139: ...eld liable for damages resulting from errors in this manual Although the monitor is manufactured using advanced high precision technology small bright points and anomalous colors particularly in the vicinity of text may appear This is normal for this type of monitor and does not indicate a malfunction images recorded with the camera are unaffected Digital cameras may malfunction when exposed to st...

Page 140: ...echnical support repairs TEL 56 2 6781200 serviciotecnico reifschneider cl Colombia Animex de Colombia Ltda Technical support repairs TEL 57 1 338 0299 animex etb net co Ecuador Espacri Cia Ltda Technical support repairs TEL 593 72 835526 Importaciones Espacri Cia Ltda Technical support repairs TEL 593 783 5526 portiz fujifilm com ec Mexico Fujifilm de Mexico S A de C V Technical support TEL 52 55...

Page 141: ...jiFilm Italia S r l Call center TEL 039 0267978181 info fujifilm it Repair service TEL 039 6058294 FAX 039 6058295 Lithuania Fujifilm Lithuania Technical support repairs TEL 370 5 2130121 info fujifilm lt Malta Ciancio 1913 Co Ltd Technical support repairs TEL 0356 21 480500 info fujifilm com mt Norway Fujifilm Norge AS Technical support TEL 0047 02273 http www fujifilm no mailto post fujifilm no ...

Page 142: ... shimone com Jordan Grand Stores Al Abdali Amman Jordan Technical support repairs TEL 009626 4646387 gstores go com jo Lebanon Fototek S A R L Technical support repairs TEL 961 1 252474 fototek antakiholding com Qatar Techno Blue Technical support TEL 00974 44 66 175 prabu techno blue com Saudi Arabia Emam Distribution Co Ltd Technical support TEL 96626978756 service fujifilm com sa Syria Film Tra...

Page 143: ... service TEL 632 7436601 06 techop_services yklcolor com Singapore FUJIFILM Singapore Pte Ltd Technical support repairs TEL 65 6380 5557 service fujifilm com sg South Korea Korea Fujifilm Co Ltd Technical support TEL 82 2 3282 7363 photo fujifilm co kr Yonsan AS Center Fujidigital Repair service TEL 82 2 701 1472 1bowl hanmail net Kangnam AS Center Digitalgallery Repair service TEL 82 2 2203 1472 ...

Page 144: ...7 3 AKASAKA 9 CHOME MINATO KU TOKYO 107 0052 JAPAN http www fujifilm com products digital_cameras index html ...

Reviews: