15
Windows
14
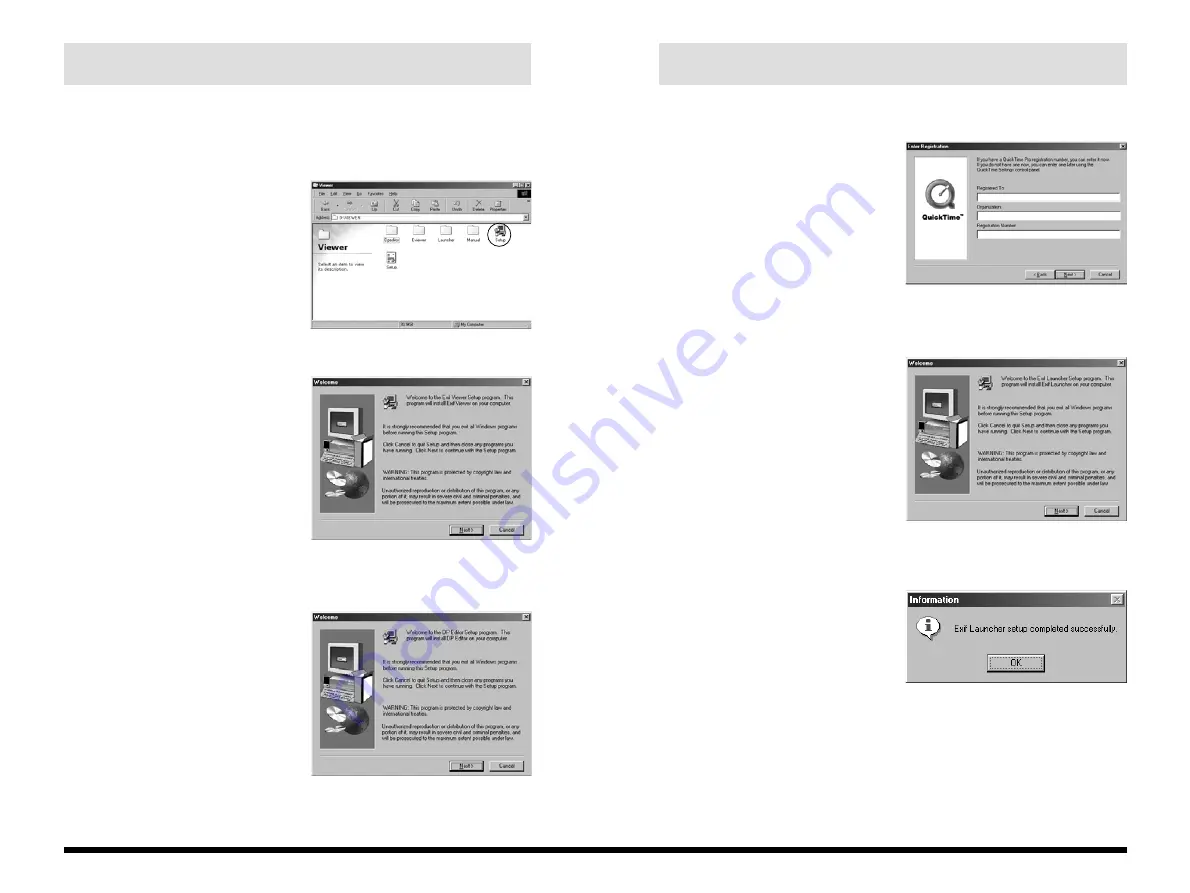
6. When the DP Editor setup ends, the QuickTime
Setup program starts up.
Proceed with the installation as
directed by the on-screen instructions.
✽
In the “Enter Registration” window,
the software will still be installed if
you enter no information.
7. When the QuickTime setup ends, the Exif
Launcher Setup program starts up.
Click the [Next >] button.
When the window for selecting the
installation destination appears, check
the destination and then click the
[Next >] button.
8. When the Exif Launcher setup ends, installation is
completed.
Click the [OK] button. This completes
the installation of all the applications.
✽
DP Editor is a software utility for creating new DPOF files and is based on DPOF
version 1.00. When you are using this software to edit DPOF files that were set
up on a digital camera, some functions may not be available depending on the
software version supported.
✽
Particularly with media containing DPOF settings specified on other brands of
digital camera, you should reset the DPOF settings using the selected digital
camera before using the DP Editor.
Exif Viewer, DP Editor, QuickTime and Exif Launcher are installed sequentially.
To stop the installation process, click the [Cancel] button. The current setup
program stops and installation skips to the next application program.
3. Double-click “Viewer” in the CD-ROM window.
When the “Viewer” window appears,
double-click “SETUP.EXE”.
4. The Exif Viewer Setup program starts up.
Click the [Next >] button. When the
window for selecting the installation
destination appears, check the
destination and then click the [Next >]
button.
Proceed with the installation as
directed by the on-screen
instructions. When Exif Viewer
installation ends, the next setup
program starts up.
5. When Exif Viewer setup ends, the DP Editor Setup
program starts up.
Click the [Next >] button. When the
window for selecting the installation
destination appears, check the
destination and then click the [Next >]
button.


